Showing posts with label Copic colouring. Show all posts

Wednesday, March 2, 2022

Monochromatic Card ft. Ink Blot Shop

Good day!! I hope everyone is fairing well these days!!  I don't know about you but my mental health is taking a beating these days. While all I want to do is ignore the goings on and live in a tiny bubble, I know that isn't possible. Thank goodness for my craft space is all I can say!

Todays project may reflect slightly on my mood.
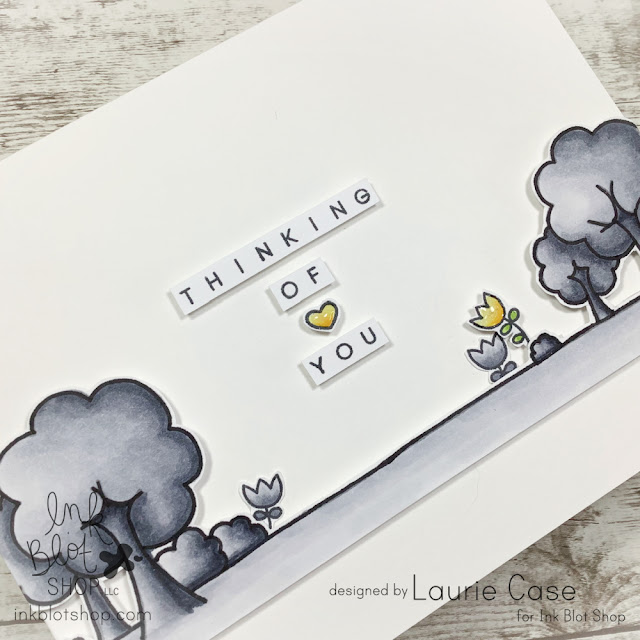

I decided I wanted to try to create a shadowy and slightly dark scene using my Cool Grey Copics. This stamp comes from the Landscape Border Stamp Set from The Ink Blot Shop.  I used C9 all the way to C1.

Now while I wanted a "darker" scene, I also wanted to add some brightness to show hope and happiness! I took a couple of the single, flower images from the Botanical Border Set and coloured 2 in grey and 1 in bright yellow (Y17, Y15, Y13). The tiny, yellow flower made me so happy, I decided to add a little yellow heart as part of the sentiment!

The sentiment comes from a mini set called Spaced Out Greetings. I love the fact that it is so spaced out because you can easily cut each word apart and place where desired!
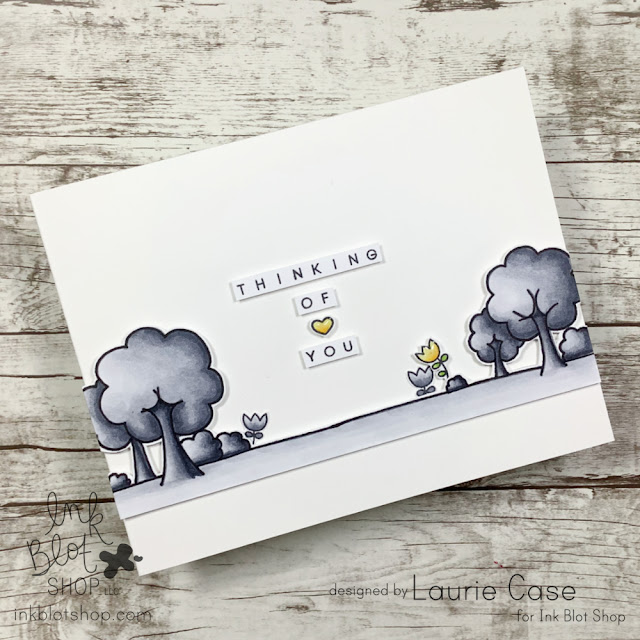

I trimmed around the tree, border stamp and foam mounted it to a white card base. I also foam mounted the sentiment. To make the yellow bit pop a wee bit more, I added some sparkle pen and Nuvo Crystal Glaze.

When I started this card, I thought maybe it would be a little too sad but in the end, I think it is quite happy! Thanks to that hopeful, yellow flower!

Thanks for stopping by!  Take care!

Laurie


Tuesday, October 20, 2020

Tweet! Tweet! (Create A Smile Stamps)

 Hello and welcome! Today I've got a fun card to share with you featuring some masking, colouring and stencilling!


This card features three of the adorable bird images from the From My Nest Stamp Set. I started by stamping the little bird, masking him off, then stamping the larger two birds beside him. After removing the mask, I appears that the little guy is standing in front! Oh, the magic of masks:)

I coloured the image with Copic markers. The birds turned out a little darker than I wanted but I just went with it.


To create the small background, I used the largest oval in the Basic Ovals Stencil. I positioned it onto a white card panel that was trimmed slightly smaller than an A2 card base. 

I used a light blue ink to add the "sky". I made sure to use heavier pressure on the outer edges and lightening things up towards the centre. With the oval stencil still in place, I added a snowfall stencil that I had in my stash and applied embossing paste over top.

When both stencils are removed, you have a perfectly ink blended, snowfall oval!!  I had some die cut leaves in branches in my "unused die cut container" so I decided to add them here for a bit of interest.


I stamped the sentiment (from the same set), foam mounted the birdies and then foam mounted the panel onto a white card base. I was going to add details like shimmer and white gel pen, but for some reason decided against it.

Thank you so much for stopping by! See you soon!

Laurie


Monday, October 5, 2020

You Rock!! with Create A Smile Stamps

 Good morning and welcome! One of my favourite things to do is mix and match stamp sets. This gives you more bang for your buck! Today, I've mixed two image sets along with a sentiment set from Create a Smile Stamps.


I also attempted to colour a white flower! This beautiful bloom comes from the Doodle Flowers Set. It's a large image and the possibilities are endless when it comes to colouring it! I used 2 Copic markers: C1 and the colourless blender. I could've used a C2 as I did add a couple of layers to darken it up. I've never actually added the flicks of colour on the outer edges of the petals before, but I think it makes a huge difference in dimension!


The sweet bee is from the popular Best Bugs Set. I thought the sizes of each image went really well together.  Before adhering the images to the front of the card base, I used the Spring Garden Stencil along with a light grey ink just to add a bit of interest to the background.

For the sentiment I used the All About You Stamp Set along with the You Twice Cool Cuts.


To finish the card off, I found a small heart die in my stash and cut a few tiny, black hearts. I added some sparkle to the bees wings, some white gel pen details and touches of Nuvo Crystal Glaze for some added shine!

I hope you enjoyed my project for today! Thanks so much for dropping by!

Laurie


Thursday, September 17, 2020

Tags for your homemade goodies ft. Create a Smile Stamps!

 Hello!! Today I'm going to share a really cute way to dress up your homemade jams or jellies using a super cute stamp set from Create A Smile Stamps!


I used the Summer in a Jar Stamp Set for these tags. This is a sweet little set that has some really cute and rather large images!

I used the jar image along with a couple different berries. I used Copics to colour then fussy cut everything out.  The tag is a die from my stash which I dressed up a little using the Narrow Stripes Stencil and a light grey ink.


What's great about this set is that it comes with a bunch of sentiments that fit on the jar label!  I arranged the images on the tags with a combination of liquid glue and foam tape. And of course, added some black & white bakers twine!


I think these are so sweet and perfect for gift giving!

I hope you will check out this set and all the other amazing CAS stamps, dies and stencils!

Thanks for popping over today! See you soon!

Laurie


Monday, July 27, 2020

Sweet Bee Card ft. Create A Smile Stamps!

Hello friends and welcome! Today, I'm sharing a cute, clean and simple card with you featuring stamps, dies and stencil from Create a Smile Stamps!


I created a couple of mini scenes using the Best Bugs Stamp Set and the Magical Frame Dies.  This was simple to do. The die cuts in 2 seperate pieces, the inner square and the frame portion. I did all the stamping on the square. The scene to the right did require some simple masking of the flowers because I did do a little ink blending.


I stamped the bees on a separate piece of cardstock and fussy cut them not leaving a white border. This gave the illusion of more masking!  After the colouring was done, I attached the frame to the inner square with scotch tape then added some foam tape.

On the card base, I masked off the centre portion (approx 2.5 inch strip) then applied the Narrow Stripes Stencil over top. I used a light grey ink to add the subtle stripes. This just gave it a little extra something.


To finish the card off, I stamped the sentiment onto one of the Useful Banner Dies and adhered it with foam adhesive. And to add even more cuteness, I used three of the new Chipboard Tiny Hearts as embellishments.

I hope you enjoyed todays look at Create A Smile products!

See you soon!

Laurie


Tuesday, June 16, 2020

Big Hugs with Create A Smile Stamps!

Hello, my friends! Today I'm sharing a card made with one of the newest stamps from Create A Smile Stamps! This mini set is called Big Surprise and it is absolutely adorable!! This latest release was full of these mini stamp sets but don't be fooled, they are all so versatile!!


This little cutie was so much fun to colour! I made a simple scene card by die cutting a circle into a 3.5X5 inch white piece of cardstock. I used one of the Stitched Circle Frames to do this. On the card base, I used a light brown ink for sand and a blue ink for the sky. Over top, I added some clouds using the Cloud Pattern Stencil.

Before adhering the aperture panel, I ran it through my die cut machine using a striped embossing folder. I foam mounted the panel then added all the elements.

The sentiment is also part of this set. I fussy cut around the "big" and foam mounted it to the card.


I added a few details with a white gel pen, a sparkle pen and a few sequins! 

I hope you enjoyed today's project!  And just a hint...the June release is almost here!!!! :)

See you soon!

Laurie


Featured Post

A Simple Thanks Card

Well, well, well. Look who decided to show up...me! It's been an awful long time yet again. I seriously thought I'd be well out of t...