Tuesday, November 22, 2016

Origami Christmas

Hello everyone!! I'm here back to share a Christmas card for Studio Katia with one of my favourite stamp sets!!  Its called Origami Winter and it's just fabulous!!

I started by heat embossing the tree, the present and the star in white embossing powder on some watercolour cardstock.  If you look closely, I stamped a couple of stockings as well but messed up and overlapped them.  It's ok, i ended up cutting that side off :).


My watercoloring medium of choice lately has been the Stabilo 68 markers.  I have the set of 30 but really want them all!!  I find these pens/markers so easy to work with and the colors are super vibrant!!!


I coloured my images in with traditional Christmas colours: red, green and a touch of gold and did a light wash of blue behind.  I trimmed the panel down to approximately 3.5 X 5.5.


You can see here that I have everything adhered. I used some gold glitter tape directly on the card base and used some sequins from the Classic Christmas Sequins Fusion mix.  What you don't see here is the sentiment.  I ALWAYS do this to myself!!!  But I wasn't going to give up!!  I placed my card into my Mini Misti and chose a sentiment, which is also from the Origami Winter set.  

Now because the background was watercolored AND heat embossed, I knew that the sentiment was likely not going to stamp perfectly, and I was right.  I used Versafine Black Onyx ink and there is one tiny place that the sentiment overlapped some of the white embossing and didn't stamp.  I could have stamped it on a tiny strip and just adhered it over but I really didn't want any distractions from the background.  In the end, I LOVE IT!!!!  And I hope you do too!! :)


Thank you so much for stopping by today!!

Laurie


Saturday, November 19, 2016

Giving the World a Big Hug!

Hi everyone!!  Have you ever been drifting off to sleep and you suddenly get an idea for a card??  That's what happened the other night and this is what became of that idea...

I recently got my hands on the Big Hugs die from Neat and Tangled.  This is a fantastic die. Great font and a great size!!  My sleepy idea started with some inlay die-cutting, then masking, then ink blending.

I started by stamping then world map from the Origami Map onto a piece of 4.25X5.5 white cardstock in Memento Tuxedo Black Ink using my Misti, of course!!  Then I simply used the Co-ordinating Die on a piece of plain, pink typing paper.  I used both the positive and negative pieces.


I placed the negative piece over the stamped image and used May's Shades of Pink, starting with the darkest shade south of the equator (Raspberry Jam) and worked my way up to Soft Pink.


Next, I placed the positive piece of my mask over the ink blended world and lightly blended some Mountain Mist from the Sea Shore Mini Ink Cube set from Altenew.


After all the masking and blending, I used the largest of the Wonky Stitched Rectangles from MFT to cut down the panel.  I centred the Big Hugs Die in the middle of the map and die cut that as well.  To add some dimension, I cut two more out of black cardstock.  Then it was time to place the puzzle back together. I added some Spectrum Noir Clear Sparkle Overlay Marker to the continents and a TON of Glossy Accents to the Big Hugs!!

And this, my friends, is what kept me up...


Thank you SO much for taking the time to stop by!

Hugs to YOU...

Laurie


Thursday, October 27, 2016

Spook-tacular!!

Hello everyone!! Laurie here from It's All Cut and Die to share a Halloween card with you!!  I don't make a lot of Halloween cards so they can be a challenge.  But here it goes!!!

I have completely fallen in love with ALL the dies from Studio Katia.  They are all truly unique! But what I love the most is the size of these creative dies!! They are huge! Which really appeals to me because I enjoy making shaped cards.  And because these dies have such great shapes and dimension to them, it makes it super easy!!

I decided to use Stitched Nested Creative Rectangles. I used the largest one in the set to create my cardbase and the smaller one for my image and sentiment.  I used ivory cardstock for the base and black cardstock for the panel.

To liven up the black background, I used some Distress Paint in Picket Fence to create a splattered effect.  I felt that I needed one more Halloween color on my card so I adhered the small stitched rectangle onto some orange cardstock and just trimmed around it with my scissors to create a small mat.


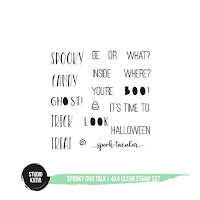
I used the super cute Spooky Duo Talk Stamp Set for my sentiment which I heat embossed in white.  I added my spider and moon image with some foam adhesive and adhered the orange and black panel directly to my base.  And of course no card of mine is complete without Glossy Accents, so I added some to the spider and the moon!!  And to finish it off, I just had to add some sequins from the Classic Halloween Sequins Fusion!!!


Thank you so much for stopping by today!!  And I truly hope that you stop by Studio Katia to have a look at these amazing products!!

Laurie

Sunday, October 9, 2016

Purse-nality

Hi everyone!!  I wanted to pop in to share a card. I had so much fun with this!!

I have been LOVING everything Waffle Flower lately!!  And I got my hands on some of their latest release!  I wanted to show you how I combined two different sets to create, what I think, is a pretty cool card :)

I started by using my Mini Mist to layout my sentiments.


The first part of the sentiment comes from the set First Step and the second part of the sentiment comes from Purse-nality. I thought they worked so well together!  Before I inked up the stamps, I had to do a little masking.


Next, I stamped the three purses in Bubblegum Pink, Ultra Pink and Raspberry Jam.  These colors, along with Soft Pink come in May's Shades of Pink Ink cubes from Hero Arts.


Before adhering the purses to the card base, I decided to take a fine liner pen and freehand some lines.   Which is one of my favourite techniques to fill white space.


I also had a scalloped frame in my "leftovers" stash so I decided to use it around the sentiment.  I adhered the purses with a combination of liquid glue and foam adhesive.


And as you can see, I added some pearl accents to the purse closures. As well as some Stardust Glitter Pen and Glossy Accents.  And to top it off, black enamel dots!!  I hope you like this card and I thank you for stopping by!!

Until next time.....

Laurie

(I've linked supplies to Butterfly Reflections Ink.  This little shop is packed with goodness and customer service is top-notch!)


Tuesday, September 27, 2016

Studio Katia New Release Blog Hop...with a Giveaway!!!


Hello lovelies!!  Welcome to the Studio Katia Release Blog Hop!!  What an exciting day!!  And make sure you read to the end because there is an unbelievable giveaway!!!!!

My project today features 3 new stamp sets, 1 new die set and new sequins!!

I used the gift image from this winter set to make a birthday card!  I adore this set. Perfect for colouring!!

I stamped the heart from the Brushstrokes Set on the tag and added some green ribbon. I love the font in the Duo Talk Set and all the words are separate giving you so many possibilities!!

For this card, I used the new Dotted Shaker Tag Set,  Origami Winter Stamp Set,  Brush Strokes stamp Set and Duo Talk Stamp Set.  To finish the card off with a bit of sparkle, I added the new Crystal Clear Sequins...which are amazing, by the way!  They have such a unique look to them, I know they will be one of my faves!!

Now here is a list of the new release!!


Now, onto the giveaway!!  To celebrate this release, Studio Katia is giving away a MINI MISTI PRIZE PACK.  This includes:

5.  Snowflakes  (Limited Edition!!)

★GIVEAWAYS!★
Studio Katia is giving away a 6 Fusion Packs (New Year’s Bash Fusion, Pink Winter Fusion, Winter Wonderland Fusion, Frosted White Fusion, Wicked Fusion, Autumn Fusion) on each stop of the hop :)  Leave me a comment for your chance to win! The winners will be announced on October 1, 2016 over on the Studio Katia Blog.

★★★Mini MISTI Stamping Tool + Studio Katia Gift Pack GIVEAWAY!★★★
Enter below for your chance to win a Mini Misti and Studio Katia Gift Pack that includes Pink Winter Clear Stamp Set, Dotted Shaker Tag Creative Die, Pink Winter Fusion Sequins Pack, Snowflakes (Limited Edition) Embellishment Pack. The winner will be announced on October 1, 2016 over on the Studio Katia Blog.


Please hop along and leave some love for this amazing release!!  

VALENTYNA!! - http://flourishtina.com/   
SVITLANA!! - http://craftwalks.com/    
ANNA!! - www.umichka.com      
KRISTINA - http://lachristanel.blogspot.ca/     


Monday, September 26, 2016

First Post for Studio Katia

Hello everyone!!  I'm here with my first ever blog post for Studio Katia!!  The announcement hasn't been made yet, but yes, I'm thrilled to be a part of this team!!  I know the sky's the limit for these great products!  The sequins alone are worth a million bucks but Kat has added some amazing new stamps and dies...to be released tomorrow in fact!!!

For my project, I decided to use the Stitched Nested Creative Rectangles die set.  I chose this set because it fit my digi image to perfection!! This die is so large! It covers enough of your cardbase that you don't really need to add anything else...LOVE THAT!!


The "celebrate" stamp and sequins are a sneak peek of what's to come :)

Hope you enjoyed!! Thanks for stopping and by and be sure to visit us tomorrow for the NEW RELEASE BLOG HOP!!!

Laurie

Concord and 9th Card

Hi everyone! Welcome back!  Today's project is for Butterfly Reflections Ink.  I know I'm seriously late to the party but I've just discovered how wonderful Concord and 9th products are!!  There is just something so sophisticated about them.  They make me feel all grown up, haha!  Don't get me wrong, I love critter stamps, but these sets I will surely be reaching for when I need to make a bit more of an "adult" card.  And by adult, I don't mean that in the R rated way :)

So anyway, here is my project for this fabulous Monday!!!


For all the details, please visit the BRI blog, which is linked above!!

Thank you so much for stopping by! See you soon....

Laurie

Featured Post

A Simple Thanks Card

Well, well, well. Look who decided to show up...me! It's been an awful long time yet again. I seriously thought I'd be well out of t...