Hi friends! Just wanted to pop in and let you know that the winner of the $25 gift certificate to the Studio Katia shop has been chosen and notified!
Congratulations, Toni!!!
Thank you all so much for leaving such amazing and kind comments!!
Laurie

Showing posts with label Studio Katia. stamps. Show all posts
Showing posts with label Studio Katia. stamps. Show all posts
Monday, June 24, 2019

Saturday, May 26, 2018
Day Two of the Studio Katia 2nd Anniversary Blog Hop!!

Studio Katia is celebrating their 2nd Anniversary and I am beyond thrilled to be a part of this celebration!! I've been a fan of this Canadian company since it arrived on the scene two years ago and my love for the products keeps getting stronger!!
We are celebrating this anniversary with a New Release and it's incredible!! 6 new Clear Stamp Sets, 4 sets of Co-ordinating dies, 4 new stand-alone Creative Dies, 2 new stencils and of course, new embellishments!!!
You should have arrived from the incredibly talented CAROL and your next stop with be the beautiful KRISTINA!! If you get lost along the way, a full list of the hoppers will be at the end of this post! Also, stay tuned for information on the incredible giveaways!!!
My cards feature a "Sea" theme for you today using all new products!! I made 4 cards in total but seriously could have kept going!! Let's take a look, shall we??
My first card features the mini stamp set, Shell-ebration as well as its co-ordinating dies. The star of this stamp set is the cutest little turtle who's ready to party! But in this case, he just wants say "I love you"!
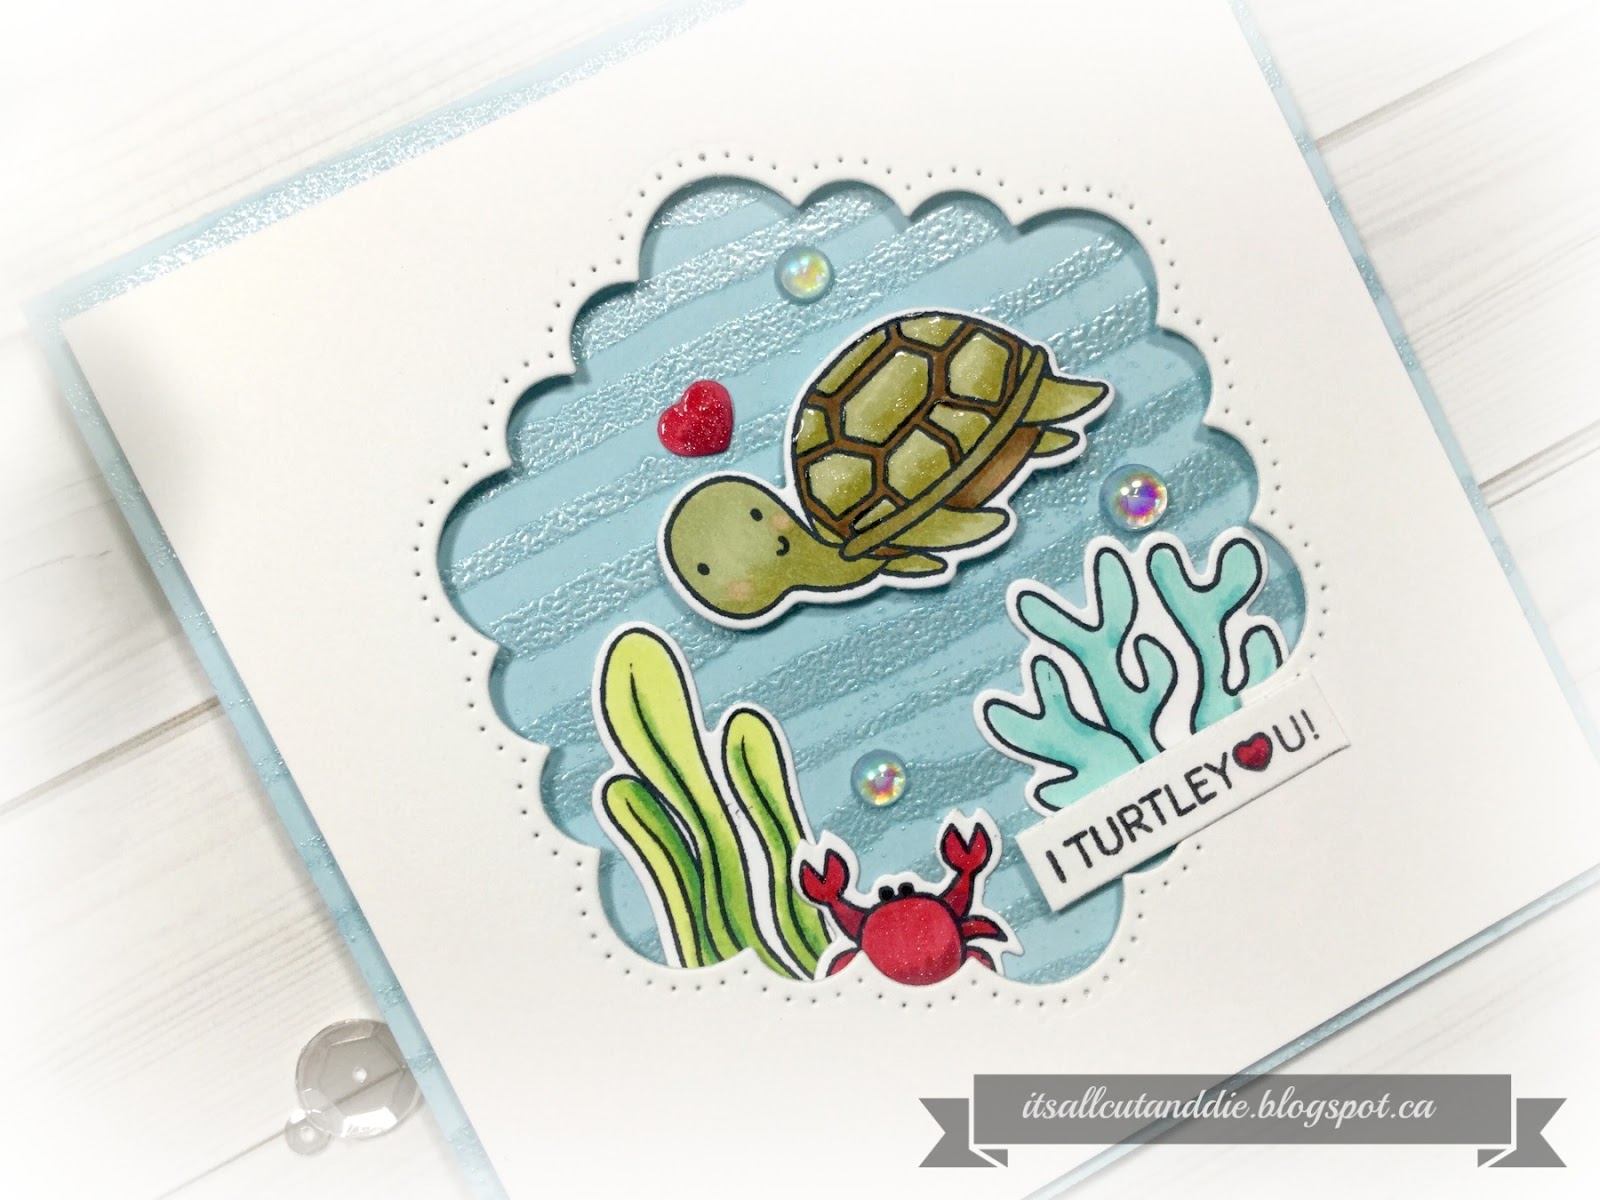
I created the window with one of the dies from the Dotted Frames: Scalloped Frames Die Set. This easily could have been made into a shaker but I wanted the embossed waves to really shine! And speaking of those waves, they were created using the new Brush Stroke Wave Stencil and Silver Pearl Embossing powder.

The elements such as the seaweed, coral and little crab come from the brand new Under the Sea stamp set. This set also has a matching set of dies available and I'll show you more now!!

Again, I created a little window scene using the Brushstroke Waves Stencil, an oval die from the Dotted Ovals and a couple colours of Distress Ink. That puffer fish is my favourite from the set and is so cute paired with the fish hook and tiny worm!!

Of course, no sea themed card is complete without bubbles so I added a few Iridescent Bubbles. Clean and simple but really cute! I made one more card that really shows off this stamp set!! What is so different about this set is that is does not have a whale in it! It has something way cooler...a stingray!! I googled stingrays before I started colouring to get an idea of what colours they were! And look what I found! A polka dot stingray!!!

Naturally, I went with that :) I got a bit more "fancy" with this card and created a watercolour background complete with water splatters.

I used the birthday hat from the Kobi the Birthday Bear Set as the scale was perfect!! White Nuvo drops were added over top of white gel pen for a bit of dimension and some March Crystals add some sparkle!!

Of course, my next project had to be a shaker and the new Seashell Shaker Die is perfect for this!!
I created a background with the Brushstroke Waves Stencil and Distress Inks. I white heat embossed a sentiment which is from the Shell-ebration set.

Instead of using foam tape to build up the shaker, I die cut several of these dies and layered them together and then placing a silver glitter die cut on top!! I used the brand new Dots Chunky Confetti Glitter, Diamond Sparkle Stars and some Silver Seed Beads for the shaker bits. The sentiment from the Shell-ebration stamp set works perfectly for this card.

I had a blast creating with these new goodies and I expect you will too!!!
Blog Hop Giveaway!!!!
Studio Katia is giving away TWO $100 CAD gift certificates on each day of the hop, that's FOUR chances to win!! Winners will be chosen randomly from the comments left on EACH blog in the hop! Make sure to leave comments by June 2nd, 2018 11:59pm EST. Winners will be announced on the Studio Katia Blog on June 3rd, 2018!! Good luck!!!!
Here's the complete Blog Hop List for today!!
Laurie...YOU ARE HERE:)
Thank you so much for stopping in today and thank you to Studio Katia for letting me be a part of this incredible hop!!!!
Laurie
Friday, December 15, 2017
Studio Katia December 2017 Release Blog Hop!!
Hello, friends!! I'm super excited to be a part of the December 2017 Release from Studio Katia!! We are celebrating with a Blog Hop full of inspiration using these latest products! Keep reading for all the giveaway details!!


This release is absolutely amazing! From florals to coffee to of course, Kobi!!! Everything was created to work together in this release, which I love! I created two projects for you today to show you how well everything can work together.
Ever since Kobi the Bear made his debut, I was smitten with him. So let's introduce ourselves to the new Kobi's Hugs & Kisses and the Best Ever Stamps and Co-ordinating Dies!!

Isn't he adorable!? There are so many images in this set that Kobi can hold on to, as the dies provide the cutting lines to tuck things under his arms. I used the "best" and "ever" dies as well as the "mom" sentiment from the Best Ever sets to create my sentiment. To finish off, I used the brand new Cupid's Kiss Crystals Mix for a light sprinkling of colour and sparkle.

I wanted to show you one more card just to demonstrate how well these new stamps and dies work together!!

Here, Kobi is holding an iced beverage! That sweet little image as well as the sentiment is from the new Sweet Latte Stamp Set which also has Co-Ordinating Dies!! For the background, I used the new and super cool Dotted Loops Die. I used the negative portion (because I had that left over from another project) as a stencil. I simply laid it over a panel cut using the Dotted Patterns Set 1 die set and lightly sponged some blue ink to create some ombre circles.

The embellishments on this card are also new!! The Mint Dream Crystals are beautiful! Now, on to the giveaways!!
Make sure you leave a comment on the Studio Katia Blog for your chance to win a $50 gift certificate, there will be 2 to give away!! You can also increase your chances of winning by following Studio Katia on Instagram and "liking" them on Facebook!!
I'm also having a giveaway for a $20 gift certificate for comments made of THIS POST!! Just leave me some love by December 22nd and I'll announce the winner HERE on December 23rd!!
You should have arrived from the lovely Tracy!!
Next stop on the hop is the super talented Olesya!!
If you get lost along the way, just return to the Studio Katia Blog!
HAVE FUN HOPPING!!!!
Laurie
Monday, August 28, 2017
Thank You Studio Katia!
Hello and welcome back!! I'm here to share what is unfortunately my last post for Studio Katia. Today I made a thank you card, which I think is fitting for this occasion.
I had a ton of fun playing with all the fabulous stamps and dies in Katia's shop and am very thankful for the opportunity to share them with you!
I started by stamping "thank you" from the Mini Thank You Stamp Set repeatedly onto some ivory cardstock using a very light beige ink. I cut the panel down using the rectangle die from the Dotted Patterns Set 1.

To give the card a bit of interest and dimension, I used the Stitched Loops die and cut directly out of the panel. I die cut this 4 times. I stacked the outer frame using 2 of the die cuts and the inner circles has 4. This gave a really cool effect. After adhering the ivory panel onto a pink card base, I simply glued all the pieces into the negative space.

I die cut the "thank you" as well as three hearts out of the same pink cardstock. These dies are from the Co-ordinating Dies to the Mini Thank you Stamp Set. I used liquid glue to adhere the sentiment and the hearts and topped them off with a generous coating of Clear Wink of Stella and Glossy Accents. I also used a few sequins from the Majestic Fusion sequins for a bit of added sparkle.

And that finishes the card!! I want to thank Katia for the time she gave me on this team, it was wonderful!!
Thank you for stopping by today! I'll be back soon :)
Laurie
Monday, August 21, 2017
Happy Fall Foxes!!
Hello everyone and welcome back!! Well, it's undeniable, fall is in the air. As I looked outside this morning, there are a few leaves on the ground. I love fall, I just don't like what's coming next :(.
For today's card, I thought I'd use the change of season for inspiration. This card has absolutely no colouring on it, just stamping and coloured cardstock. I used one of the super cute fox images from the Foxes Stamp Set and used a couple of brown shades of ink to give it some shading. Of course, I used my Misti for this! I stamped the whole image in a light brown ink, stamped then inked only the lower portion in a darker brown and stamped again. This gives a really pretty effect. I also stamped the tree trunk and leaves from the same set onto different colours of cardstock. I die cut everything using the co-ordinating dies.


For today's card, I thought I'd use the change of season for inspiration. This card has absolutely no colouring on it, just stamping and coloured cardstock. I used one of the super cute fox images from the Foxes Stamp Set and used a couple of brown shades of ink to give it some shading. Of course, I used my Misti for this! I stamped the whole image in a light brown ink, stamped then inked only the lower portion in a darker brown and stamped again. This gives a really pretty effect. I also stamped the tree trunk and leaves from the same set onto different colours of cardstock. I die cut everything using the co-ordinating dies.

To create my little scene, I did a light wash of watercolour onto a scrap of watercolour cardstock. Using the centre of the rounded edge label die from the Dotted Patterns Set 1, I gave that strip a really cute edge!! I used the same die to cut a piece of brown polka-dotted paper and layered the two pieces together. I adhered all my little bits and pieces to the watercolored piece and the scene was complete!

I was just going to adhere my little label onto an ivory card base but decided it needed just a little extra something. So, I die cut the rectangle die from the Dotted Patterns Set 1 out of ivory cardstock. I adore all that dotted detail!! The sentiment come from the Happy Stamp Set which I stamped in a mid-tone brown ink.

To finish off, I used a few sequins from the Autumn Fusion Sequin pack.
Thank you for stopping by today!! Have a great day!!
Laurie
Monday, August 14, 2017
Ink Lifting Technique with Distress Oxide Inks and Studio Katia Stamps
Hi everyone and happy Monday!! Today I thought I'd show you a technique!!! Exciting, right? Actually, this is far from new but really fun and easy. It's the "ink lifting" or "ink bleaching" technique. Let's get started!
I started by heat embossing the large floral image from the You're So Ranunculus set in white onto some watercolour paper. I stamped only the top of the image on both the bottom and the top of the panel. The Original Misti and the Misti Creative Corners make this really easy. All you have to do is rotate your paper 180 degrees and you get the perfect mirror image!


I started by heat embossing the large floral image from the You're So Ranunculus set in white onto some watercolour paper. I stamped only the top of the image on both the bottom and the top of the panel. The Original Misti and the Misti Creative Corners make this really easy. All you have to do is rotate your paper 180 degrees and you get the perfect mirror image!

I picked two colours of Distress Oxide Inks, Picked Raspberry and Worn Lipstick. One of the keys to this technique is to use LOTS OF INK. Really saturate your paper. You can take the ink pad directly to the paper if you want but because I wanted a bit of a blended look, I used my blending tools.

Now, all you have to do is apply a liberal amount of water to the inside of the embossed image. Because these inks are reactive with water, the ink will start to "lift" or "bleach", giving the image a whiter look! I would let the water sit for a few seconds before dabbing it with a paper towel.

I probably could have added more water for a brighter white but I was happy with this. I also took my wet paint brush and flicked some clean water across the background, because I totally couldn't resist.
I took the "lovely" word die, also in the You're So Ranunculus bundle and die cut that directly out of the panel. My original idea was to do some inlay die cutting but after I layered this piece onto black cardstock, I changed my mind!

I used the positive die cut to help with placing the bits and pieces of the letters. To finish off, I stamped the You're So above the Lovely in Versafine Black Onyx ink. Now, I'm going to show you what happened next....

Yup! I adhered that beautiful panel onto the wrong side of the card base, with my ATG adhesive, no less! I just sat there, so annoyed with myself. I could have just trimmed around the card base but this is quite a heavy layer already, so I didn't want to have THREE pieces of cardstock on top of a cardbase. So, I took my bone folder and carefully lifted the panel off and adhered it the RIGHT WAY!!
To add a bit of sparkle, I used sequins from the Crystal Clear Sequin Fusion and a little Shimmer Pen over the flowers.


Thanks for joining me today!! Have a great week and see you soon!!
Laurie
Monday, August 7, 2017
Back to School with Studio Katia!
Hello and welcome back!! This week we are celebrating Back to School on the Studio Katia Blog!! There is still some summer left but you can almost "feel" fall coming and that means back to school!! I was always an anxious kind of kid so the first day of school was always a little terrifying for me, really happy those days are over :).
Now onto my cards. Yes, I made two cards but I'll mainly focus on the second one which I think is better. But I'll share the first one and you can let me know what one you like better!


Now onto my cards. Yes, I made two cards but I'll mainly focus on the second one which I think is better. But I'll share the first one and you can let me know what one you like better!


Now let me show you the card that I thought just wasn't as cute:

Let me know what one is your favourite!! Also, please visit the Studio Katia for all the details on the making of these cards!!
Stay tuned to the SK blog this week because there's more "Back To School" projects to share!!
Have a great week, everyone!!
See you soon!
Laurie
Monday, July 31, 2017
Mandala Flower Thank You Card
Hello everyone!! I have this card up on the Studio Katia Blog today!! Hope you have a chance to check it out!!


Thank for stopping by :)
Laurie
Monday, July 24, 2017
Die Cutting and Colouring Birthday Card!
Hello everyone and welcome back! I'm here to share a super fun birthday card for Studio Katia! One of my favourite things to do is die cut!! There is something so satisfying when you remove that piece of cardstock from the die. Another one of my favourite things is colouring. I recently invested in some Copic markers and am loving them!! So, let's check out my project!!
I started by cutting the rectangle die from the Dotted Patterns Set 1 out of some white cardstock. I knew I wanted some sort of banner on this card so I took the small scalloped edged die and ran this through also with white cardstock.


I started by cutting the rectangle die from the Dotted Patterns Set 1 out of some white cardstock. I knew I wanted some sort of banner on this card so I took the small scalloped edged die and ran this through also with white cardstock.
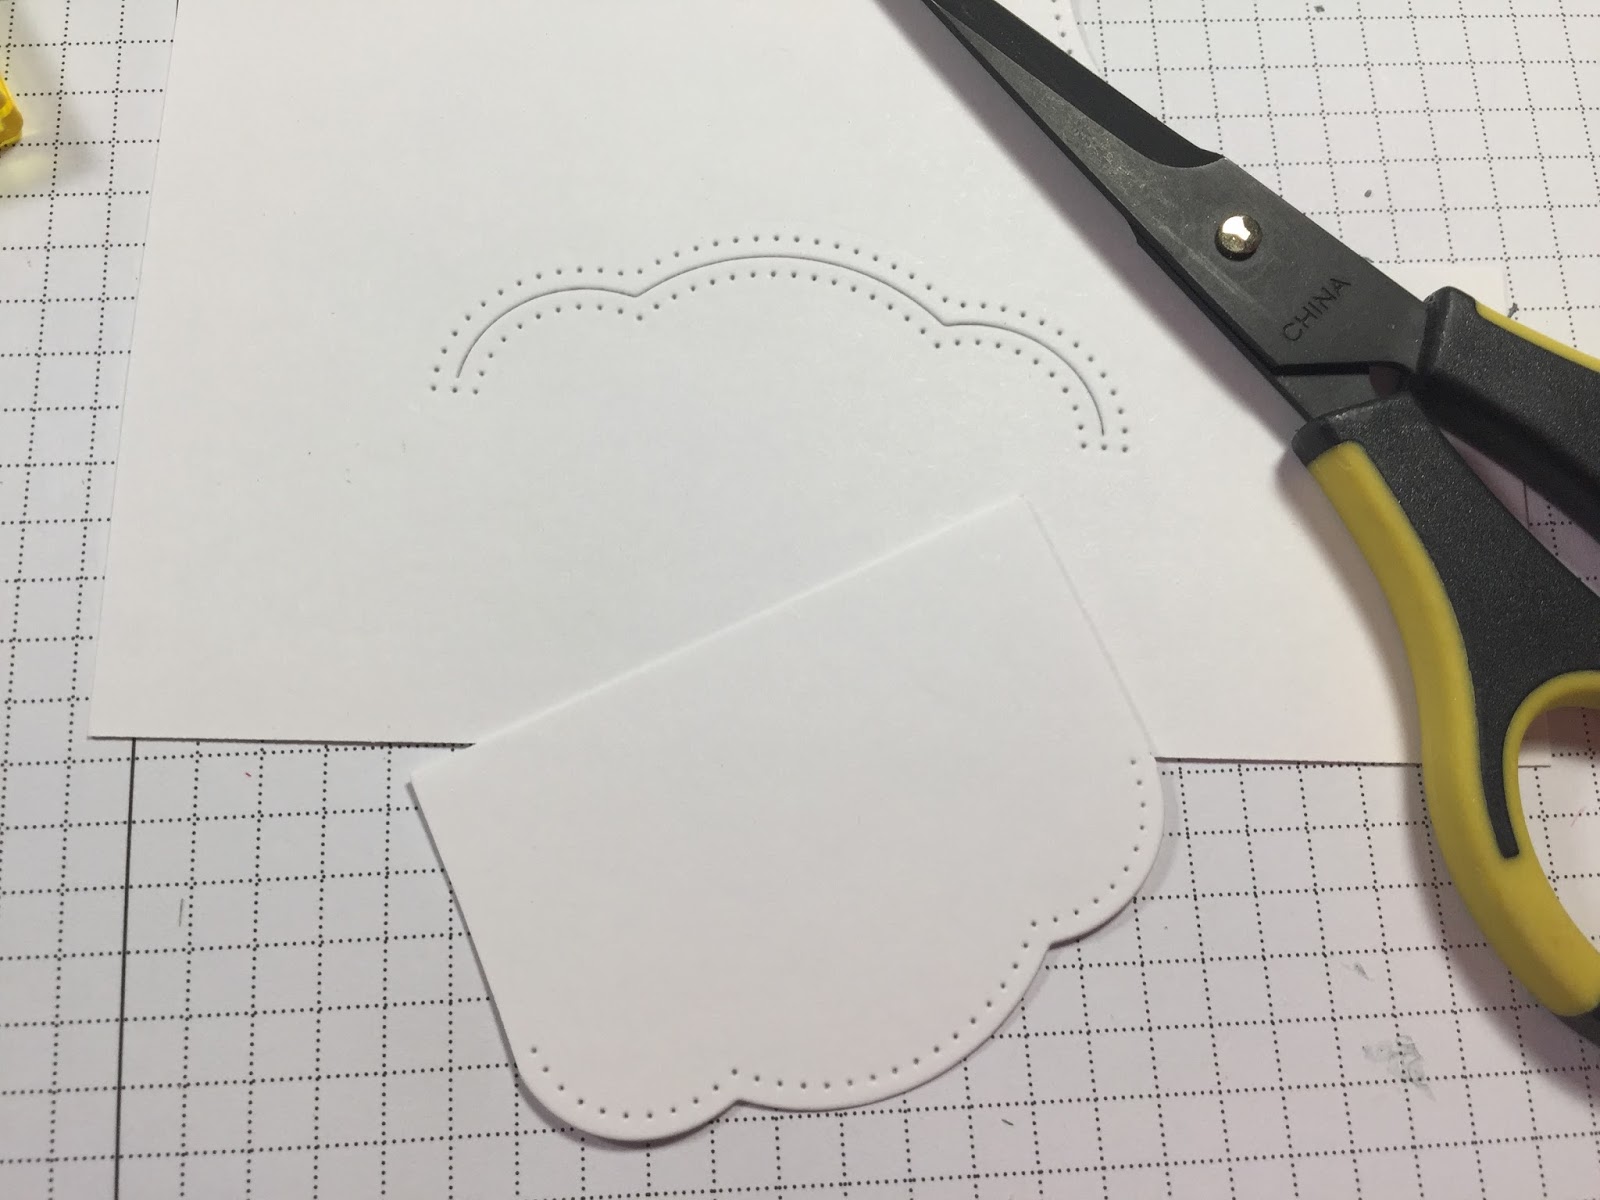
This particular die is very cool. It can be used to create pretty slits in your projects to insert gift cards, etc. In this case, I trimmed it to become a banner shape. I layered this piece onto black cardstock and trimmed around it to give some contrast...you will see this in the finished card :)
Next, I stamped the presents and party hats from the super cute Kobi the Birthday Bear stamp set and chose some Copic markers.

The presents to the right was a total human error! Please ignore.
I love the shapes and designs on these images! Whimsical and so much fun to colour! I die cut everything out with the Co-ordinating Dies.

Before I put my card together, I decided the white panel was a little too stark, so I squished some Black Soot Distress Ink onto an acrylic block, added water and using a brush, created some splatters.

I started by adhering my banner directly onto the card panel. For the sentiment, I white heat embossed "Happy Birthday" onto a strip of black cardstock (the sentiment is also from Kobi). I snipped one end to make a fishtail banner. I adhered this on top of the banner.

I placed some black and white ribbon around the top of the banner and sentiment and adhered the panel on to a white cardbase using fun foam. I adhered the hats and presents in a fairly random order using a combination of tape runner and foam adhesive.

For a bit of added sparkle I used various sizes of sequins from the Crystal Clear Fusion...love these things!!
I hope you enjoyed todays project and got inspired to do some colouring and die-cutting!! Thank you SO much for stopping by!!

Have a great week!!!
Laurie
Monday, July 17, 2017
#LOVE with Distress Oxide Inks
Hello, all!! I'm back to share a bright and happy card! I recently received the new set of Distress Oxide Inks and just had to have a play. This card also had a couple of "happy accidents" which I'll point to you :)
I started by picking some rainbow colours of the Oxides. I chose Picked Raspberry, Twisted Citron, Peacock Feathers, Spiced Marmalade, Wilted Violet and threw in a bit of Faded Jeans.
I used Bristol cardstock which worked beautifully. I started stamping the outline heart shaped from the Sweetheart Candy stamp set. I tried to create a random pattern using different colours. Then, taking a damp paintbrush, I added water to the inside of the heart. As soon as the water touches that ink, it starts to bleed...in a good way! It feathers the ink towards the inside of the heart but yet maintains a crisp outline image, love it!!

Happy accident #1: At some point while stamping, I turned the panel to start filling in the gaps. This resulted in the hearts going in two different directions. Totally not what I had in mind, but I went with it and in the end, really liked it. The small heart comes from the Foxes stamp set. These two hearts are exactly the same shape.
I wanted to leave the insides of the hearts white but didn't want the end result to have so much white space. So I smooshed some Broken China Oxide Ink onto a non porous surface, spritzed it with water and applied it CAREFULLY around all the hearts. I'm not sure if it was the ink or the paper, but I ended up with a lot of hard edges and I LOVE hard edges to watercolour!

I used the rectangle die from the Dotted Patterns Set 1 die set. I adhered that onto a piece of textured, white cardstock that was trimmed just slightly larger than the heart panel. For my card base, I used a blue cardstock that went well with the Broken China Distress Oxide Ink.

The sentiment also come from the Sweetheart Candy stamp set. I used a sentiment strip die and embossed the #love with Silver Embossing Powder. I layered the sentiment onto the same blue cardstock to make it pop a bit more. Before adhering the sentiment, I put a messy nest of silver thread behind.

And of course no card is complete without some Studio Katia sequins!! I used a few of the flat sequins from the Majestic Fusion sequin mix and added a dot of Silver Stickles to the centres.
Happy Accident #2: I meant to round the bottom two corners but grabbed the wrong punch, so ended up with these corners!! But again, I think it looks okay!!

And that's my finished for today! I hope you enjoyed!! Thank you for stopping by! Until next time..
Laurie
Tuesday, July 11, 2017
Christmas in July with Studio Katia!!

HO, HO, HO!!! This week at Studio Katia we've been celebrating Christmas early!! On one hand, it's nice to mix things up in the middle of the year by taking out your winter stamps and having a play. On the other hand, it's too soon to think about snow and winter (we get about 6-7 months of winter here, so I plan on enjoying summer while I can!).
To bring some summer into my winter card, I used non-traditional Christmas colours. I started by stamping a few of the images from the Origami Winter stamp set using Versamark Ink and then embossed them using Ranger Fine Detail white embossing powder. I decided I wanted to colour on kraft with pencils crayons. Seems like ages ago that I used my pencils!!
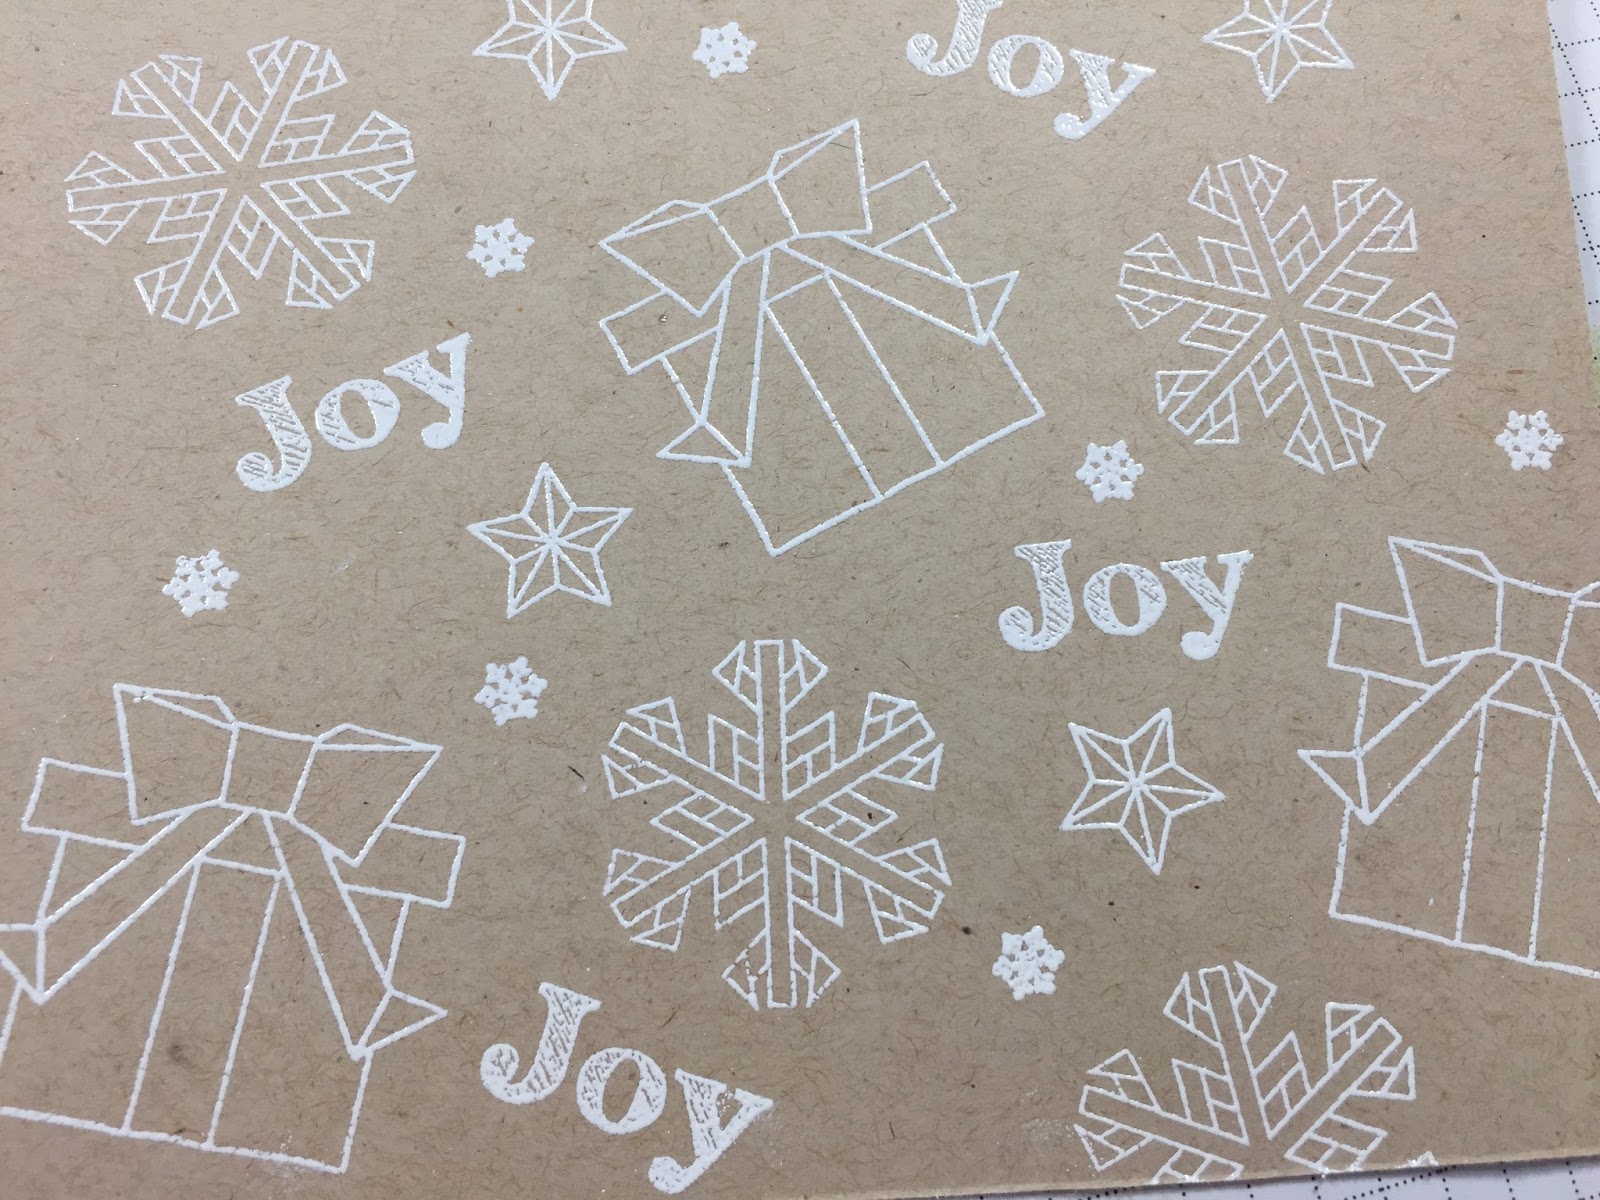
I chose two shades of each colour: pink, turquoise, purple and blue.

I use the Lyra Rembrandt PolyColor pencils and love them!
After I had all the images coloured, I decided that the one bow was way too dark in comparison to my other colours.

To remedy this little problem, I restamped the present and heat embossed like before, chose a couple of lighter colours then fussy cut around the bow portion only. I used a bit of TomBow liquid glue to adhere it right over the dark bow.

I cut down the kraft panel using the rectangle die from the Dotted Patterns Set 1 and adhered directly onto an A2 white card base.
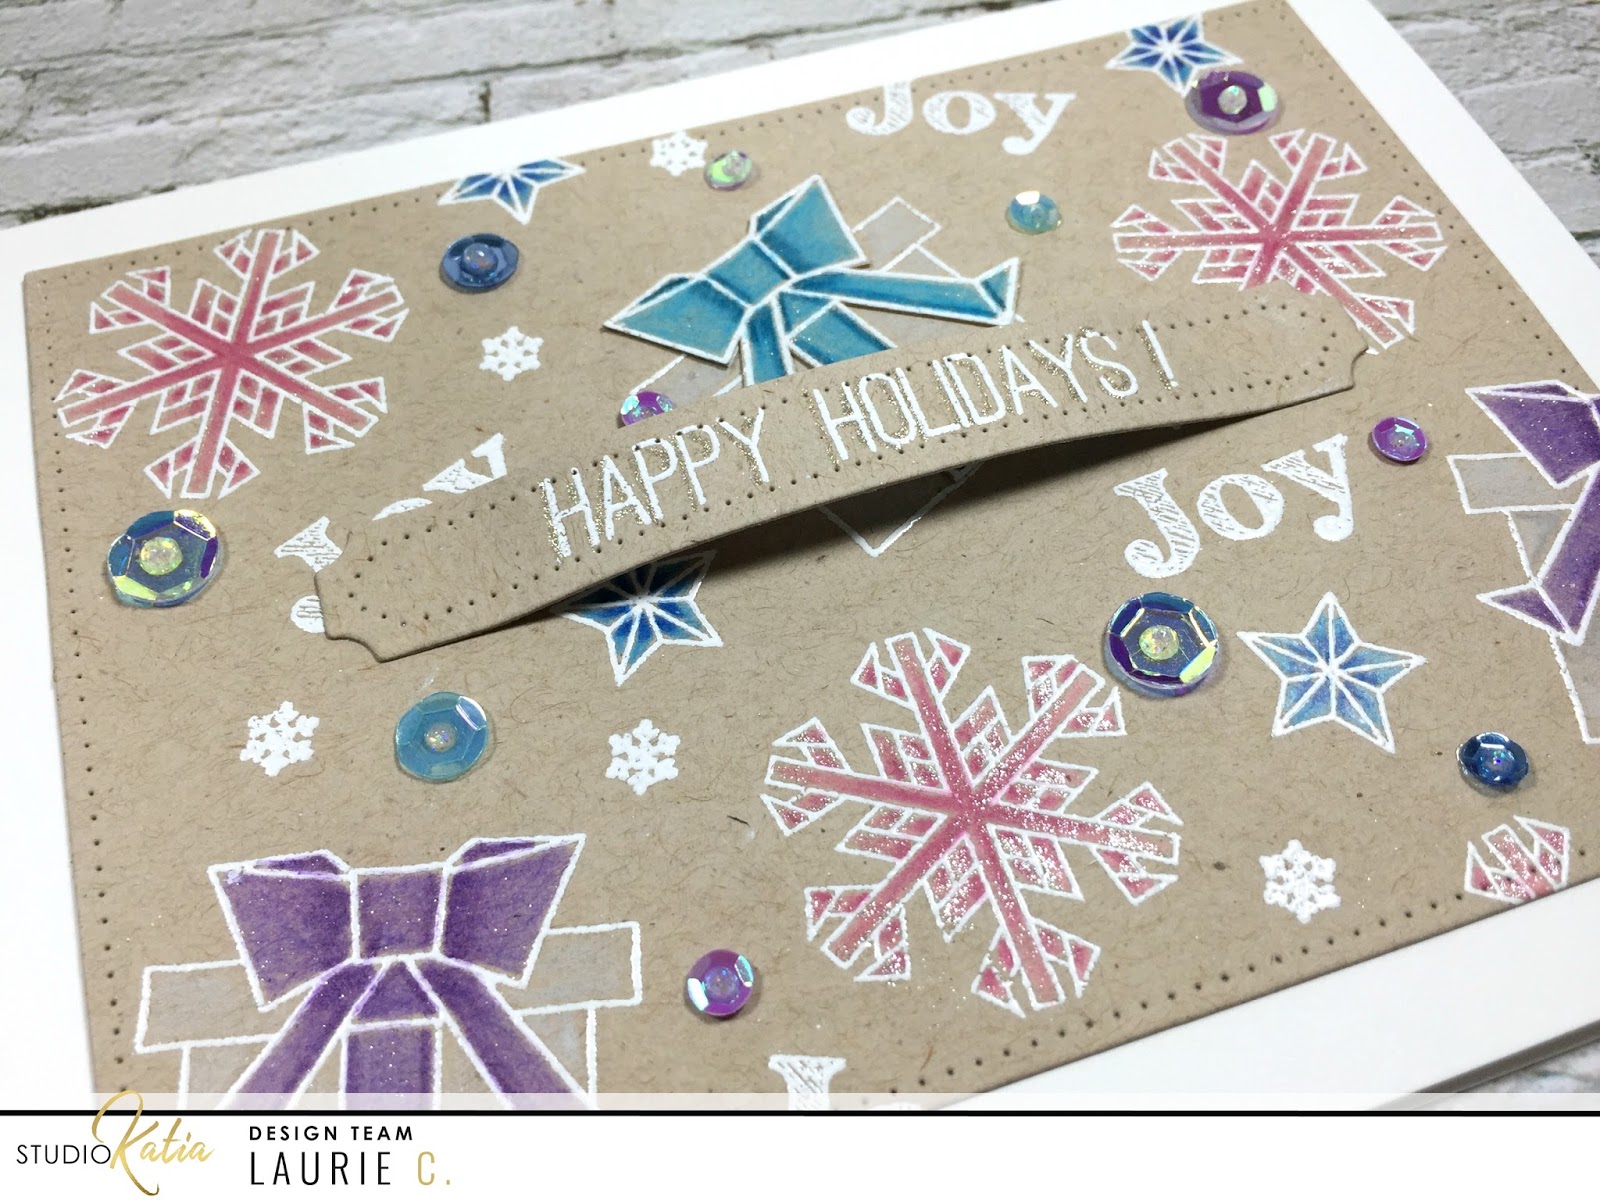
The sentiment also come from the Origami Winter set. I white heat embossed it onto the sentiment strip from the Darling Ribbon and Dotted Frames creative dies set. To give it a bit of dimension, I added two layers of foam adhesive to the middle of the strip and used liquid glue to adhere the ends.

With a few touches of Clear Wink of Stella, the card was almost done...

I went through my stash of SK sequins and picked out a few that matched my colour scheme. I used the 8mm sequins from the Crystal Clear Fusion, a few 4mm Luminous Lavender and picked out a couple light blue sequins from the Winter Wonderland Fusion.


I hope you enjoyed today's "Christmas in July" card! Thanks for stopping by and see you soon!!
Laurie
Subscribe to:
Posts (Atom)
Featured Post
A Simple Thanks Card
Well, well, well. Look who decided to show up...me! It's been an awful long time yet again. I seriously thought I'd be well out of t...

-
 Hello and welcome!! I'm so happy to be participating in the #spreadjoynotgerms blog hop which was put together by our friends at Cat...
-
 Hi All!!! Welcome to this special blog hop in honour of Studio Katia's First Birthday!! I am so thrilled and honoured to be a part...
-
Studio Katia is celebrating their 2nd Anniversary and I am beyond thrilled to be a part of this celebration!! I've been a fan of this...
