Showing posts with label challenge. Show all posts

Tuesday, April 21, 2020

Pinkfresh Studio Sketch Challenge

Welcome back! Today I've decided to participate in the current challenge over at Pinkfresh Studio Blog. This month they have a sketch to play along with.


Sketch challenges always get my creative juices flowing. Sometimes, I will follow it to a tee, other times I'll try to put a little spin on it.  This is what I came up with:


I started by doing some no-line colouring of the Leafy Decor Stamp with my Derwent Inktense Pencils. I haven't used these in ages! I used the co-ordinating die to cut the image out.

I actually had the Essential Braided Tag Die already cut out and just sitting on my desk. So, I layered my coloured florals onto one edge of it. I took a piece of white cardstock and used a stitched rectangle die to cut it out. I used some Peacock Feather Distress Ink around the edges as the white on white on white was a bit too....white.


Before adhering the die cut sentiment, I used the same Peacock Feather Ink to add a few splatters.
The sentiment is from the Classic Words Die Set. Again, I inked it up with the same distress ink.

I adhered everything to a white card base and added a few sequins. It was at this point, I decided to add the sub sentiment which come from the Leafy Decor set.


Thank you for stopping by! I hope you enjoyed my creation for today!

See you soon!

Laurie


Monday, February 17, 2020

February Pinkfresh Studio Challenge!

Hey, hi, hello there and welcome back! Today, I'm sharing a card I made for the current challenge over on the Pinkfresh Studio Challenge Blog.


I received some brand new items from their January release and was dying to have a play with them! Speaking of a new release, they are releasing a bunch of gorgeous background stamps today! They have some very unique designs and I may just have to "take a look" aka "add to cart".

Okay, let's have a look at the card I made! It's very clean and simple but I've added a few, subtle details to step it up a notch.


I just had to use the new Curvy Floral Vine Stamp Set. This is a simple layering set that is just beautiful. TIP: I die cut first, then stamped. I don't usually do it this way but I was having some issues having the die fit properly after I stamped the image. **This is NOT a flaw with the products! Photopolymer stamps are flexible so sometimes while placing it on your block or in your MISTI, it can shift slightly. And while it's easy to manipulate the stamps to line up, if you're off just by a little, the die will not line up.**

I used the smaller banner shape from the Essentials: Ornate Banner Die Set on a piece of white cardstock. I have a homemade stencil that easily lets me ink blend a heart shape. I used a light yellow ink.  To add a bit more detail to the banner, I flipped it over and using my scoring board, added score lines every 1/4 inch.


To add a bit more detail to flowers and leaves, I took a slightly darker shade of pencil crayon and added some simple flicks. This made quite a difference!  I used the Curvy Floral Vine die and cut it from white cardstock 3 more times. I adhered all those layers together including the stamped image. This created some nice dimension. For putting everything together, I stamped the sentiment in the middle of the heart using a dark, grey ink.  This sentiment comes from the new Leafy Decor Set. This stamp set is packed with awesome sentiments!!


I adhered the florals to encircle the heart. I foam mounted the focal banner onto an ivory card base that measures 3.75 X 5.25 inches.  I added a few pink jewels from my stash to add a bit of sparkle.

And that's it!  I hope you enjoyed my little process today!

Thanks so much for stopping by!

Laurie


Sunday, January 26, 2020

Pinkfresh Studio January 2020 Challenge

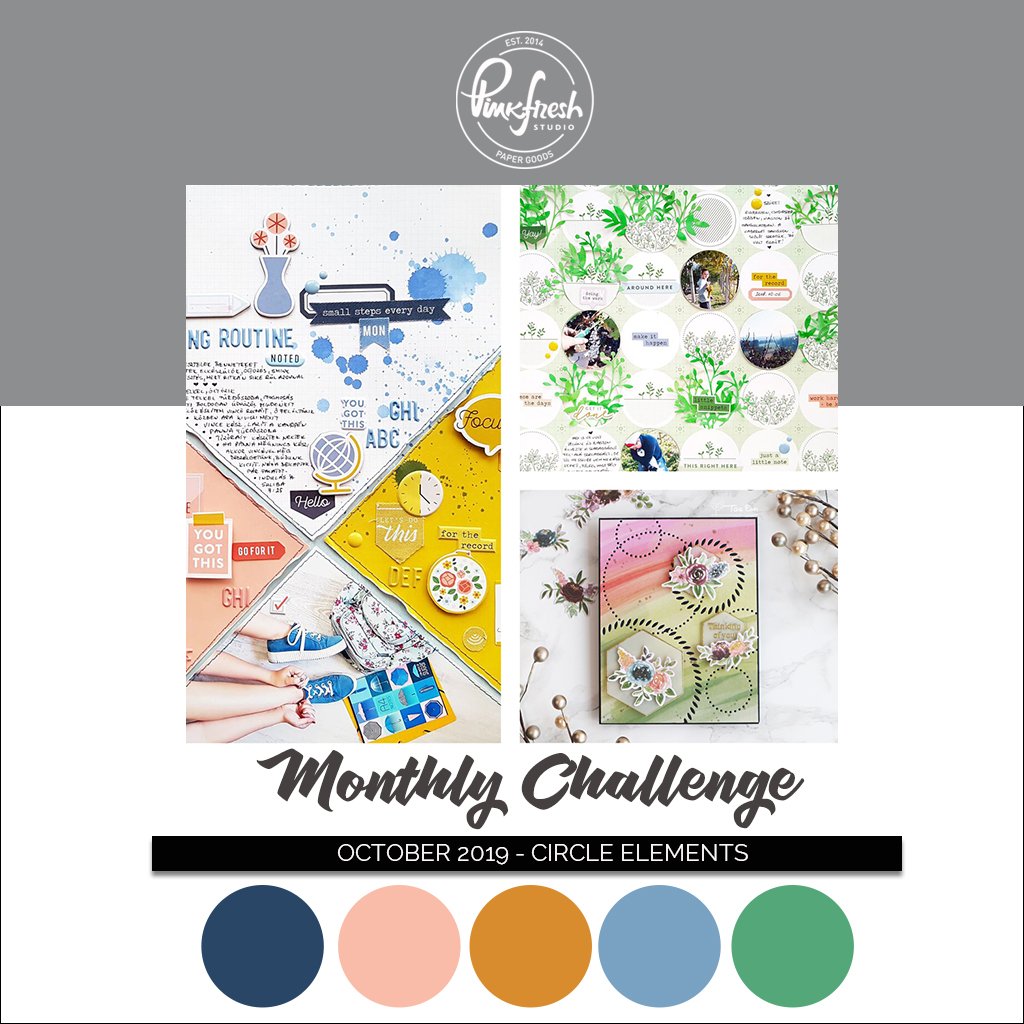
Welcome back! Today, I've joined in the first challenge of 2020 over at Pinkfresh Studio and it's a super fun one!  For this challenge, you can choose any of the challenge themes from 2019, fun right?

I chose October's theme...Circle Elements.


Now, I currently don't own much Pinkfresh Studio but let me tell you that I have remedied that!  I've recently placed a couple orders to beef up my stash! And I'm so excited!! I've really been loving Pinkfresh for awhile and can't wait to get all my goodies!  But enough rambling, let's have a look at what I've made!


I used the Braided Circles Die set to be the focal point on this birthday card. I coloured and fussy cut a couple of images from the Party Animals Stamp Set. This is an older set that has been discontinued.

The "hooray" comes from the Essentials Classic Words Die Set. If you're looking for a set of word dies, I highly recommend this set. It comes with any sentiment you'll ever need. Plus, the font is beautiful and there's a shadow die for each word! It's an amazing set! I used Picked Raspberry Distress Ink to add colour!


One of the first PF sets I got was the Dainty Botanicals Set. I love this set as it is filled with lovely, filler images that are great for almost any card! I thought the greenery would fill in this circe nicely.

Before adhering all the bits and pieces, I added a little blue ink to the top of the circle for a bit of contrast.  I used liquid adhesive for the greenery and foam adhesive for the critters.  I die cut the "hooray" 3 times from scrap, white cardstock and adhered them all together to give the die cut some dimension.


The sub sentiment comes from the Playful Animals 1 Set. This was another great set and I'm sad it's no longer available.  I used an embossing folder from my stash on the front of the card base and foam mounted the focal circle.

A few sequins finish this card and I love the way it turned out.

Thank you so much for stopping by! See you soon!

Laurie


Sunday, October 6, 2019

Paper Smooches October Challenge!

Hey, friends! I've decided to participate in the monthly challenge going on over at Paper Smooches ! This one is very interested as the challenge is to get inspiration from one of the PS Design Team.  This design team is amazing so inspiration is easy to find!!  I would suggest checking these ladies out on social media if your mojo needs a little boost!


My muse of choice is the amazing Alice Huang!  I love her style. She does a lot of no-line colouring, which is awesome, as well as a lot of die cutting...which is one of my favourite things to do!  She creates stunning, dimensional backgrounds on her cards which are to die for!!

So, that is exactly what I did!  


I used the Loopy Leaf die to cut out five different colours of cardstock. I placed them onto the card front, not adhered, to get the placement just right. After figuring that out, I die cut the leaf again from craft foam for each piece. 

Before adhering them down, I stamped the sentiment which is from the Kindness Sampler Stamp Set. Paper Smooches has, hands down, the BEST sentiment stamp sets!!


I adhered all the loopy leaves down with liquid glue, added a bit of glitter pen to the hearts and called this card done!

Thank you, Alice for the inspiration and thank YOU for stopping by today!

Laurie

Friday, July 5, 2019

Turnabout Blog Hop with Scrap 'N Stamp Canada!

Welcome back to another monthly blog hop for Scrap 'N Stamp Canada!  It's all about the Turnabout stamps from Concord & 9th. These stamps are a lot of fun to use but do require some precision.  But once you get the hang of things, the results are awesome!!


I chose to use the Stitched Turnabout stamp set for my projects today.  This is a great set because it has two separate portions. You can stamp the large outline, the inner portion or the whole thing together!  It's quite versatile. Plus, there are quite a few other images and large sentiments!

The first thing you need to know about these stamps, well this one in particular anyway, is that precision is key. If the stamp is not laid down correctly, the images will overlap or not line up. This will make the image look...not right.  Concord & 9th have included in the newer sets, an alignment guide which makes this step much easier!

The guide will tell you which side is up. Place the guide in your stamping tool (necessary for all turnabout sets!!) and lay the stamp on top, stamping surface down.  I found I had to stretch, tug and push to get the images to line up perfectly. I think because there is no centre portion to this stamp, it makes it wobbly.


Now, C&9th also offer a Turnabout Jig. I don't own one so I can't say for sure what it's made of but it basically gives you a surface to hold down your cardstock so it can be turned easily.  I myself, use a 6X6 inch piece of cardstock, lightly adhere my cardstock to it and bam, you got yourself a jig! BUT, you can also skip that whole process and stamp directly  onto a 6X6 piece of cardstock and trim it down after...which is what I did here!


I went for a tone tone look by stamping a dark brown ink onto kraft cardstock.  I used all 4 turns of the stamp but eliminated the middle portion.


On an ivory piece of cardstock, I lined up the centre portion of the stamp and used some light, pastel colours to stamp. With each rotation, I used a new ink colour. This is where these stamps really shine!!  

I used a circle die that matched perfectly with the centre portion and cut the ivory stamped section out.  I stamped "happy birthday" with the same brown ink as the background panel.


I foam mounted the sentiment circle onto the stamped background and adhered the entire thing to an A2 side fold card base.


While I was playing around with this set, I stamped out another of the inner portion and fussy cut around it. I didn't want to waste that piece, so I used it on a 3X3 inch card. 


With a some faux, white stitching and a few details added to the hearts and leaves, this would make a cute tag for a gift!  The "for you" sentiment is also included in the Stitched Turnabout Set!


GIVEAWAY AND DISCOUNT CODE!! 

Scrap 'N Stamp is generously giving away one $50 gift certificate to the SNS store! To have the chance to win, all you have to do is leave some love for all of us on the hop! The winner will be announced on the SNS Blog.  Also this month, all Concord & 9th products will be discounted 15% by entering the code CCD15.

CHALLENGE PAGE

Just a reminder that SNS has a Facebook Challenge Page. You also have the chance to win a prize there! All you have to do is upload a project with this months theme!! We love seeing what you create, so please share!!

BLOG HOP LINEUP:

Sandi

Thank you so much for joining us! We hope you are inspired to take out your Turnabout Stamps or even add to your stash...wink,wink!

See you next time!!

Laurie

Monday, May 27, 2019

Pinkfresh Studios "Anything Goes" Challenge!

Hey there!  Today, I've decided to participate in my first ever challenge for Pinkfresh Studio!!  I love their products but sadly, don't have many.  But I dug out what I do own and had a good play!

The challenge this month is "Anything Goes".  A great and easy theme for my first entry:)


I definitely chose those colours for my inspiration!  I stamped a whole bunch of images from the Dainty Botanicals Set and used the co-ordinating dies to cut them out. (FYI: as I'm writing this post, this set is ON SALE!!!)


After die cutting all those pretty leaves, I decided they needed a bit more detail. So, I took out my coloured pencils and added some tiny strokes to each petal or leaf.


I inked up the lower portion of a white card panel with Tumbled Glass Distress Ink and after many, many minutes, decided how to layer up and adhere all those images.  Most were adhered with liquid glue but the two at the very front are adhered with foam adhesive.


The sentiment comes from the Playful Animal Friends 2 stamp which looks to be discontinued on the PF site...sorry!!  I added a bit of white gel pen detail then foam mounted the white panel to a grey card base.  In the end, I'm pretty happy with how this card turned out!!

Playing with these goodies makes me realize I need more Pinkfresh in my craftroom!!

Thanks for stopping by!!

Laurie


Sunday, May 5, 2019

Paper Smooches Flower Challenge!!


Hello friends!!  It has been awhile since I've participated in any sort of challenge...not design team related.  Paper Smooches always has great challenges, and I used to participate in them often!  So, when I seen this month's challenge, "Flowers", I just had to play along!


I dug through my PS stash of stamps and dies and chose the Best Buds stamp set for all my flowers.  I picked the small florals in the stamp and using the Gina K Wreath Builder Template, created a 4X4 wreath.


I stamped everything in a alcohol marker safe, grey ink.  I thought I'd stray away from a bold, black ink.  I coloured all those adorable flowers with Copic markers.


My collection of Copics is fairly small, so I tend to use the same colours over and over in my projects. But I don't mind, I LOVE these colours!  I was flip flopping on what to do next and thought I'd place a cute critter in the centre of the wreath. So I used the bee and the bear images from the Courteous Cuties stamp set and used the co-ordinating dies to cut them out.  


And yes, I decided to cut the centre of my wreath out using the smallest of the Pinked Circle Dies. I found that with all that stamping, the critters got "lost". Plus, I didn't really want to cover too much of those pretty flowers!


After I die cut the circle out of the front panel, I lined everything up and cut it out of the front of the cardbase as well.  I stamped the sentiment (from Courteous Cuties) onto the positive die cut using white embossing powder and adhered it onto the inside of the card.  I added a ton of foam adhesive to the stamped panel and popped it on top.


Of course, I didn't let those critters go to waste!  I glued the bear on the inside of the card and he looks super cute there!!


I was going to add some sequins to the front, but went with a few white gel pen details instead.


I'm really happy with the way this card turned out. I'm not gonna lie, this one took me awhile :)


Thanks for stopping by today!! See you soon!

Laurie


Wednesday, January 9, 2019

Create A Smile Stamps Challenge...Kraft!!

Hello my lovely friends and welcome back!!  Today I'm super excited to make the official announcement that I am on the Create A Smile Stamps Challenge Team, yay!!  I adore CAS stamps. They are fun, adorable and totally unique!!  I'm so honoured to be a part of this team with some incredible designers from all over the world!!

This is a bi-weekly challenge and for the first challenge of 2019, you are asked to use kraft! Kraft cardstock, embellishments, ink, you name it!!  As always, you'll be playing for a £25 gift card to the Create A Smile shop! For a full list of the challenge rules and to link your projects, please visit the Create A Smile Challenges Blog!!
I used a lot of kraft on my project today, including using my alcohol markers to colour the main image!  If you haven't tried your alcohol markers on kraft paper, I encourage you to do so!  I love the effect!


I used the sweet fox from the Cool Buddies Stamp Set. This is one of my all time CAS stamps sets!!  Because the image was stamped on the kraft paper, just a little bit of shading with my markers was necessary.  Now, I usually fussy cut my images leaving a border around the edge, but because I was popping him up onto a white "hill", I thought it would look better to cut right against the stamped line.  

Speaking of the hill, I used the Magical Frame Cool Cuts Die Set to frame my cute little fox. Because I used quite a bit of the kraft, I decided to break it up with some white accents like the faux stitching (white gel pen), a white mat behind the Cool Cuts die, the white hill and by using a white card base.


To add a bit of texture, I used a polka dot embossing folder on the large, kraft panel.  I actually did this before stamping my sentiment (please, don't do this) but by using my Mini Misti, I was able to stamp twice getting a fairly good result!  

I hope you enjoyed my take on this challenge!  I hope you will play along with us, we cannot wait to see what you make!!


Until next time...stay crafty!!

Laurie


Friday, September 14, 2018

Neat & Tangled Throwdown: Making Your Own Cover Plate with Small Dies!!!

Hey, crafty peeps!  Today I decided to participate in the Neat & Tangled Throwdown which happens to be a tutorial challenge!


I love creating tutorial style blog posts and I try to do them often. I actually do have a You Tube channel but I'm very bad at it!  If you're so inclined, you can check it out HERE :)  

I decided to create my own cover plate style card front using small dies.  This is a fun and easy technique although a bit time consuming.  Now, I say time consuming because I did run into a slight problem that haunted me through the entire process, which I'll share with you a bit later!

I wanted to get a fairly symmetrical look to the die cutting so I started by dividing my 4.25 X 5.5 inch piece of cardstock into 4 equal sections.


So, 2 1/8 on the short side and 2.75 on the long side.  I chose the Medallion Flower Builder Nice and Neat Dies for the die cutting.  These dies are the perfect size and shape to make an entire background.


I lined up the largest die at the corner where the 2 lines intersect. It snuggled it perfectly there!  And I made sure the smaller leaf was centred over one of the lines. Now, as I looked at this, I thought to myself "you'll never line this up the same every time". So, I sat there until it came to me. Adhere the dies together so they can be moved as one piece!!  Great idea. Executed poorly. This is the beginning of the problem that followed me to the end of this card.


I decided to use Press N' Seal.  This stuff works great for moving around die cuts, however not so good for actual die cutting. Yes, this stuff held the dies beautifully! It did not tear the cardstock at all. But....every time I ran it through, it left a bit of whatever it is that makes it sticky on the cardstock.  I didn't think it was a big deal because it seemed to come off easily with a white eraser, so I kept going.  But even as I would erase, it would just reappear later on.  TIP: Use a low tack painters tape or 3M Post It Tape for this!!


See what I mean?  Even cat hair stuck to it, hahah!!  The positive of using the Press N' Seal was that it was transparent so it was easy to place the dies where they needed to go.  


All you have to do is turn the cardstock and place the dies in all four corners, making sure to line up the top leaf with the pencil line!  


This was the first four cuts.  I felt like there were a few places that were too "empty" so I added a couple more dies and this time used 3M Pore Tape to adhere them.


I should mention that I did keep all the positive die cuts.  These will make our faux cover die look more intricate!


I trimmed the panel down to 3.5 X 5 inches.  At this point, I wasn't super impressed with how this was looking so I set it aside...for a day. When I got back to it today, I knew what I wanted to do. Ink blending with Distress Oxides!!  I chose three colours but ended up only using one, my favourite of all time..Crushed Olive!


And of course no ink blended panel would be complete without water splatters!


I used regular white cardstock for this, not watercolour paper.  Works great but you can't overdo it with the water or your paper will start to disintegrate!  I did dry this with my heat tool but was able to give it an extra few minutes because I had yet to do the most tedious part of this whole process...apply foam tape!!


Ugh, I know! But it was well worth the effort!!  Once that was adhered to the ink blended panel (which was also cut to the same dimensions of the die cut panel), it was time to adhere some of the positive die cuts back into place.


My preferred adhesive for things like this is Glossy Accents.  Not sure why cause it can be messy but you can't beat the hold of this stuff!!

Okay, folks. We're almost there!  Time to place a few clear sequins (which kind of evened out the design a bit),


And stamp the sentiment!


I used one of the greeting from the Scandinavian Prints Stamp Set and stamped it onto a die cut banner.  The white banner needed a bit of definition from the white die cut panel so I layered it up with a light grey one! This just so happens to be the same grey cardstock I used for the base!

And here (finally) is the finished card...


This really is an easy card to make IF you don't use Press N' Seal. Live and learn, right?!


Thank you so, so much for hanging in there with me for this one! I hope I was able to inspire you to maybe give this a try!!  I know I'll be trying this again!


Until next...stay crafty!!

Laurie


Featured Post

A Simple Thanks Card

Well, well, well. Look who decided to show up...me! It's been an awful long time yet again. I seriously thought I'd be well out of t...