Showing posts with label handmade card. Show all posts

Monday, June 26, 2023

Simon Says Stamp Monday Challenge!

 Hello and welcome! I thought I'd join in on a challenge today!! I rarely participate in challenges and I don't know why. They are a great way to get the creative ideas flowing. I also find that I make better use of my supplies. With prompts such as layout, theme or colour combination, it tends to make you look at your stamps, dies and inks with fresh eyes.

This is the Simon Says Stamp Monday Challenge. The theme is "Vacation". Typically, the Monday challenge is a vintage theme. My card is definitely NOT vintage. But that's ok!

I used all older supplies, some of which are no longer available or retired...sorry! But that's the beauty of challenges...you can give your older goodies some more love!

I created a pastel, beach themed card. Everything was cut from white cardstock and then ink blended with Distress Inks. I have tons of coloured cardstock which would make this easier but I love the look of the Distress Inks!


I'm pretty happy with the way this card turned out. It's definitely got a relaxing vibe to it.

Here's a list of the stamps and dies I used. Like I mentioned before, some of these are unavailable but worth a search:)

My Favourite Things:  Beach Scene Builder
                                     Beach Bungalow and Accessories
                                     Cloud Stencil
                                     Sunny Vibes Stamp Set
The scalloped frame is the Fancy Frames from Craftin' Desert Divas (oldie but goodie)

Thanks so much for stopping by!  Have a great week!

Laurie


Friday, October 28, 2022

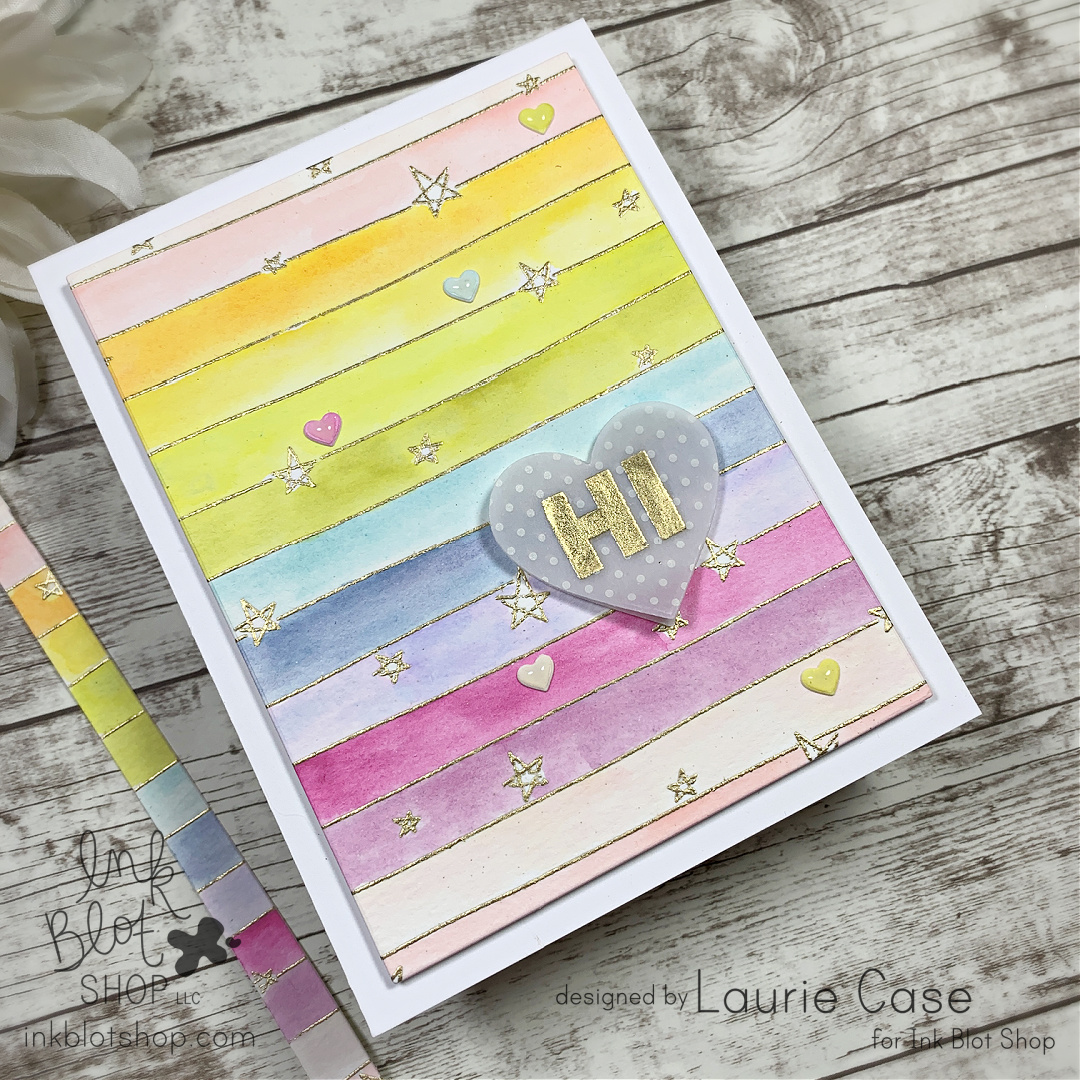
Rainbow "HI" Card

 Hi friends and welcome back! I'm sharing an easy and fun card featuring stamps from Ink Blot Shop! This card features simple watercolour and heat embossing.


I heat embossed the Stars and Stripes Background onto a piece of watercolour paper in Gold. Using a rainbow selection of Ranger Distress Oxide Inks, I quickly coloured in each stripe.


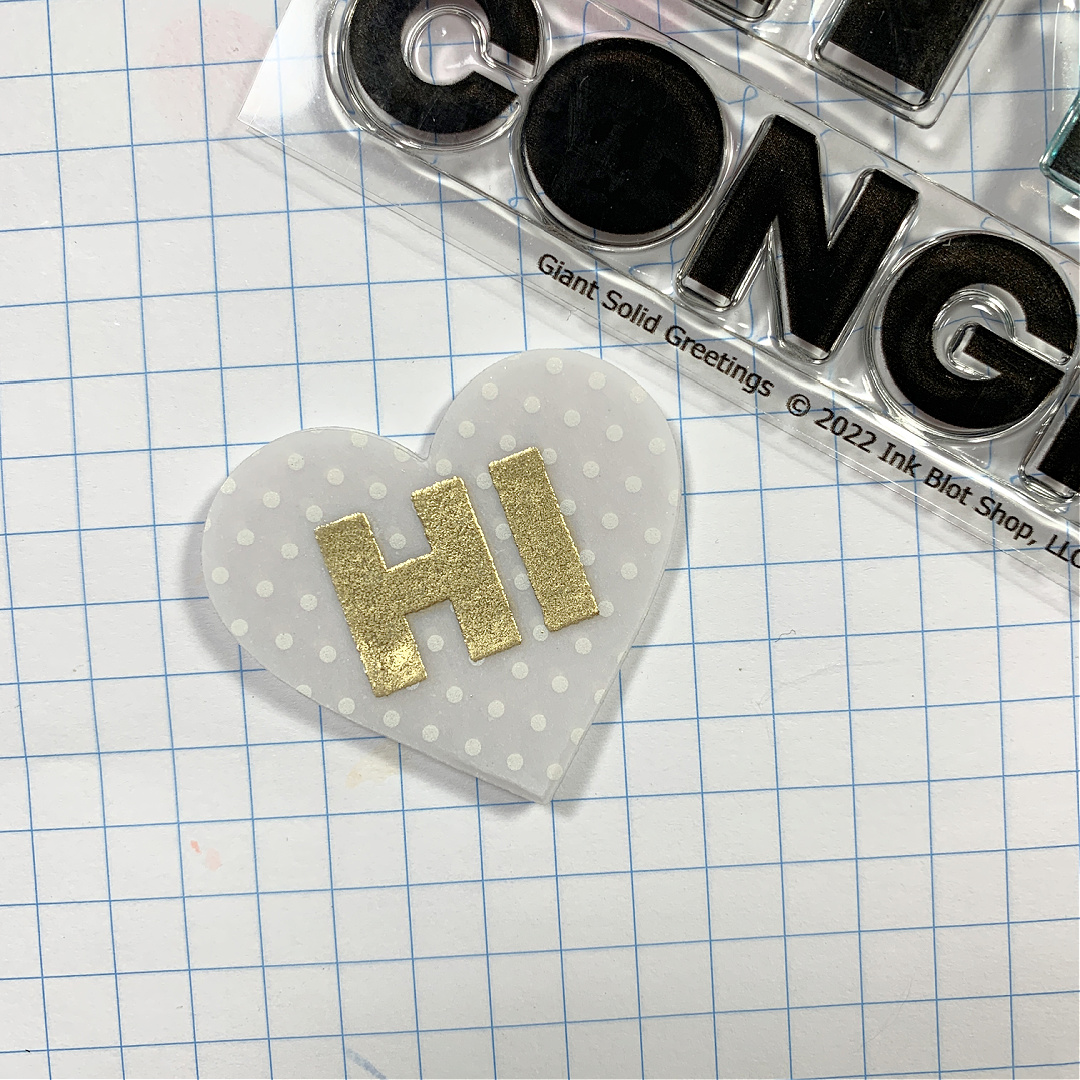
I found a piece of patterned vellum in my stash and decided to gold heat emboss the "HI" from the Giant Solid Greetings Stamp Set. 


I used a simple heart die to cut out the sentiment. I decided to use one of the leftover strips from the focal panel. I used a teeny-tiny heart die and cut out a few different colours. I added these as small embellishments.


I foam mounted the rainbow panel onto an A2 card base, foam mounted the vellum sentiment and used liquid glue on the tiny, embellishment hearts.

And the card is done!


And I still have the pretty little rainbow strip left over!

Thanks for dropping by! Have a great day!

Laurie


Wednesday, July 1, 2020

Canada, Eh? Blog Hop for Scrap N Stamp Canada

 We're celebrating Canada Day today with a fun blog hop brought to you by Scrap N Stamp Canada!


I made a very simple, very quick card. I don't generally give or mail these types of cards, do you?
I also do not have many "patriotic" sets in my stash so I had to improvise!


I used one of the zebras from the Zippy Zebras set from MFT. I actually drew the flag myself, fussy cut it out and attached it to the zebra.

I foam mounted the zebra and added a bit of "grass" using one of the Grassy Hillside Borders Dies from Lawn Fawn. I added a couple of clouds from another set in my stash. Any cloud stamps would work here.


For a bit of interest and to break up some of the white space, I added some doodled borders in opposite sides of the card.

The sentiment comes from an older set from PhotoPlay called O Canada. This is an adorable set and worth checking out!


I love the simplicity of this card and it was so quick and easy to make.

PRIZES

This month there are 3 prize packs up for grabs! There will be one winner chosen from comments left on the hop, one winner from comments made on our Facebook Page and one winner from comments made on our respective Instagram posts.  Winners will be announced on the SNS Blog on July 15th, 2020.

BLOG HOP LINEUP


I hope you all have a fantastic day and thank you for hopping along with us!
Happy Canada Day!!


Wednesday, June 3, 2020

Miss You Mandala Card with Create A Smile Stamps!

Hello and happy Wednesday! I'm back to share a card made with stamps and dies from Create a Smile Stamps.

This card is not mass producible but was a lot of fun to make!  I started by doing some no-line colouring with my Lyra Coloured Pencils. I used the Mesmerizing Mandalas Stamp Set along with the No Line ink pad from The Stamp Market.


I used a few pinks shades, a purple and a turquoise to colour this image. It's actually not as tedious as it may look and didn't take that long.  When the colouring was done, I fussy cut around the mandala then trimmed in half.

I cut a panel of white cardstock with the second largest of the Scalloped Rectangles then used the same die to cut the bottom of each half of the mandala. This added the scalloped edge so it would fit nicely on the panel!


The sentiment comes from the new Miss You Mini Stamp Set and was stamped in a grey ink. I used foam tape to adhere the mandala pieces to the top and bottom of the scalloped panel.

The card base measures 3.5 X 5.25 inches. I lightly inked around the edges using Spun Sugar Distress Ink to take away some of the brightness. I used tape adhesive to adhere the panel to the card base.


I played around with some embellishments but couldn't really come up with good placement so I used my white gel pen to add some details instead!

Thanks for dropping in! See you soon!

Laurie


Wednesday, May 27, 2020

Sending Smiles with Create A Smile Stamps!

Hello!! Today I'm sharing a card using some brand new products from Create A Smile Stamps!  The May release is now available for purchase.

I used the new Plant A Tree Stamp Set along with the Basic Ovals Stencil. The stamp set is on the smaller scale which means the price is fantastic. But it is also packed with a ton of images! The stencil is so versatile. It has four different sizes of ovals and it also comes with the co-ordinating masks!


I started by using the largest oval on the stencil and ink blended some blue and a little brown at the bottom. I stamped each image (they are all separate) directly onto the ink blended background. I used Gina K Inks for this as they work well with alcohol markers.  I added very simple shading to images which really brought them to life!


I used the second largest of the Scalloped Rectangles Dies to trim down the piece of cardstock I was working on. To create the embossed lines perfectly around the oval, I held the panel up to the light and on the back side, lightly adhered the mask portion of the stencil. You can see through the cardstock just enough for placement. I then traced around the mask with a pencil.

On my scoring board, on the BACK of the panel, I added the scoring lines every 1/8th of an inch, stopping when I got to the traced line.

I added some white gel pen details to the images as well as 3 tiny, die cut hearts.  The sentiment comes from the new From Afar Mini Stamp Set and was stamped onto one of the Useful Banner Dies.


Both the sentiment strip and the panel were foam mounted to a light grey card base which measures 5.25 X 3.25 inches.

I hope you enjoyed todays card and will check out the new CAS release!!

Thanks so much for taking the time to stop by today.

Laurie


Sunday, January 26, 2020

Pinkfresh Studio January 2020 Challenge

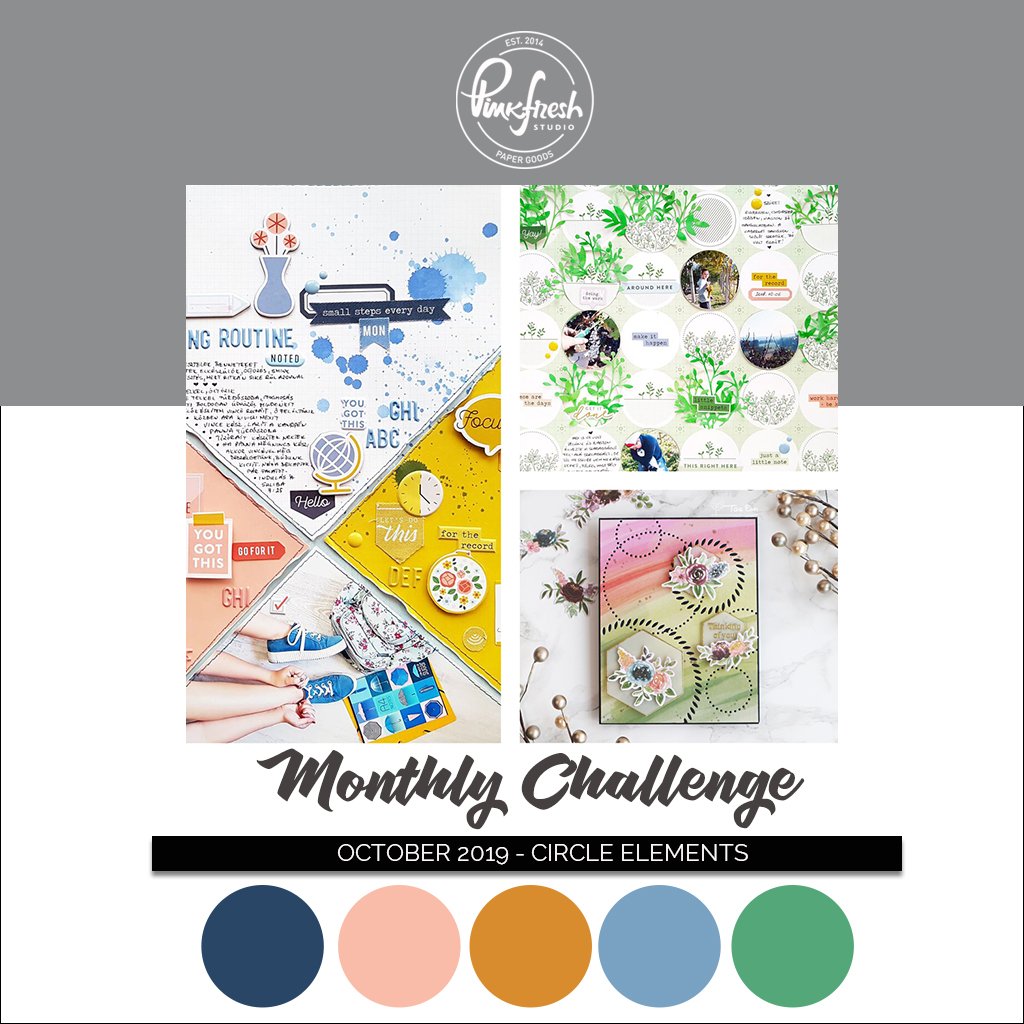
Welcome back! Today, I've joined in the first challenge of 2020 over at Pinkfresh Studio and it's a super fun one!  For this challenge, you can choose any of the challenge themes from 2019, fun right?

I chose October's theme...Circle Elements.


Now, I currently don't own much Pinkfresh Studio but let me tell you that I have remedied that!  I've recently placed a couple orders to beef up my stash! And I'm so excited!! I've really been loving Pinkfresh for awhile and can't wait to get all my goodies!  But enough rambling, let's have a look at what I've made!


I used the Braided Circles Die set to be the focal point on this birthday card. I coloured and fussy cut a couple of images from the Party Animals Stamp Set. This is an older set that has been discontinued.

The "hooray" comes from the Essentials Classic Words Die Set. If you're looking for a set of word dies, I highly recommend this set. It comes with any sentiment you'll ever need. Plus, the font is beautiful and there's a shadow die for each word! It's an amazing set! I used Picked Raspberry Distress Ink to add colour!


One of the first PF sets I got was the Dainty Botanicals Set. I love this set as it is filled with lovely, filler images that are great for almost any card! I thought the greenery would fill in this circe nicely.

Before adhering all the bits and pieces, I added a little blue ink to the top of the circle for a bit of contrast.  I used liquid adhesive for the greenery and foam adhesive for the critters.  I die cut the "hooray" 3 times from scrap, white cardstock and adhered them all together to give the die cut some dimension.


The sub sentiment comes from the Playful Animals 1 Set. This was another great set and I'm sad it's no longer available.  I used an embossing folder from my stash on the front of the card base and foam mounted the focal circle.

A few sequins finish this card and I love the way it turned out.

Thank you so much for stopping by! See you soon!

Laurie


Saturday, December 28, 2019

MFT Weekly Sketch Challenge #469

Hello, friends and welcome back! Being on Christmas break is always nice because it gives me time to sit and create! Although, after making all those holiday cards my creative juices flow a little slowly. That's why I like to participate in challenges. I find that by looking at a colour palette or sketch can trigger an idea. And this weeks Sketch Challenge from MFT Stamps did just that!!


I followed the sketch closely but did switch a couple of things! That's the beauty of these challenges. You can follow it exactly, flip it around or switch out shapes! It's wherever the creative process takes you!


I used the second large Stitched Mini Scalloped Rectangles to house my little scene. I coloured the adorable little girl and her basket of flowers from the Bring Out the Sunshine Stamp Set and used the co-ordinating dies to cut them out.  On the scalloped panel, I used the Drifts and Hills Stencil to create a little grassy hill for the girl to stand on.

Instead of the clouds from the sketch, I die cut 3 hearts using the Infinity Heart Dies from Hero Arts and used my alcohol markers to colour them.


I adhered the panel and the hearts on a white card base with liquid glue and used foam adhesive to adhere the girl, the flowers and the sentiment. The sentiment comes from the Essential Sentiments Set and was stamped onto a speech bubble die with the little tail cut off.

I just had to add some white gel pen details to a few areas as well as some Nuvo Crystal Glaze!!


Thanks for dropping by! 

See you soon and...stay awesome :)

Laurie


Wednesday, November 13, 2019

Create A Smile Stamps Mood Board Challenge!

Welcome back, friends!!  Today is the start of another challenge over at Create A Smile Stamps! We've got a beautiful mood board to inspire you...

I took inspiration from the wood, wreath and the colour gold.  I started by breaking out the Wreath Builder Template from Gina K Designs (a must have, in my opinion) and the Floral Decorations Stamp Set.  Before creating my wreath, I used a circle die that matched up to the largest Postage Edge Circle Die. I wanted to make sure my wreath didn't get too big!


I chose a variety of images from the stamp set and created the wreath using Icing on the Cake Ink from Catherine Pooler Designs. The sentiment comes from the Decorated Wishes Add On Stamp Set, this is one of my all time favourite stamp sets!  I used Versamark Ink and Gold Embossing Powder from WOW.  I then used the circle die (same one I used for a guide), to cut around the wreath.


To create the gold Postage Edge Circle, I simply pressed the Versamark Ink pad around the edge and added the same gold embossing powder. I did this twice to get a nice smooth finish.  I decided to add a few gold heart to my wreath using a good ol fashioned acrylic block.


I foam mounted the circle onto an ivory card base that was dry embossed using an embossing folder from Stampin' Up.  I refrained from adding any embellishments :)

Thanks for stopping in today!  I hope you'll join us for this challenge! As always, you'll be playing for a €25 gift certificate to the Create A Smile Stamps online shop!  For more details, please visit the Create A Smile Stamps Challenge Blog.


Tuesday, November 12, 2019

Paper Smooches November Challenge!

Hey, friends!  I wanted to drop in quickly with a card I made for the current Paper Smooches Challenge.  This challenge is especially exciting because it's also part of their new Challenge Design Team Call..yippee!!


If you're interested in entering, you can find all the details HERE!

I created a Christmas/Holiday card to add to my stash.  I used a bunch of awesome dies and hardly any stamping...the sentiment only.


I used the following PS products on this card:

Bird House Dies (for the tiny, red bird)

All the "colouring" was done with Distress Inks and either a sponge dauber or ink blending tool. Super quick and easy!


I love how this card turned and hope you do, too!

Thanks for dropping by! Have a great day and see you soon!

Laurie


Wednesday, October 30, 2019

Sketch Challenge for Create a Smile Stamps!

Hello and welcome back to another challenge for Create a Smile Stamps! This week we're playing with a sketch...


I used the Same Frequency Stamp Set for the super cute robot image! 


I used the Focal Die Set along with the second largest Postage Edge Circle Die as the two circles in the sketch.  I used foam tape to attach the robot to give a bit of a "lift".  Then sentiment was stamped onto a banner die from MFT and layered on top of another cut from the same grey cardstock as the cardbase.


To create some seperation, I cut some white cardstock using the second largest Scalloped Rectangle Die and adhered that directly onto the card base.  For a finishing touch, I stamped and fussy cut a few "nuts" that are in the stamp set. I glued them down and added some sparkle to each one using a glitter pen. 


I foam mounted the sentiment and that was it!!  Hope you enjoyed my take on the sketch!

Please join us! We love seeing what you create!

Also, up for grabs is a €25 gift certificate to the Create A Smile online shop...woohoo!  Please visit the CAS Challenge Blog for all the details!!

I wanted to let you know that Create A Smile Stamps has a DESIGN TEAM CALL for the Challenge Team going on right now!!  You can find all the details HERE!

Thanks for stopping in!  See you soon!

Laurie


Tuesday, October 15, 2019

96th Edition Release Sneak Day 2...My Creative Time!

It's Day Two of sneaks for the upcoming release from My Creative Time!  Are you excited??!!  Today, we are showing you TWO new dies!


You likely remember the Spooky Tree Tag Die from the August release.  Well, Emma has designed two more to add to this line!  I love these sets because it contains both the detailed frame portion as well as a backing.  These dies are super versatile. They can be used on a card or by simply punching a hole, can be used as a tag!

So, without further ado, here are the new Snowflake Tag Die and Christmas Tree Tag Die!!


I used the Snowflake Tag Die on a square card base and it looks fantastic. By punching a hole in the second die, it instantly becomes a tag!


I thought it would be fun to have a pink snowflake. Then, I couldn't help myself and created a VERY pink card!  But I just love non-traditional christmas colours!  By adding a few sequins inside the frame, it creates the illusion of a shaker card.


The sentiment comes from the Christmas Wishes Stamp Set.

The Christmas Tree Tag is extra fun because you can create a tiny little scene!  By adding a snow bank behind the tree and adding an ink blended sky, you get a cut little picture on a tag!


The garland, ornament and stars all pop out of the tree so they can be coloured and inlaid back in place! Again, I chose non tradition colours. The sentiment comes from the Dec 25th Stamp Set.


This makes a great tag but would also look great on your Christmas tree!

And that's day two!!  Tomorrow is probably my favourite day of sneak peeks so be sure to come for a visit!!

Thanks so much for stopping by!!

Laurie

**Sneak Peek Giveaway**

We will be giving away the sets we are showcasing each day to ONE lucky winner!! For example, the sets we showcase on Wednesday, Emma will announce the winner of that on Thursday and the sets we showcase on Thursday will be announced on Friday on the MCT Blog!  All you have to do is leave some love on each of our blogs.  You are not required to comment on every blog, but the more you do comment on, the more chances you have of winning!!   VERY IMPORTANT: Please leave a way for us to contact you with your comment, just in case you are the lucky winner! For extra entries, you can spread the word about this release on Facebook, Twitter or Instagram using #mycreativetime!  Good luck!!


Monday, September 16, 2019

My Creative Time 95th Edition Sneak Peek #1!

Welcome back my friends!! My Creative Time has a spectacular release coming this month! Well, they're all spectacular but this one, in particular, has got my mojo going!! Emma is releasing some amazing new Christmas goodies so help with your holiday gift giving. However, most of this release can be used year round!

Today, we are starting with the Dec.25th Stamp Set and the Mailbox Gift Card Holder.  These work well on their own but pair perfectly together!


This gift card holder is adorable! I decided to decorate my mailbox with flowers made from the Flower Petal Dies. I used red cardstock to make them look Christmas-y.


A gift card fits perfectly inside the slot of the mailbox!  The sentiment is from the new Dec.25th Stamp Set and was stamped onto a label which is also included in this die set!


I love this die set SO much! It is fun and beautiful all wrapped into one!

Thank you for stopping by today! See you tomorrow for another amazing sneak peek!!

**Sneak Peek Giveaway**

We will be giving away the sets we are showcasing each day to ONE lucky winner!! For example, the sets we showcase on Wednesday, Emma will announce the winner of that on Thursday and the sets we showcase on Thursday will be announced on Friday on the MCT Blog!  All you have to do is leave some love on each of our blogs.  You are not required to comment on every blog, but the more you do comment on, the more chances you have of winning!!   VERY IMPORTANT: Please leave a way for us to contact you with your comment, just in case you are the lucky winner! For extra entries, you can spread the word about this release on Facebook, Twitter or Instagram using #mycreativetime!  Good luck!!


Wednesday, September 4, 2019

New Create A Smile Challenge!!

Welcome back! It's the beginning of September, can you believe it?? Where is this year going and why is it in such a hurry?  I say that every fall because I cannot stand winter. Especially, the Canadian Prairies winters. I've lived her all my life and I still can't get used to them!  But enough rambling about the changing seasons...it's time for another CAS Challenge and this week we have a sketch!


It's a clean and simple design that you can make not so clean and simple if you'd like!  I followed the design pretty much to a tee this time.


To create the hexagon shapes, I used the Hexagon Web Stencil. This is a very cool stencil! I chose the size of the hexagon and then took a brush with a little paint on it and lightly traced the shape.  I carefully removed the stencil and filled in the entire hexagon.  I did two layers of watercolour to get the hard edges that I love so much and repeated 3 times.

To jazz it up a bit, I used some gold paint thinned out with water and added a generous amount of splatter! 


I decided to do some rough outlines with a black pen on the inner portion of each hexagon. This defined the shape a bit more.  I took the "hey" sentiment from the Decorated Wishes Add On Set and used Versaclair Ink in Nocturne. To make the sentiment stand out a bit more, I added a bit of a drop shadow with a white gel pen.  I cut down the panel using a stitched rectangle die and foam mounted it onto a grey, A2, top fold card base.

And that's my take on the sketch!!  

Please link up your fab creations on the Create A Smile Stamps Challenge Blog. We love seeing what you create and how the theme inspires you! Remember, you're playing along for a chance to win a €25 gift certificate to the Create A Smile Stamps Shop!!

Thank for dropping by! See you soon!

Laurie


Friday, July 19, 2019

My Creative Time 93rd Edition Release Blog Hop and Sale!

Today is the day!! All the fabulous products we've been showing you this week are now available to purchase in the My Creative Time Shoppe!!


I used the new I Have Faith in You Stamp and Die Set for my project today. I adore this wreath image but wanted to try something a little different!


I stamped the wreath, did some simple no-line colouring and die cut as it was intended.  I decided to snip the bow portion off and create more of a garland than a wreath. I love how it turned out. There are so many more possibilities with this image than just using it as intended!

For a bit of contrast on this card, I used the Grainy Wood Background Stamp with Barely Beige Ink from Simon Says Stamp. It's "barely" noticeable but it does create a bit of texture.  I decided to cut down the stamped panel using one of the More Stitched Edges Dies which creates the look of torn paper...so cool!


I adhered the woodgrain stamped cardstock directly onto a white card base. I added a ton of foam adhesive to the floral images and adhered that down over top.  The sentiment comes from the same stamp set and was stamped in a slightly darker shade of ink.


And because I can't get enough of these white gems, I added a ton of them!!  I hope you enjoyed today's card and are able to see the possibilities of this set!!  Here is the full blog hop list! Prepared to be amazed and inspired :)

Thank so much for joining us!! Up next is the super talented Miss Ruthie!!


BLOG HOP GIVEAWAY!!

For our blog hop giveaway, Emma is giving a $25 gift card to the My Creative Time Store to ONE lucky winner!  All you have to do is leave a comment on each of our blogs. You are not required to comment on every blog but the more you comment, the more chances you have of winning!! Very important:  Please leave a way for us to contact you (with your comment) just in case you are the winner!!

FREEBIE!!

Starting today, Friday June 21st, 2019 at 8am PST, we will be giving away these adorable new "Cute Micro Tag Dies".  This new set will be given to the first 25 shoppers!  It will be automatically added to your package during packing/shipping. Once the 25 shoppers have gone through, this die set will be available for purchase!  So, if it's available in the store, you are not one of the first 25 shoppers.  No exceptions will be made.  the "freebie" is NOT part of the bundle and will be sold separately.

SALE ALERT!!

Don't forget!! Our sale starts right now at the My Creative Time Store!!  Use the code July2019 at checkout to receive 15% off your entire in-stock purchase!! The sale ends on Friday, July 26th 2019 at midnight PST!!

Here's the complete blog hop lineup:

Laurie (that's me!)

Here's a look at the entire release!

Especially for You

More Chunky Tag Dies

I Have Faith in You


Strawberry Treat Box

Cute Micro Tag Dies (FREEBIE)


Featured Post

A Simple Thanks Card

Well, well, well. Look who decided to show up...me! It's been an awful long time yet again. I seriously thought I'd be well out of t...