Showing posts with label MFT. Show all posts

Monday, June 26, 2023

Simon Says Stamp Monday Challenge!

 Hello and welcome! I thought I'd join in on a challenge today!! I rarely participate in challenges and I don't know why. They are a great way to get the creative ideas flowing. I also find that I make better use of my supplies. With prompts such as layout, theme or colour combination, it tends to make you look at your stamps, dies and inks with fresh eyes.

This is the Simon Says Stamp Monday Challenge. The theme is "Vacation". Typically, the Monday challenge is a vintage theme. My card is definitely NOT vintage. But that's ok!

I used all older supplies, some of which are no longer available or retired...sorry! But that's the beauty of challenges...you can give your older goodies some more love!

I created a pastel, beach themed card. Everything was cut from white cardstock and then ink blended with Distress Inks. I have tons of coloured cardstock which would make this easier but I love the look of the Distress Inks!


I'm pretty happy with the way this card turned out. It's definitely got a relaxing vibe to it.

Here's a list of the stamps and dies I used. Like I mentioned before, some of these are unavailable but worth a search:)

My Favourite Things:  Beach Scene Builder
                                     Beach Bungalow and Accessories
                                     Cloud Stencil
                                     Sunny Vibes Stamp Set
The scalloped frame is the Fancy Frames from Craftin' Desert Divas (oldie but goodie)

Thanks so much for stopping by!  Have a great week!

Laurie


Wednesday, July 1, 2020

Canada, Eh? Blog Hop for Scrap N Stamp Canada

 We're celebrating Canada Day today with a fun blog hop brought to you by Scrap N Stamp Canada!


I made a very simple, very quick card. I don't generally give or mail these types of cards, do you?
I also do not have many "patriotic" sets in my stash so I had to improvise!


I used one of the zebras from the Zippy Zebras set from MFT. I actually drew the flag myself, fussy cut it out and attached it to the zebra.

I foam mounted the zebra and added a bit of "grass" using one of the Grassy Hillside Borders Dies from Lawn Fawn. I added a couple of clouds from another set in my stash. Any cloud stamps would work here.


For a bit of interest and to break up some of the white space, I added some doodled borders in opposite sides of the card.

The sentiment comes from an older set from PhotoPlay called O Canada. This is an adorable set and worth checking out!


I love the simplicity of this card and it was so quick and easy to make.

PRIZES

This month there are 3 prize packs up for grabs! There will be one winner chosen from comments left on the hop, one winner from comments made on our Facebook Page and one winner from comments made on our respective Instagram posts.  Winners will be announced on the SNS Blog on July 15th, 2020.

BLOG HOP LINEUP


I hope you all have a fantastic day and thank you for hopping along with us!
Happy Canada Day!!


Friday, June 5, 2020

Perfect Pearls...A Blog Hop!

Hello all and welcome back! Today we're having a blog hop brought to you by Scrap N Stamp Canada! From the title of this post, you've probably guessed that we are featuring Perfect Pearls, remember those?!


I've had a few pots of these kicking around my craft room for quite some time. I do have have some of the Perfect Pearls colour mixed up with some water (homemade shimmer spray) but I hardly ever use that! So, this was definitely a great challenge because it made me use some much neglected supplies!

There are many different techniques that involve Perfect Pearls but I tried something new. Well, new to me but maybe this technique is "out there"...let me know!


These are the colours I had on hand: Pewter, Heirloom Gold, Perfect Gold, Perfect Bronze and Perfect Copper. Sorry about the washed out photo but you can faintly see a die cut rainbow at the bottom..


Instead of using a binding agent like Versamark or the Perfect Medium, I wanted to see if double sided adhesive would work. Spoiler Alert:  It did!!  I die cut the Rainbow Whimsy Die from MFT out of white cardstock which I placed the Stick It Adhesive to.

I removed the backing from the adhesive and using a fluffy brush, liberally applied the Perfect Pearls. I started with the Perfect Copper shade for the largest arch of the rainbow.


The key to this is to make sure the entire surface is covered, including the edges. I found that the Perfect Pearls adhered very well and removed any sickness of the adhesive. 


As you can see, my rainbow isn't in the typical colours but I think it turned out beautiful as well as quirky!

I die cut the rainbow 3 more times out of scrap, white cardstock and layered them all together. Now, it's time to put this onto a card!


 I used the Cloud Stencil from MFT and a blue ink to create a sky directly onto the front of the card base.  I thought this card needed a few raindrops. I used the Colour Drops Die Set (MFT) and die cut 3 of the smallest die. I used the same adhesive covered cardstock. After removing the backing, I added the Perfect Pearls and the Pewter shades. It's so easy to blend different powders! I also stacked the drops onto scrap card stock.


As you can see, white gel pen works beautifully over top of this medium. I may have gone over board on that.  The sentiment come from the Essential Sentiments Stamp Set (older but must have set from MFT) which I stamped onto a strip of white cardstock and snipped into 3 pieces.  I popped those up as well because why stop with the dimension, right?


I hope you enjoyed my take on the Perfect Pearls! This is such an under used medium and I encourage you to give them a try!

BLOG HOP LINEUP:


PRIZE AND SALE!!

There will be one $50 gift certificate given away to one lucky commenter! So make sure to leave a comment at each stop to increase your chances of winning! The winner will be announced on the SNS Blog on 

For this weekend only, all Perfect Pearls will be 10% off so now is a perfect time to stock up!!

**Some affiliate links used. Thank you so much if you make a purchase through one of these links**

Thanks for stopping by!

Laurie


Saturday, December 28, 2019

MFT Weekly Sketch Challenge #469

Hello, friends and welcome back! Being on Christmas break is always nice because it gives me time to sit and create! Although, after making all those holiday cards my creative juices flow a little slowly. That's why I like to participate in challenges. I find that by looking at a colour palette or sketch can trigger an idea. And this weeks Sketch Challenge from MFT Stamps did just that!!


I followed the sketch closely but did switch a couple of things! That's the beauty of these challenges. You can follow it exactly, flip it around or switch out shapes! It's wherever the creative process takes you!


I used the second large Stitched Mini Scalloped Rectangles to house my little scene. I coloured the adorable little girl and her basket of flowers from the Bring Out the Sunshine Stamp Set and used the co-ordinating dies to cut them out.  On the scalloped panel, I used the Drifts and Hills Stencil to create a little grassy hill for the girl to stand on.

Instead of the clouds from the sketch, I die cut 3 hearts using the Infinity Heart Dies from Hero Arts and used my alcohol markers to colour them.


I adhered the panel and the hearts on a white card base with liquid glue and used foam adhesive to adhere the girl, the flowers and the sentiment. The sentiment comes from the Essential Sentiments Set and was stamped onto a speech bubble die with the little tail cut off.

I just had to add some white gel pen details to a few areas as well as some Nuvo Crystal Glaze!!


Thanks for dropping by! 

See you soon and...stay awesome :)

Laurie


Sunday, September 15, 2019

MFT's 2019 Card Design Superstar Challenge!

Hi everyone and welcome back!  I've decided to enter the MFT 2019 Card Design Superstar Challenge!! This is always daunting as there are so many talented card makers out there!


Last year I entered the Clean and Simple category but white space isn't my forte, haha!  So, this time around I thought I'd enter into the Colouring Virtuoso category. Now, I do not possess an outstanding technical ability (I totally googled the meaning of virtuoso, hahahaha) in colouring. But as I sat down to create this card, I thought it leaned more towards colouring than CAS.


I decided to make a shaped card using some older, oval dies from MFT. The Stitched Mini Scallop Ovals the Double Stitched Oval (which appear to not be available anymore).  I created the base by die cutting 2 of the scalloped ovals, scoring one about 3/4 inch from the top and adhering them together.  

I stamped the flower from the Beautiful Bloom Stamp Set with Versamark Ink then used clear embossing powder over top.  I watercoloured it using the Vintage Pastels set from Prima in the colour    Breezy. I added a bit of Stone Grey to the centre and an even more watered down version of the same colour around the outside of the flower.

I used the Double Stitched Oval Die to cut a portion of the image and layered it onto the card base. It was at this point I decided it needed a popped up frame. I nested the Double Stitched Oval die inside the Scalloped Oval Die and ran it through my die cutting machine to create the frame. I used foam tape to adhere it and give it more dimension.


Before adhering the sentiment, I decided to add some flicks of a darker colour using coloured pencils in 2 shades of green. This really made the image pop and gave it some much needed detail!  The sentiment comes from the Essential Sentiments Stamp Set.  Before calling this card done, I added a few Sparkling Clear sequins.


Thank you so much for stopping by!  

Laurie


Friday, March 8, 2019

This Pun's For You Blog Hop!!

Welcome!!  It's time for our monthly blog hop for Scrap 'N Stamp Canada and it's a good one...PUNS!!! Who doesn't like a good pun??  Sometimes they make your eyes roll but mostly they're good for a laugh!!


For my card today, I used the Birthday Bears Stamp Set from My Favourite Things.  This set is full of the most adorable bear images. And while it isn't a new release, this set is definitely one of my faves from MFT.

I went with a fairly clean and simple look today as I wanted that bear to be the main focus of the card.


I did so some simple ink blending to with Peeled Paint Distress Ink to create the illusion of ground and used the Cloud Stencil (also from MFT) along with Tumbled Glass Distress Ink for a very light, cloudy background.

I coloured up all the images with my Copic markers and fussy them out as I don't have the co-ordinating dies.

I used a stitched rectangle die to cut the ink blended panel out then layered it on a piece of dark teal cardstock which almost matches the colour of the balloon.


I added some Nuvo Crystal Glaze to the balloon and a few other areas on the images because I cannot get enough of that stuff!!

To finish off, I stamped the sentiment on the bottom of the focal panel.  This pun is more cute than funny but does the job just fine!!


Here is the full hop lineup!!  Don't forget to leave each of us some love for your chance at winning a fabulous prize!!!

Laurie (you are here!)


PRIZES:

Scrap N Stamp is kindly offering 8 Punny Prize Packs as well as 1 $50 gift certificate to the SNS store!! 


Wednesday, September 12, 2018

MFT's 2018 Card Design Superstar Entry: Clean & Simple Genius

Well, holy cow!! I'm entering a challenge, can you believe it?  I got so excited when I seen the 2018 My Favourite Things Card Design Superstar Challenge that I just had to enter!


There are 3 categories in this challenge: Clean & Simple Genius, Colouring Virtuoso and Innovation Master.  While I love colouring, my skills are what you'd call..lacking. I do love a good interactive card but honestly, I'm terrible at them!! Seriously. I struggle through a simple shaker card :).  So that, my friends, leaves the Clean & Simple Category!

I love "clean" cards. It has taken me quite some time to embrace the white space but now I'm pretty comfortable with it.  Although, my finished card turned out quite colourful. I hope this will still count as CAS!!

I used a ton of MFT product on this card starting with the Stitched Circles Stax.  I adhered them all together to cut as one piece. So instead of cutting full circles, they cut rings.


I went through my stash of scrap cardstock and picked out some rainbow-ish colours.  I discovered that I do not have any orange cardstock so a coral colour would have to do.


Look at all those beautiful rings of colour!! So many rainbow cards in my future!  To make one solid, rainbow circle, I die cut the largest circle out of scrap paper and glued each ring to it. Then I cut it (almost) down the middle.


This is the layout I had planned.  It's faint but I did use the Stencil Cloud with some Tumbled Glass Distress Ink to add a bit of interest and dimension to the background. Before I adhered the rainbows to the panel, I used the large stitched rectangle die from the Blueprints 15 die set (which is not available any longer).  This was the perfect size to frame my scene.


I changed my mind on the sentiment but thought I would show this anyway as the process was the same.  I white heat embossed, on black cardstock, a sentiment from the Beach Bunnies Stamp Set. I trimmed it out using the small banner die from the Blueprints 27 Die Set. 

Now it was time to put everything together!!  I adhered the rainbows directly onto the cloudy panel and foam mounted the sentiment strip. The entire panel was adhered to a pink card base.


It was looking a little "flat" to me so I die cut a few clouds from the Somebunny Co-ordinating Dies set and foam mounted those using craft foam (also cut with the dies).  


I added a good dose of clear sparkle to each cloud instead of adding any embellishments.


I know it's quite colourful but I think the design itself is quite simple!!  I actually LOVE the way this card turned out and I hope you do too!!

Thank you so much for stopping in today! I love it when you visit :)

Until next time...stay crafty!

Laurie


Saturday, August 25, 2018

Shake Up Summer Blog Hop with Scrap 'N Stamp Canada!!

Hello and welcome back!  Are you ready to shake things up a bit?  Today Scrap 'N Stamp is having a blog hop featuring SHAKER CARDS!


I will admit that I do not make a lot shaker cards. Why? I'm really not sure. They are not that hard to make and are always so fun to give out.

Sit back, relax and enjoy all the incredible shaker cards made by my team mates! Please stay tuned until the end of this post for details on prizes, because what's a blog hop without prizes :)!

There are tons of products on the market that make constructing shaker cards super easy. These include dies with co-ordinating "pouches" for all your shaker bits and pieces. Tonic Studios make a bunch of different shaped sets including a circle, balloon, star and heart.  These sets come with the die AND 5 pouches and are really affordable. These products eliminate the use of acetate which can be a bit frustrating to use!

Now, after all that being said, I actually went "old school" and created my shaker using acetate (shakes head).  While these sets are fantastic, I wanted a bit more room for all my shaker bits and pieces.  I started by stamping and die cutting all the images from the More Rustic Wildflowers set from MFT.


I lined up all the stamps on my Misti by using the dies as a guide. Once everything was stamped, I was able to die cut everything with one pass!


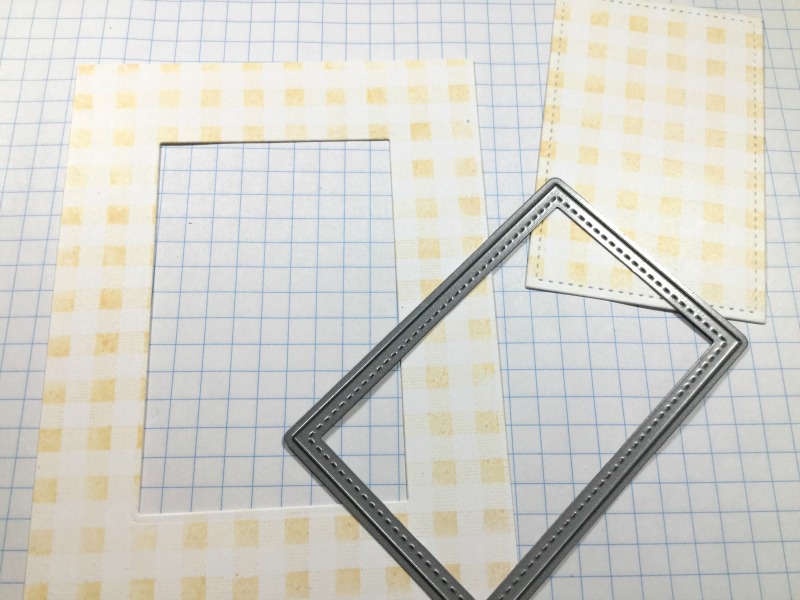
Next, I stamped a panel of white cardstock with an old Gingham Background Stamp but you could use any stamp or patterned paper for this.  To create the window for my shaker, I used one of the Stitched Rectangle Dies from Lawn Fawn.


To make the window a little prettier, I made a frame out of white cardstock using this same die as well as one die larger from the Fancy Scalloped Rectangle Dies from Lawn Fawn.


By nesting the two dies together and running them through your die cutting machine, you will end up with a frame that fits perfectly around the window!


I trimmed a piece of acetate and adhered it to the back side of this panel. Any plastic packaging will work for this.  To create the "well" for the bits and pieces, I placed a border of foam tape around the edges of the plastic.  I use this foam tape.


Before adding the sequins, I wanted to line up my sentiment stamp which will be on the card base itself.  I did a dry run on the placement of all my flowers and lined up the sentiment on my Misti.


The sentiment comes from the beautiful Choose Happy Stamp Set from Penny Black and I stamped in Versafine Clair Nocturne Ink.

Now it's time to add all the sparkle and shine. I used an old sequin mix plus some Nuvo Confetti Crystal Cloud Circles.  Here's a little tip:  after removing the lining from the foam tape, add another layer of acetate, this will make it heaps easier to line the shaker panel on your card base. You can flip it over and nothing will spill out!!!


I may have overdid it on the sequins as you have to give it quite a shake to see the full sentiment.


I placed my little floral arrangements is opposite corners using a combination of Nuvo Deluxe Adhesive and foam squares.


I'm really happy with the final outcome and had heaps of fun creating this card!!  Just wait until you see what the other designers came up with...you'll be blown away!!

Here's the full blog hop line up:

Laurie (YOU ARE HERE)

PRIZES!!!

Scrap 'N Stamp Canada is giving away ONE Tonic Die and Shaker Set to one lucky commenter on each stop of the hop. There will also be one set given away on the Scrap 'N Stamp Facebook Page! That's SEVEN in total!!  So please leave some love on each of our posts for a chance to win one of these amazing sets!  Winners will be announced on Saturday, September 1st on the SNS Blog!  Good Luck!!

SALE!!

All Shaker Windows are 20% off right now!!

Thank you so much for hanging in there with me. I know this post was a bit lengthy :)

See you soon and happy blog hopping!!

Laurie


Saturday, July 21, 2018

Christmas in July Blog Hop with Scrap 'N Stamp Canada!!

Welcome, my crafty friends to the Christmas in July Blog Hop for Scrap 'N Stamp Canada!! You should have arrived from Tara at the SNS Blog. Don't worry if you get lost along the way, there will be the full line up at the end of this post!!


I know that it's very hard to think about Christmas right now, but Oh What Fun I had making a Christmas card!!  It was nice to have a break from stamping summer-y scenes!!

I used the Globe Greetings Stamp Set and co-ordinating Dies from Concord and 9th for my card today.  This is not a Christmas set but when paired with other products and using traditional Christmas colours, it works perfectly!!!

I chose kraft, red and lots of white embossing for my colour palette. I'm going through a bit of a "kraft phase" right now. Absolutely love the look of it!

I started by embossing the globe stand with gold embossing powder directly onto a kraft card panel.  I die cut the circle (included in the co-ordinating dies) out of white cardstock and then using white embossing powder and Versamark, I used the "land image" to stamp. I use a light blue ink to ink blend over the top of the stamping for the embossed resist look!


The Globe Greetings die set has flowers, leaves and a super cute banner. I used them all!! I already had all my red flowers stamped before I realized that the dies are solid so I ended up fussy cutting everything out. I foam mounted the banner and flowers to the globe and added the leaves with Nuvo Deluxe Adhesive. 


I die cut the MFT Word Die "Joy" out of white cardstock and used the same ink I used for the flowers to add some colour.  Before adhering that to the card panel, I did some selective stamping of one of the sentiment from the Globe Greetings set and again, used white embossing powder.  The original sentiment says "Welcome to the World". It's amazing what a little masking or stamp surgery can do with your supplies, isn't it?

After adhering the die cut sentiment, I used the same liquid glue to adhere the kraft panel onto a white cardbase.  


I added a lot of sparkle with a Clear Wink of Stella pen and loads of Nuvo Crystal Glaze .  I decided to add a few drops of Nuvo Drops in Gloss White to fill the empty areas of the card!

Mixing and matching stamps and dies and thinking a little outside the box is a great way to stretch your supplies!!

I hope you find lots of Holiday Inspiration on the hop today!! Up next is the super talented Amy!!

Here is the full hop line up:

Laurie (YOU ARE HERE)

PRIZES: Scrap 'N Stamp is giving away 7 Christmas Embellishment Packs, one for every stop in the hop!  All you have to do is leave a nice comment at each stop and you will be entered to win!! Winners will be announced on the SNS Blog on July28th..Good Luck!!

SALE ALERT!!!! Right now, if you spend $100, you will receive $25 off your order!! That's an incredible savings! Just use code CJ25. But hurry, this promotion ends July 25th!!

Thank you so much for stopping by today!!

Until next time, my friends, stay crafty!!

Laurie


Featured Post

A Simple Thanks Card

Well, well, well. Look who decided to show up...me! It's been an awful long time yet again. I seriously thought I'd be well out of t...