Showing posts with label friendship card. Show all posts

Wednesday, September 30, 2020

No Line Colouring with Create a Smile Stamps!

 Good morning and happy Wednesday! I'm back to share a card made using one of the newest stamp sets from Create a Smile Stamps! And I've also decided to do some no line colouring with my pencils!


This simple eucalyptus image is from the Breathe In, Breathe Out Stamp Set. This set has multiple images in different sizes. I used one of the smaller ones so as not to get overwhelmed while colouring.
I'm not an accomplished colourer. I don't really go for realism and my technique is my own. I do it purely for the fun of it. I just want good results that I'm happy with. This is the stress-free way!!


After colouring, I used the second largest die from the Stitched Circle Frames. This cuts the inner portion as well as the detailed frame. The coloured panel measures 3.75X3.75 inches. I adhered it to a 4X4 square card base. I glued the frame down, added a piece of fun foam (cut using the same die), then adhered the coloured portion on top!


The sentiment comes from the Small Sentiments Set. I resisted the urge to add any further embellishments, leaving it clean and simple.

Thanks for dropping by today! See you soon!

Laurie


Friday, February 7, 2020

"Galentines" Blog Hop for Scrap N Stamp Canada!

Hi and welcome to the Scrap N Stamp monthly blog hop! We are celebrating "Galentines Day". This is a fun take on Valentines where you make cards for your girlfriends!  Valentines Day can be a rough day for some people so this is a great way to spread some cheer.  What's really nice about this theme is that is doesn't necessarily have to love. It can be a simple "thinking about you", "thank you" or "hello"!


I've made a couple of cards using the Friendship Bloom Stamp Set. This is a collaboration set with Hero Arts and Gina K Designs. I highly recommend this set if you like florals. The main image is massive and the sentiments are amazing.


I white heat embossed the entire image onto a piece of Bristol Smooth paper.  For the colouring, I actually used some GinaK Designs. These are dye inks that come in beautiful colours! I used the Autumn and Summer Assortment set of ink cubes. 


When the colouring was done, I cut the image in half and trimmed the pieces down to fit 2 cards. This purple is my favourite!


But this pink is pretty fabulous, too!


I foam mounted each floral piece with foam tape. Each of the sentiments come from the You Get Me Stamp Set, also from Gina K.  This is a small, affordable set that has THE best sentiments that would make any girlfriend smile!


To finish each card off, I added a few colour co-ordinated sequins from my stash.

PRIZES:

There will be one lucky winner of a $50 gift certificate to the Scrap N Stamp Online Store. All you have to do is leave a comment on each stop of the hop for your chance to win! The winner will be announced on the SNS Blog on February 18th, 2020!

FACEBOOK CHALLENGE:

For another chance to win, you can upload a creation with this months theme to the SNS Facebook Challenge Page. Use #SNSCHALLENGE.

BLOG HOP LINEUP:

Laurie (that's me!)
Deb

Thanks for hopping along with us! Thank you in advance for all your lovely comments!

Laurie


Wednesday, February 6, 2019

Create A Smile Challenge...Friendship!!

Hello and welcome back to another Create A Smile Stamps Challenge!!  This one is an easy one.  It's all about friendship. Friendship cards are a favourite of mine to make because you can use so many different styles of stamps. Critters, florals, graphic...anything goes!

For my card today, I combined an older CAS set along with a new release set.  I heat embossed one of the leaf images from the new Fine Ferns Stamp Set.  I used Silver Pearl embossing powder for this.  This is one of my most loved embossing powder!  Because I used watercolour paper, the images are a light shimmery colour without being stark white.


I used my Misti for the stamping as it's super easy to create a mirror image.  To colour, I chose 3 different greens from my set of Tombow Dual Brush Pens.  I swiped some colour inside each leaf and blended it out with water.


For the sentiment, I used the Alphabet Sticker Set in the colour of Deep Sea.  This was my first time using these stickers and I love them!!  I stuck them onto a piece of the same watercolour paper cut with a Cool Cuts Scalloped Rectangle Die.


The small "wonderful" word comes from the All About You Stamp Set. The stamp actually says "are wonderful", but I masked off the "are" before stamping.


I added some glitter and Nuvo Crystal Glaze to the letter stickers, adhered that panel with foam adhesive and added a few clear sequins.  The entire panel was glued onto a white card base.

I hope you enjoyed my project for today and I encourage you to play along!!  Create A Smile Stamps has wonderful products you are sure to love!!

All the details are on the Challenge Blog but here is what you're playing for:

Thank you for stopping by today!!  See you soon!!

Laurie


Thursday, August 30, 2018

CAS-ual Fridays Challenge #207

Welcome back!! It's time for another challenge on the CAS-Fridays Challenge Blog!!  The theme for the next two weeks is...


Mint and Neutral!!  Oh, what fun!  I love the colour mint, every shade of it, so this was an easy and fun challenge for me!

I went for a very clean and simple look and choose Ivory as my neutral colour.  I created a dimensional background by cutting the gorgeous Casual Trees Fri-Dies multiple times out of ivory cardstock and adhering them directly to a 4 bar ivory card base (3.5 X 5 inch). This gives a very elegant look.


I die cut the Friend Fri-Dies from white cardstock and used Catherine Pooler inks in the colours, Mint To Be and Seafoam.  These inks are awesome and I highly recommend trying them!! I added Versamark Ink over the die cut and heat embossed it in clear. I did this twice to give a nice, raised, shiny look!


I adhered the word die onto a scalloped oval die from MFT to make it pop a little from the background. The tiny hearts come from the Fun-fetti Fri-Dies and were treated the same as the friend die.


I usually leave the inside of my cards blank. Especially if it's a generic friendship card.  You can customize it later for any occasion!!

Link up your project on the CAS-ual Fridays Challenge Blog. Ten (10) winning entries will be featured on the blog the Thursday before a new challenge starts. The overall winner will receive a $25 gift certificate for the CAS-Fridays shop! But if that winner featured CAS-Fridays products, the prize amount will double!! Remember, you are not required to use CAS-Friday products :)


Thank you for stopping by today! I hope you'll join the challenge! Have fun creating and good luck!

Laurie
     

Thursday, March 29, 2018

Anything Goes Thursday with My Creative Time!

Hello and welcome back!!  It's Anything Goes Thursday for My Creative Time!  For today's project, I made a sweet little mini card with a friendship theme,

I went through my MCT stash and came across the Stitched Restroom Peeps die.  This is one of the very first dies I bought from Emma!  I have not used it in quite some time so I thought today was the day!

I started by die cutting two of the female images out of white cardstock and used a couple of Distress Inks to colour them.  I also cut one of the "friends" dies from the Friendships Are Forever Stamp and Die Set out of the same cardstock.


I foam mounted my peeps onto one of the circles from the Scalloped Stitched Circles Dies then mounted that onto the co-ordinating size of the scalloped die.


I layered about 4 of the "friends" die to give it some dimension. Everything was adhered directly to a 3 X 3 cardbase.

This card was quick and easy to make and would make a nice surprise to give to one of your pals!


Thank you for stopping in today!! 

Until next time...stay crafty!!

Laurie


Wednesday, November 15, 2017

Paper Smooches Guest Designer Entry

Hello everyone!!  So, this is a very last minute entry into the Paper Smooches Guest Designer Search for December 2017!  I love me some Paper Smooches so I thought what a great way to have a play with some stamps and dies AND possibly get to be a guest designer!!


One of my all time favourite PS sets is Chubby Chum Pals.  That moose gets me every time:)  I also used leaf images from the Natural Beauties stamp set.  All the images were stamped with Versamark ink onto watercolour paper and heat embossed using a combination of Zing Chestnut and Brown Sugar Embossing powders.  Just a side note on those powders..I've had these for ages and have never used them.  They are a chunkier powder that seems to emboss nicely but they smell terrible!!! Seriously, almost toxic smelling!!  So embossing powders go bad??

Anyway, let's have a look at the card I created!  After, using my Tombow Dual Brush Pens to do some simple watercolour, I used the co-ordinating dies, here and here to cut everything out.


I then cut out the Frame 2 die to act as a backdrop for my moose.  I used Broken China and Brushed Corduroy Distress Inks to add the colour.  After making a dry run on how to place the images, I decided I needed that super sweet bird, also from the Natural Beauties set, to sit on the moose's head!

I adhered almost everything with foam adhesive to add some great dimension.  For the sentiment, I used the one that always makes me smile!  The "I miss your face" comes from  the Fun & Flirty stamp set, which is one of my all time favourite sentiment sets!

I added a little extra detail with a white gel pen, Clear Wink of Stella (which is impossible to see here) and Glossy Accents!


Thank you for stopping by today!! 

Until next time...

Laurie


Wednesday, November 1, 2017

Hugs!!

Hello!!!  I wanted to stop in and share a card made using some new goodies from Butterfly Reflections Ink.  This is by far my favourite shop!!  I've gotten spoiled with the ridiculously fast shipping and awesome customer service from Vanessa!!

My last order included the The Crew: The Garden Club Stamp Set and its Co-ordinating Dies.  I've recently become addicted to colouring people and houses. And while I'm currently waiting for my next "house" stamp set to show up, I thought it would be fun to colour in a few images from this set.

I also ordered the Bold Alphabet Die Set a while ago and have never used it.  I'm not sure why because this set is AWESOME!!! Now, while this set is quite pricey, in my opinion it is worth every penny.  These are some big letters that can easily stand alone on your card!

Let's get to stamping and colouring!!  I started by colouring up some flower pots, a table and one of the pretty girls from the Garden Club set.  I used my Copics to colour.  I definitely need help in the skin tone department, but I try :)


I then die cut the letters H, U, G and S from the alpha dies and used some Faded Jeans Distress Inks to get an ombre look.


I got a huge fingerprint on the "g" but hid that later!  Next, I adhered a piece of navy cardstock onto a white A2 cardbase and placed a white mat on top of that.  I foam adhered the letters to roughly the middle of the white panel.


I strategically placed the little girl on top of the "g", this hid that ugly fingerprint. I added the flower pots beside her.


I finished off by adding a few Sparking Clear Confetti.  I was tempted to use a white gel or glitter pen but I resisted.  

I love the way this card turned out and I hope you do too!!


Thank you for stopping by today!!

See you soon...

Laurie


Sunday, September 17, 2017

Starting with "P"!

Hi everyone!!  Last week I picked a new letter for my "Making Use of My Stamps" series.  The letter picked was P.  I knew I had a lot of Paper Smooches stamps and dies but as I was going through my stash, I realized that I also have a lot of Papertrey Ink!!  I don't keep my PTI stamps in with the general population so I totally forgot about them...bad me!!  In this portion of the series, you'll also see some Pretty Pink Posh, Poppy Stamps and Penny Black.

I posted this card on Instagram yesterday for the 30 Day Colour Challenge hosted by the beautiful Kathy Racoosin!  It features the Forest Whimsy Stamp Set from Paper Smooches.  I haven't used my pencil crayons in quite some time so that was my medium of choice.  I have the Lyra Rembrandt Polycolor pencils and I love them!!


I also used the Leaves 1 Dies and the Pinked Circle Dies on this card.

The next two cards feature PaperTrey Ink.  I love PTI products but have not ordered from there for a long time due to shipping costs :(  This first card uses the Lovely Layers Stamp Set and the Co-ordinating Dies.  These dies are solid, which I'm not really a fan of (only because my stamping is ALWAYS off!).  I used all Catherine Pooler Inks for the stamping, love these inks for so many reasons, but that's another post!


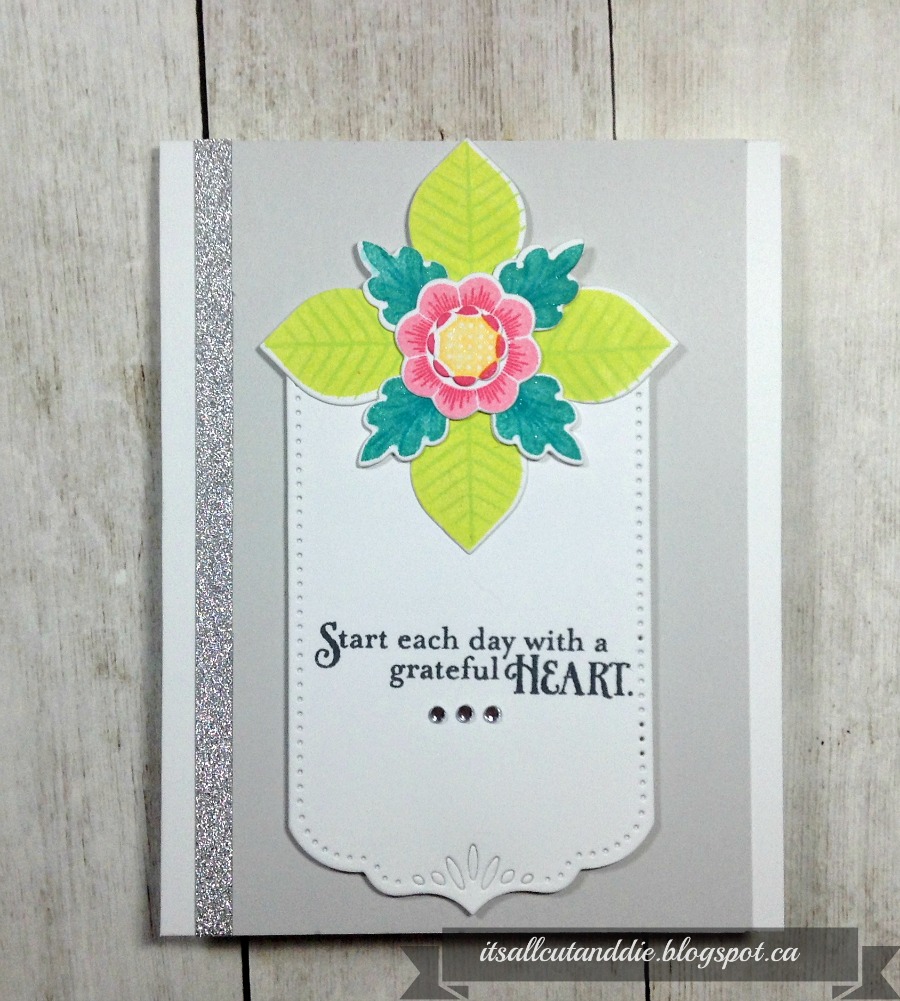
Because the colours are so vibrant, I left the card fairly neutral.  I also used the Basic Bookmark 3 Die.   As an afterthought, I added a strip of sparkly washi tape to one side, I felt like it needed some shine!


And my final card for today uses one of my all time faves from PTI,  the Be Happy Stamp Set. Unfortunately, I could not find this set on the PTI website.  The shop still carries the Dies, which can totally be used on their own!


Again, I used CP Inks for the stamping.  This card is so happy, love the way it turned out!


I think I'm really going to enjoy the letter P!!  From whimsical and cute to classy and elegant, this is going to be fun!!


Thanks for stopping by today, I really appreciate it!

Hugs!

Laurie


Featured Post

A Simple Thanks Card

Well, well, well. Look who decided to show up...me! It's been an awful long time yet again. I seriously thought I'd be well out of t...