When I go to my craft room I always bring my iPhone or iPad with me. Just in case I get a blog-worthy idea and I can document it, 9 times out of 10, it isn't blog-worthy, lol!! Although, I really need to start posting more...even the fails!! Well, I guess you can say this card started out as a fail...
I apologize in advance for the numerous photos..
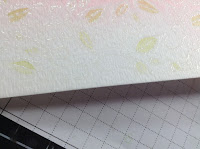
So, it started with a background cling stamp from Impression Obsession called Leaf Flourishes (linked to Simon Says Stamp). I hadn't used it yet and thought I would pull it out. I also knew I wanted to do some sort of watercoloring. I heat embossed the image with clear embossing powder on to watercolour cardstock...mistake #1. The image was almost impossible to make out, but I tried anyway.
I painted as many leaves as I could spot but just wasn't happy with the results (there are quite a few flourishes on the stamp as well, so there was a lot of unpainted area). I took out some Worn Lipstick Distress Ink, and sponged the entire thing. Then I thought it needed some Brushed Corduroy Distress Ink...oh my, mistake #2.
Yup! There it is! It would've made a lovely sofa pattern in the 80's, don't you think? So, here is where my brain started working. Let's try to freehand watercolour before stamping a floral image. I got out the Doodlie-Do Stamp set from PaperTrey Ink and chose a stamp. I started to watercolor behind the stamp, trying to put a specific color in the right spot i.e.: red for flowers, green for stems/leaves.
When I was done, I placed the stamp over top and....it didn't line up. I know its a loose-goosey type of card but I really didn't like it.
I thought I could take some of the separate images from the set and stamp them over each part of the watercolour. But as I took a close look at what I had created, I decided to Stop Right There!! This was my very first freehand watercolour!!! I knew if I stamped over it, it would be ruined. So, I ended up adding a few splotches of color to each part and...stopped.
To finish things off, I used a Stitched Square Die from Simon Says Stamp to cut out my "flowers". I misted it lightly with some Perfect Pearls (in the shade Perfect Pearl) mixed with water to give it a wee bit of glimmer.
I used my scoring board to score some lines around the edge of the card base (1/4" around all sides). I really wanted to keep this as clean and simple as I could, which is rather difficult for me!! I thought about tying some black ribbon around the card but the only ribbon I has was rather thick, so I skipped it!! I stamped the sentiment, also from the Doodlie-Do stamp set, added a few Sparkling Clear sequins and called it done!!
Sorry this post was rather long, but I really wanted to show you how my thought process works sometimes!!
Hope you enjoyed!! Until next time...Stay Crafty!!
Laurie
PS: I did not throw away the 80's sofa panel...will try to do something with it :)


