Saturday, December 17, 2022

Scrap n Stamp's 12 Days of Christmas!! Day 9

 Hello everyone!! I'm super excited to be participating in the 12 Days of Christmas event for Scrap N Stamp Canada


Today is Day 9 and we are featuring AALL & Create!! This brand is new to the shop and I'm so happy about that as I'm a huge fan!  This company has every "style" you can think of. From cute to grunge to artsy and vintage. You must check it out!

I went with the cute theme today. I used a stamp set illustrated by Janet Klein..she creates the most adorable sets!


I made a shaped card for you today. The base used a Disc Bound Journal Die set but this would look great as a tag too!


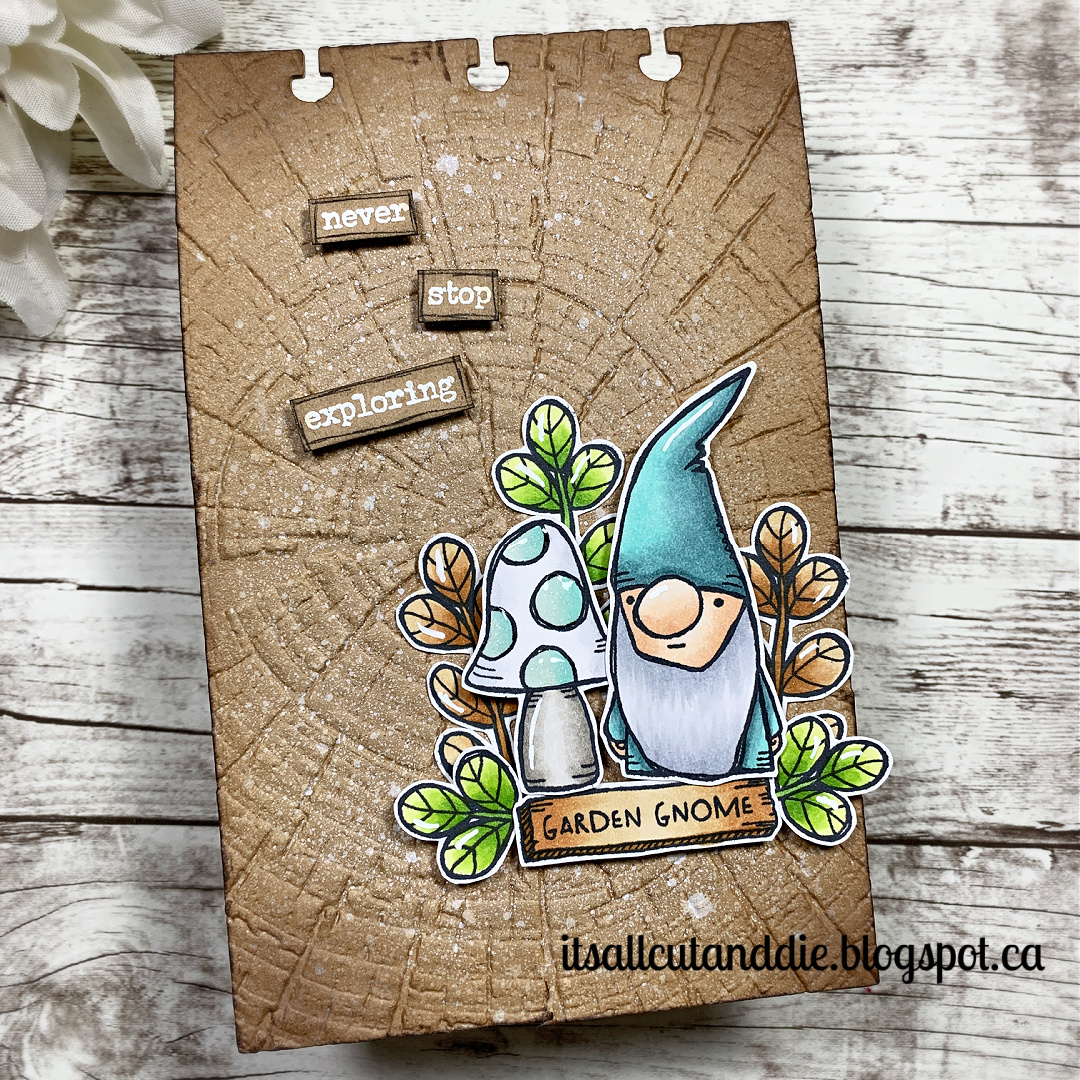
I started by stamping and colouring all the images. There are no coordinating dies but the images are super easy to fussy cut! 

To add some amazing texture, I used the Tree Rings Embossing Folder by Tim Holtz. Side note: If you're on the fence about this folder, jump off the fence and add to cart because it is incredible!

I used White Ink Spray by Avery Elle to add a few splatters then used Vintage Photo and Walnut Stain Distress inks to add some colour around the edges.


I used a combination of liquid glue and foam adhesive to add my images. I cannot get over how cute this gnome is!!!!

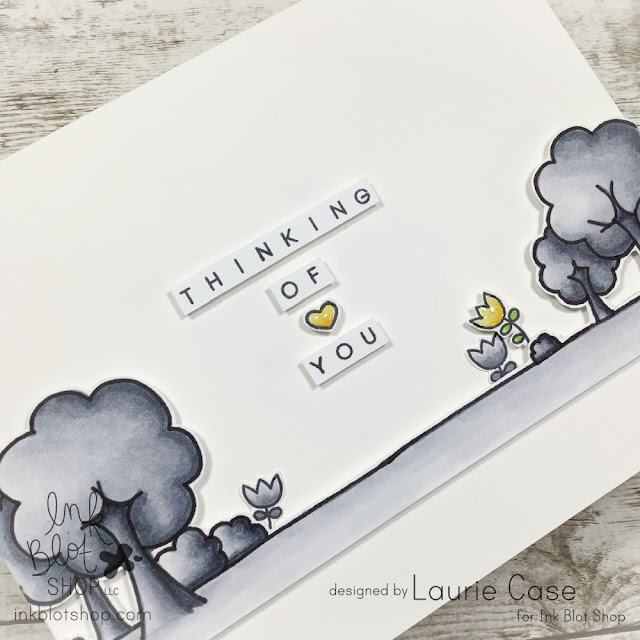
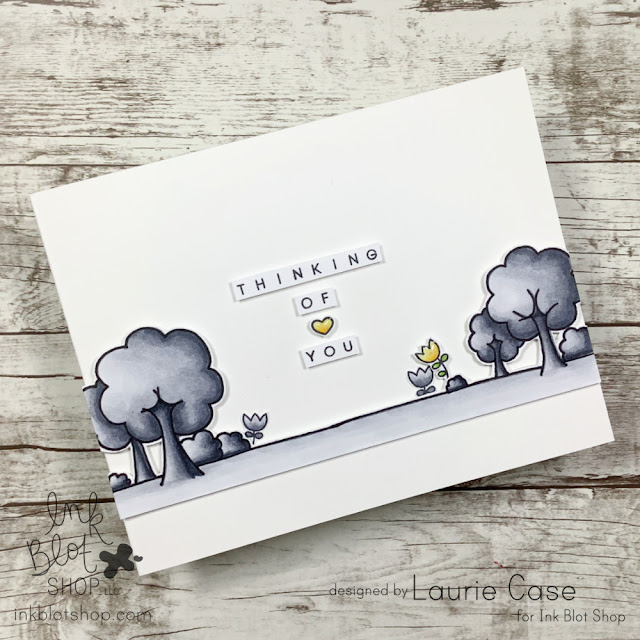
For the sentiment, I pulled out the Tiny Text Stamp Set from Tim Holtz. I white heat embossed it then trimmed around each word to create little strips. I foam mounted these as well.

To create the card, I simply die cut another panel, scored 1/2 inch from the top and applied a strong adhesive above the score line then attached the panels together.


This was a super fun project to make. I adore AALL & Create and hope to see more products added to the shop soon!


AALL & Create is 25% off!! I hope you'll snatch a deal while you can!

Thanks so much for stopping by! See you soon!

Laurie


Tuesday, November 22, 2022

YNS Challenge #192

 Hello and welcome!  To get my creative mojo kick started, I perused the internet for some inspiration and a fun challenge. Your Next Stamp was the first company challenge I participated in when I started card making!

The theme of this challenge is "Thank You". I dug through my YNS stash and found one of the cutest sets called Scarf Weather. While I'm typing this post, I just discovered that this set has been discontinued...so sorry about that!

I used my pencil crayons to colour the sweet images, used the coordinating dies to cut everything out and came up with a simple scene.

I used a leaf embossing folder from Taylored Expressions to create some interest on the background panel. Again, apparently discontinued! Can you tell I've been shopping my stash lately, haha?!


This layout is a bit different for me as I usually like things to be centred. I used foam adhesive to pop everything up. And I usually always add white gel pen details!


Thank you very much for stopping in! If you're looking for a fun challenge, check this one out! But hurry, it's almost over!!

Until next time!

Laurie

Friday, October 28, 2022

Rainbow "HI" Card

 Hi friends and welcome back! I'm sharing an easy and fun card featuring stamps from Ink Blot Shop! This card features simple watercolour and heat embossing.


I heat embossed the Stars and Stripes Background onto a piece of watercolour paper in Gold. Using a rainbow selection of Ranger Distress Oxide Inks, I quickly coloured in each stripe.


I found a piece of patterned vellum in my stash and decided to gold heat emboss the "HI" from the Giant Solid Greetings Stamp Set. 


I used a simple heart die to cut out the sentiment. I decided to use one of the leftover strips from the focal panel. I used a teeny-tiny heart die and cut out a few different colours. I added these as small embellishments.


I foam mounted the rainbow panel onto an A2 card base, foam mounted the vellum sentiment and used liquid glue on the tiny, embellishment hearts.

And the card is done!


And I still have the pretty little rainbow strip left over!

Thanks for dropping by! Have a great day!

Laurie


Monday, September 12, 2022

Simon Says Stamp Monday Challenge....Diecutting!!

 Well, hello there!! I'm really not sure how many subscribers I have left here and that's understandable and okay.  I've been so very absent here. I apologize and will try harder.  I don't have any other excuse except I'm super lazy.  I actually love sitting down and writing blog posts but when you don't actually HAVE to do it (ie. design teams), it just seems easy to ignore/forget about it! Anyway.....

I'm entering the current Simon Says Stamp Monday Challenge which is all about die cutting!! If you know me or follow me on Instagram, you'll know that die cutting is my all time favourite thing to do so I just had to enter this one!

I love making cards but I've discovered that I can take all the same supplies and techniques and turn paper into home decor pieces! I actually have a bunch of framed "paper pieces" throughout my craft room!


I've used the Lovely Envelope Die Set from Altenew to create this floral filled envelope. I used water colour paper and used Distress Oxide Inks along with the "smooshing" technique. For the sentiment, I used the You Matter Die from Simon.

Once all the pieces were put together, I adhered everything onto a 5X7 piece of ivory cardstock embossed with the Geo Screen Embossing Folder from Spellbinders.


This is just an inexpensive frame. The panel is quite dimensional so I had to really push it in there but it worked!!

I love the way it looked and it is on my wall now!  

I do apologize for the photos. It was a little late and I was having a bit of trouble not catching the glare of the photo frame.

Thanks so much for dropping by. I hope you found a little inspiration :)

Laurie


Wednesday, March 2, 2022

Monochromatic Card ft. Ink Blot Shop

Good day!! I hope everyone is fairing well these days!!  I don't know about you but my mental health is taking a beating these days. While all I want to do is ignore the goings on and live in a tiny bubble, I know that isn't possible. Thank goodness for my craft space is all I can say!

Todays project may reflect slightly on my mood.


I decided I wanted to try to create a shadowy and slightly dark scene using my Cool Grey Copics. This stamp comes from the Landscape Border Stamp Set from The Ink Blot Shop.  I used C9 all the way to C1.

Now while I wanted a "darker" scene, I also wanted to add some brightness to show hope and happiness! I took a couple of the single, flower images from the Botanical Border Set and coloured 2 in grey and 1 in bright yellow (Y17, Y15, Y13). The tiny, yellow flower made me so happy, I decided to add a little yellow heart as part of the sentiment!

The sentiment comes from a mini set called Spaced Out Greetings. I love the fact that it is so spaced out because you can easily cut each word apart and place where desired!


I trimmed around the tree, border stamp and foam mounted it to a white card base. I also foam mounted the sentiment. To make the yellow bit pop a wee bit more, I added some sparkle pen and Nuvo Crystal Glaze.

When I started this card, I thought maybe it would be a little too sad but in the end, I think it is quite happy! Thanks to that hopeful, yellow flower!

Thanks for stopping by!  Take care!

Laurie


Wednesday, February 23, 2022

Release Day at Ink Blot Shop!!


Hey, friends!  Today is a day filled with cuteness over at the Ink Blot Shop!! This months release is not only super adorable but super versatile!

Here's just one of many projects I made with this release!

I combined two of the new sets to create this pocket tag. That adorable girl is from the Little Sweeties Stamp Set (I LOVE this set!!) and it's paired up with the new Little Notes Set. What is so incredible about Ink Blot Shop stamps is that they work so well together!!


I think this little tag would be great for a teacher gift or even as a bit of encouragement for a student!

I hope you get a chance to check out all the wonderful new products and are able to pick up something special for yourself!

Thanks so much for dropping by!

Laurie


Friday, February 18, 2022

Ink Blot Shop - Spotlight Technique!

 Hello, friends! It's been awhile, right?! I hope all is well wherever you might be! I've been ignoring my blog for so long but am going to try my best to start posting more!!

I recently had the honour of making the Ink Blot Shop design team! I'm very excited because Tifany, the owner, has some of the sweetest and UNIQUE stamps and stencils out there!! So, I thought we'd kick things off with one of my fave techniques...the spotlight technique!


This, to me, always packs a punch! And in this example, it's so easy.  I started by making a 4X4 inch card base. The layer on top was cut to 3.75X3.75. I stamped this cute floral image from the Botanical Border Stamp Set across the bottom of the layer. 

I took a couple of heart dies and cut out three different spots of the image. All I had to do was colour in the heart themselves. I used alcohol markers to do this.


I glued down the stamped panel to the card base. You could inlay the coloured pieces with a flat adhesive but I chose to pop them up. I took the same heart dies to cut out some craft foam. I adhered the foam hearts in place on the card, then glued the coloured portions on top. This extra step really makes a statement!


The sentiment comes from the same set. Now, because I just couldn't resist, I added a generous helping of Nuvo Crystal Glaze to each heart. That shine is everything!!

I hope you enjoyed this simple spotlight technique! Thanks for stopping by and hope to see you back here soon!!

Laurie


Featured Post

Patterned Paper and Coloured Cardstock

Hey friends and welcome! I wanted to share a fun shaped card with you using dies from Pretty Pink Posh and Scrapbook.com ! I've been a l...