Friday, December 21, 2018

My Creative Time 86th Edition Release Blog Hop & Sale!!

Welcome back my crafty friends!! It's time to celebrate this fabulous little release from My Creative Time!!


Over the past couple of days, we've given you a peek at some florals and some word dies!!  For my card today, I've combined both!! As well as an awesome technique!!


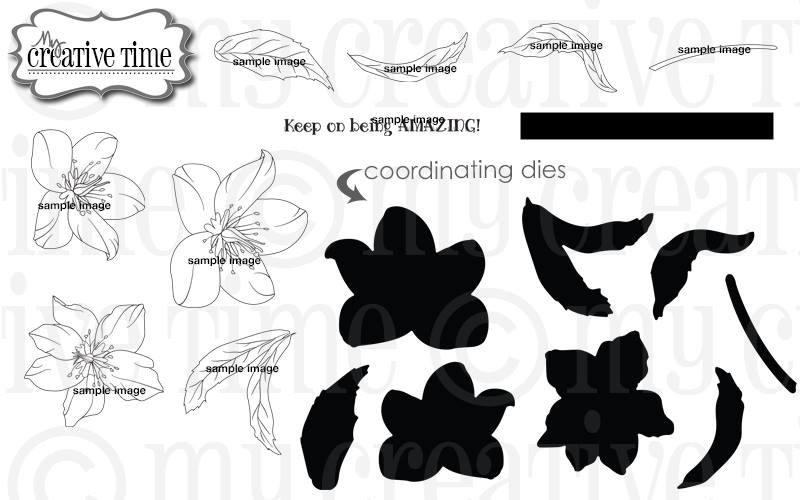
I started with a piece of plain, white cardstock and white heat embossed a couple of the floral and leaf images from the new "Amazing" stamp set. I heavily applied Dusty Concord, Seedless Preserves and Chipped Sapphire Distress Oxide Inks over the top.  I then took a water brush filled with water and "painted" the inside of each flower and leaf.  This lifts some of the colour and gives it a bleached look!


I decided to add a few water splatters for a bit more interest as well as a healthy dose of shimmer pen!!  I used the "miss" and the "you" dies from the You Dies Set 2 for my sentiment.


I die cut each word 3 times and layered them together for dimension. I love that font so much!!  I mounted the panel onto a white card base and before calling it done, I added some teeny tiny hearts.  These hearts are the positive pieces from the More Scalloped Heart Dies and are the perfect size for this card!!


And that's my project for today!!  Up next is the super talented Miss Ruthie!! You can find the entire lineup here.


***FREEBIE***
Starting today... Friday, December 21, 2018 at 8am PST we will be giving away this ADORABLE new "You Dies #1". This new die set will be given to the FIRST 25 shoppers! If you are one of the 1st 25 shoppers it will automatically be added to your package at the time of packing/shipping. Once 25 shoppers come through, this stamp set will be available for purchase! So, if it's available in the store, you are not one of the 25. No exceptions will be made. This freebie is not part of the "Bundle" and will be sold separately!
***BLOG HOP GIVEAWAY***
For our blog hop giveaway, Emma is giving away a $25 gift card to the "My Creative Time" store to ONE LUCKY winner! ALL you have to do is leave a comment on each of our blogs! You are NOT required to comment on EVERY SINGLE blog, but the more you comment on, the MORE chances you have for winning! VERY IMPORTANT, PLEASE leave a way for us to contact you w/your comment just in case "YOU" are the lucky winner!
***SALE ALERT***
ALSO, DON'T FORGET our sale starts RIGHT NOW here:http://shop.my-creative-time.com/Ne...! Use the code: DEC2018 to receive a 15% discount off your entire purchase! This sale applies to "IN-STOCK" items ONLY. This sale will end on Friday, December 28th, 2018 @midnight PST.
Thank you for hopping along with us today!! See you soon!
Laurie


Thursday, December 20, 2018

CAS-ual Fridays Challenge #215

Hello and welcome back to another Challenge for CAS-ual Fridays Stamps!! Unfortunately, this will be the last challenge for the blog.  While this makes me sad, I'm very grateful for the opportunity to be on this team as I was incredibly inspired and blown away by all the amazing talent I seen!  Thank you all who participated!

We're featuring a fun technique this time around...Embossing with Dies!!


I love all things related to dies and die cutting so this was a real fun challenge!!  I used the set of dies called Flurry for my project today!

To emboss with your dies, it is crucial that you have a rubber embossing mat. This is what prevents the die from actually cutting the paper.  It provides a durable, yet forgiving surface for the die to press into.


I used Mixed Media paper for this as I find that thicker cardstock yields better results.  After die cutting a panel with a stitched rectangle die, I placed the 3 snowflake dies that are included in this set face down (just as if you were going to cut them!).  I use a Sizzix Big Shot so I opened the first tab (as if I was going to use an embossing folder), placed one cutting pad, the rubber embossing mat, the cardstock with die and another cutting plate on top.  I ran it through twice, but once would have been enough!


The snowflakes are now impressed into the cardstock which made it easy to do some loose watercolouring!!  

I heat embossed a couple of snowflakes and a sentiment from the Snowy Saying Stamp set in silver and foam mounted the embossed panel onto a white card base.  I thought a few clear sequins would look pretty and add a bit of sparkle!


I hope you're able to give this technique a try and I can't wait to see what you make!  Remember this is our LAST CHALLENGE so let's go out with a bang!!

Here's what you're playing for...

(Link your creations up on the CAS-ual Fridays Challenge Blog!)


My Creative Time 86th Edition Release Sneak Peek Day Two!!

Are you ready for a look at what is going to become my favourite die set for the upcoming months?!  You are going to love today's sneak peek for the 86th Edition Release for My Creative Time!!


Technically, there are two new die sets being shown today. I'm showing you the "You Word Dies Set 2".  I am in love with the script of these dies.  This is a thin, delicate font but not so thin that it's hard to die cut or even stack!  It's perfect, actually!

I die cut a bunch of the "love" and "you" dies out of plain, white cardstock. After fiddling with them for a few minutes, I decided on this simple layout.


I didn't take much time or care to line things up perfectly, I basically eyeballed it.  I die cut two more of each word and used my alcohol markers to add some colour.  I stacked them on top of the centre "love you" for lots of dimension!


I die cut quite a few hearts which are from the Have A Super Day Stamp and Die Set and used the same colours of markers to colour them.  I adhered them randomly around the card front.


A bit of shimmer pen and Glossy Accents on all the coloured bits finish this card!!

***Sneak Peek giveaway!***
We will be giving away the sets we are showcasing each day to ONE lucky winner! For example, the set we are showcasing on Wednesday, Emma will announce the winner of that on Thursday & the sets we are showcasing on Thursday, Emma will announce that winner on Friday on her blog! ALL you have to do is leave a comment on each of our blogs! You are NOT required to comment on EVERY SINGLE blog, but the more you comment on, the more chances you have for winning! VERY IMPORTANT, PLEASE leave a way for us to contact you w/your comment just in case "YOU" are the lucky winner! For EXTRA entries, you can spread the word about this release on Facebook, tweet about it OR even instagram it! #mycreativetime! GOOD LUCK EVERYONE & let's start spreading the word!;)
Thanks for stopping in today!! See you tomorrow for the release BLOG HOP!!
Laurie


Wednesday, December 19, 2018

My Creative Time 86th Edition Sneak Peek Day One!!

Hello, my friends and welcome to the first day of sneak peeks for the 86th Edition release for My Creative Time!! This is a tiny release but it is SO beautiful!!


We are showing you a little look at the new "Amazing" Stamp and Die Set. This is a lovely floral image set that will be the perfect addition to your MCT stash!


This card came together so quickly!!  I stamped the large flower and leaves with Versamark Onyx Black Ink onto some watercolour paper.  I did mask the flower before stamping the leaves!  To keep things simple, I decided to do a wash of colour on the outside of the image. This really makes that flower pop!!  


I was going to leave it completely white inside the lines but in the end, I added a VERY light wash but took no time to shade or blend!!  To jazz it up a bit, I added a ton of clear sparkle pen!

The sentiment is from the stamp set as well and was also stamped in the Versafine ink.  I die cut the panel using the largest rectangle from the Scalloped Stitched Rectangular Dies and added a bit of black and white bakers twine.

The card base was made using the largest scalloped rectangle die from the same set. Because this is quite a flat card front, I used foam adhesive to adhere it to the card base.


And a few sparkling, clear sequins finish this quick and easy card!!


***Sneak Peek giveaway!***
We will be giving away the sets we are showcasing each day to ONE lucky winner! For example, the set we are showcasing on Wednesday, Emma will announce the winner of that on Thursday & the sets we are showcasing on Thursday, Emma will announce that winner on Friday on my blog! ALL you have to do is leave a comment on each of our blogs! You are NOT required to comment on EVERY SINGLE blog, but the more you comment on, the more chances you have for winning! VERY IMPORTANT, PLEASE leave a way for us to contact you w/your comment just in case "YOU" are the lucky winner! For EXTRA entries, you can spread the word about this release on Facebook, tweet about it OR even instagram it! #mycreativetime! GOOD LUCK EVERYONE & let's start spreading the word!;)
Before I go, I want to mention that there are several new Overstock and Retired items on sale!! It's totally worth a look!!
Laurie


Friday, December 14, 2018

All That Sparkles Blog Hop (Scrap N' Stamp Canada)

Hello friends and welcome to the All That Sparkles Blog Hop for Scrap N' Stamp Canada!!  It's all about glitter, shine and sparkle...some of my favourite things!!


I recently ordered some loose glitter from the shop and tried something new (to me, anyway).  I have a love/hate relationship with loose glitter. Love the sparkle, hate the mess.  To remedy the mess, I decided to use embossing paste to keep the glitter in check.

For my first "glitter mix", I used a white embossing paste and the Olive Green glitter from the Nuvo Pure Sheen Glitter in the Jingle Bells Mix. I have to say that this glitter is super fine and beautiful!


I added a bit more glitter than in the photo above to create this consistency...


For the next mixture, I used a Translucent Texture Paste and the Silver Glitter from the Nuvo Pure Sheen Glitter Let It Snow Glitter Pack.


I used the Pines Stencil from Tim Holtz and applied my glitter embossing paste to white cardstock that was die cut with the second largest die from the Fancy Scalloped Rectangles Dies from Lawn Fawn.


Look at that shine and dimension!!  I prefer using the translucent paste. It might be because I didn't add enough green glitter to the white paste, I could see white showing through.  None the less, still very pretty!!

I did make a third mix using the Translucent Texture Paste and a combination of white and silver glitter, both from the Let It Snow Glitter Pack.  I used the Snow Flurry Stencil for this mix.


All that was left to do was put these panels on cards and add sentiments.  For the green embossed trees, I used an ivory card base that was cut to 5 X 3.5 inches.  I used a sentiment from the SnowGlobe Sentiments stamp from MFT and used a banner die to cut it out.


I wanted to keep these cards fairly simple and let the glitter be the star of the show.  

My next card uses the snowfall background panel and a couple of tree dies from the Fresh Pine Tree  Trio Die from Memory Box. This is where things got a little messy.  I die cut the trees out of white cardstock which was covered on one side with Stick-It Adhesive.  After exposing the adhesive, I poured silver glitter on one tree, and green on the other.  But, I found that even after burnishing in the glitter, it still wanted to come off.


Because there is nothing more annoying then glitter falling off a card, I decided to add a layer of clear embossing powder over top.  This sealed the glitter perfectly and also added another level of shine! I used the same Snowglobe Sentiment set and banner die to finish this card!

My final card, and probably my favourite is this one..


I love the translucent paste with the silver glitter. It definitely has the most shine!  For the sentiment I used the Be Merry die from the Tis the Season Dies from Penny Black.  I used cardstock with the Stick-It Adhesive again, but instead of clear embossing, I used the Nuvo Crystal Glaze over top. This worked beautifully to keep the glitter contained and added some awesome, shiny dimension.

Here's a look at all three projects.,


In real life, they all shine beautifully!!


I hope I gave you some inspiration on how to use loose glitter.  Even though I had glitter almost everywhere, I had so much fun making these cards:)

Now, onto the fun stuff!!  Scrap N' Stamp Canada is giving away FIVE Sparkly Surprise Packages and ONE $25 gift certificate to the shop. All you have to do is leave a comment on each stop of the hop for a chance to win.  But wait!! There's more!  Have you joined the SNS Challenge Group??  If you post a creation you've made with this months theme, you have the chance of winning a $50 gift certificate to the shop!!

Thank you so much for hopping along with us today!! Thanks for all your lovely comments and good luck!!

Here's the full Blog Hop Lineup:

Jessica
Nancy
Amy
Kia
Laurie (you are here)


Before you go, here's another special treat!!


Wednesday, December 12, 2018

Whatever Wednesday with My Creative Time

Hello, my friends and welcome back!  Because it's "whatever Wednesday", I thought I would shake things up a bit and share a non-Christmas card!!  Truthfully, as much as I enjoy making Christmas cards (and I do love it), I felt it was time to break out some other stamp sets.  And because the next next big paper craft holiday is Valentine's Day, that's what I went with!!

I began by die cutting the large puzzle pieces from the Stitched Puzzle Pieces Dies out of white cardstock.  I placed the empty puzzle into my Misti and secured it with the magnets.  I took the super cute girl and boy images from the You're A Hit Valentine Stamp and Die set (which is at an amazing price by the way!) and with a little masking, stamped them to look like they are holding one heart.


I used my alcohol markers to colour these cuties in.  I did add temporary adhesive on the back of the die cuts while I coloured. The sentiment and hearts come from the The Last Piece of our Family Stamp Set.


I played around with the idea of placing the puzzle on a card, but decided it would be better to place the pieces inside a box.  So, of course, I just had to use the Gift Card Gift Box Die!  To decorate the outside of the box, I used the More Scalloped Hearts Dies as well as the "Be Mine" dies from the You Make My Heart Smile Stamp and Die Set.


The tiny puzzle fits perfectly and would make a super fun and interactive Valentine to give!!


This was one of those projects that was a joy to make!!  I hope you like it!!

Thanks so much for dropping by today, I appreciate your visits!!

Until next time...

Laurie


Thursday, December 6, 2018

CAS-ual Fridays Challenge #214

Welcome back to another awesome challenge for CAS-ual Fridays Stamps!!  This week brings holiday inspiration with this photo...


I knew immediately that I wanted to try to recreate this gorgeous Christmas ornament.  However, instead of an ornament, I made a snow globe!  CAS-ual Fridays has an awesome die set called Ornament Tag Fri-Dies. It's perfect to create a little scene like this or make a shaker card!  

I started by white heat embossing a bunch of snowflakes onto the large circle die from the set and did a bit of emboss resist with a light blue ink.


For the trees I used the Casual Trees Fri Dies and inked them up with shades of green Distress Ink. To create the base of my globe, I used the Bubble Box Fri-Dies, with a couple snips here and there. It created the perfect rounded corners.


The fact that the sentiment fit perfectly on the base was a total fluke and made me so happy!  I repeatedly stamped the snowflake border stamp from the Snowy Sayings Stamp Set  in a light blue ink onto a white card base and foam mounted my snow globe.


I added some glitter pen to the trees and a few clear sequins inside the globe to give almost a faux shaker-card look!

And that's my project for this challenge! I cannot wait to see what you create!

Thanks so much for stopping by!  Here's what you're playing for:

Remember to visit the CAS-ual Friday Challenge Blog for all the details and to link up your project!!


Laurie


Monday, December 3, 2018

Manly Monday with My Creative Time!!

Hello and welcome to "Manly Monday". Today I'm showing you a masculine card made using products from My Creative Time!  This card involves mostly die cutting which I love.

I've been really enjoying making smaller sized cards lately. This particular one measures 5 X 3.5 inches.


As you can see this is very clean and simple. Not a lot of fanciness that I'd normally put into a card :) I started by die cutting the male super hero die from the Have A Super Day Stamp and Die Set out of black cardstock. I decided a bright blue would go well for this masculine design.  The die cut stars are also out of this set.

I foam mounted my superhero with foam adhesive onto a white panel that was cut using one of the rounded rectangle dies from the Scalloped Stitched Rectangular Dies.  To add just a bit more pop of blue, I partially cut one of the larger scalloped dies from this set and layered the two together.


I stamped the simple sentiment on the inside of the card. 


And a simple handrawn border finishes this card.  I really think this is a striking card, perfect for a young boy, teenager or even grown up!

Thanks for stopping by today!!  I'll be back soon!

Laurie


Featured Post

Patterned Paper and Coloured Cardstock

Hey friends and welcome! I wanted to share a fun shaped card with you using dies from Pretty Pink Posh and Scrapbook.com ! I've been a l...