Sunday, July 24, 2016

Coloring on Adhesive Fabric

Hello everyone!!  In the spirit of the 30 Day Coloring Challenge hosted by the uber fabulous Kathy Rac from The Daily Marker,  I thought I would share my latest colouring project!!

I had this 6x6 Adhesive Fabric Paper pad for sometime now and was never quite sure how to use it.  Today, I decided to experiment a bit.


I chose a stamp set from The Ton Stamps called Happiest of Peonies.  It's a beautiful image.  I used my MISTI for the stamping because of the texture of the fabric.  I used Ranger Jet Black Archival Ink because I wasn't sure what medium I was going to use or rather, what medium was going to work!


I used a small corner to test a few mediums out..

The red mark is an alcohol marker (quite a bit of bleeding), the light green is a watercolour pencil with water (again, some bleeding) and the dark green is 3 different shades of green watercolour pencil blended with water.  Of course, I knew there was going to be some bleeding, it is fabric after all!!  I decided not to use water at all, just pencils.  I stuck with the watercolour pencils because I already had them out!


First of all, pencils blend fabulously on this!! No multiple layers needed.  I used medium to hard pressure with one layer.  As you turn the image to color, you get different textures as the fibres of the material start to pull, it is so cool!!


I chose purple as my other color.


To make the image pop a little bit, I added a grey outline, then used the white pencil to blend it out...which worked amazingly!!

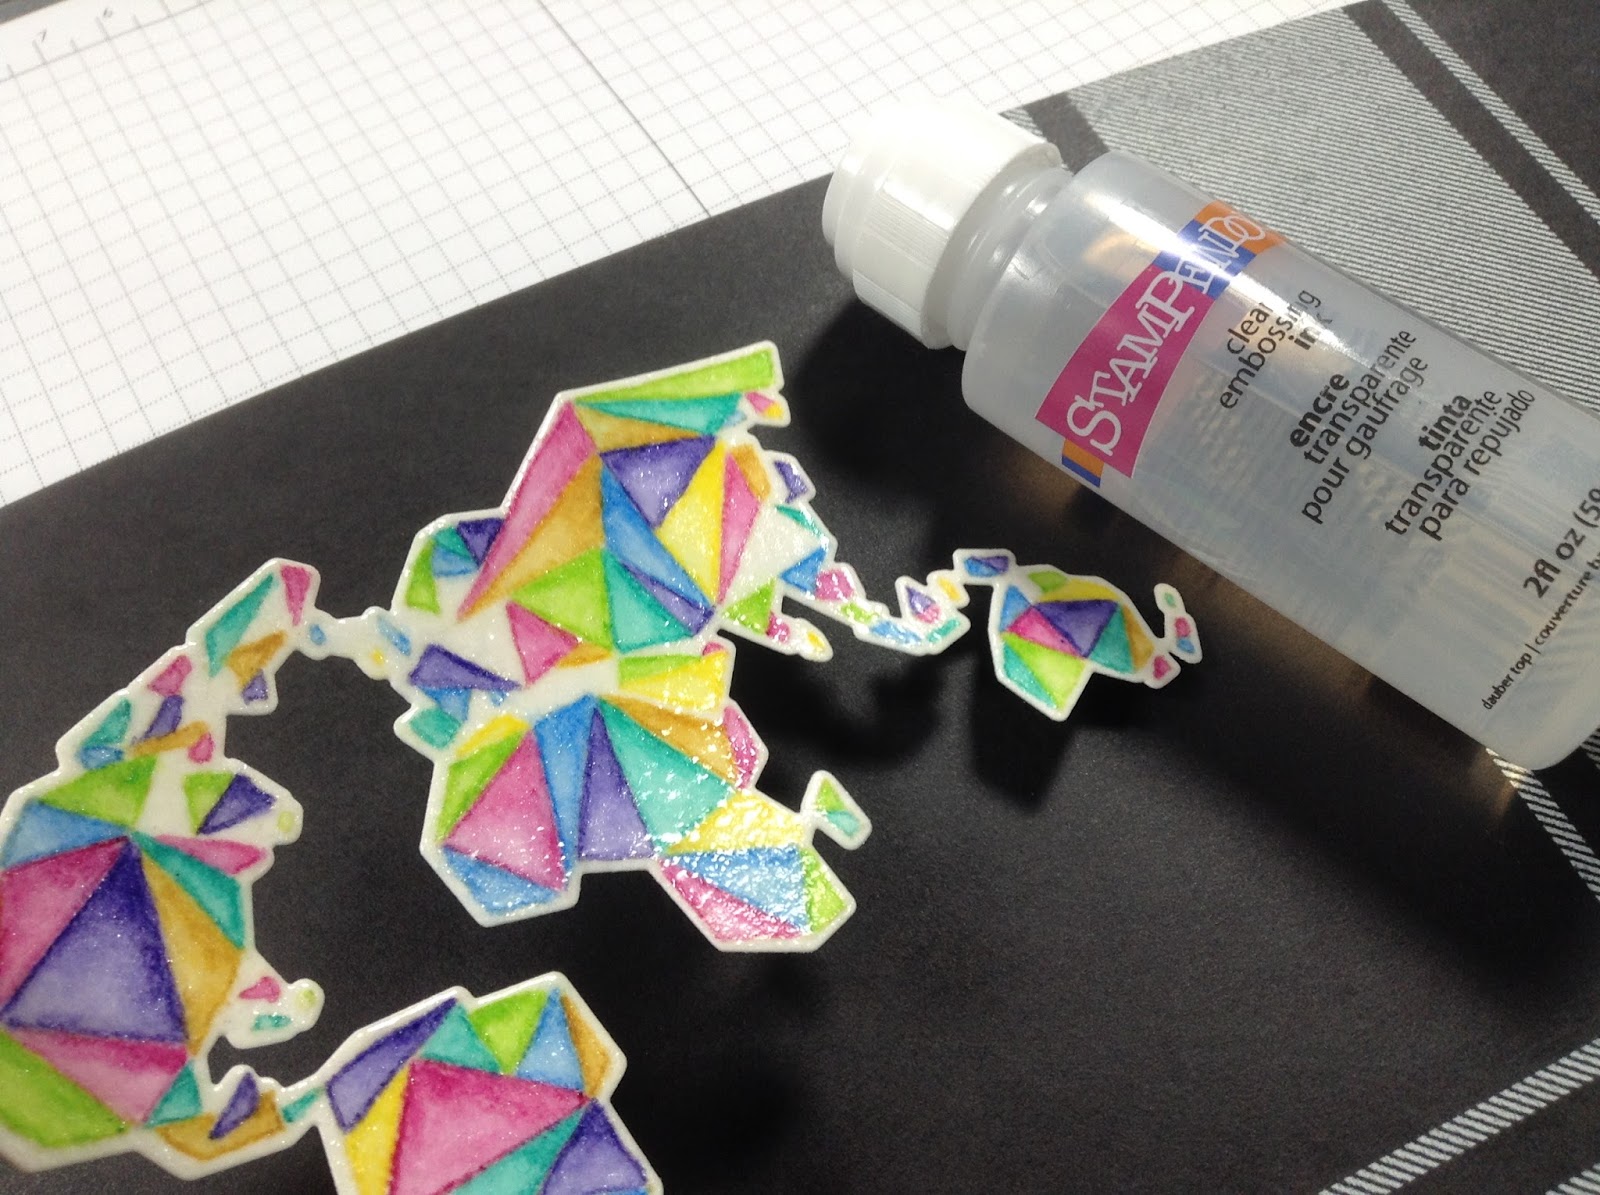
Now here is where things went awry :)  It all started when I die cut the image.


As you can see, it did not cut all the way through, with two passes.  This was really not a big deal to me.  I just used a craft knife to cut away any spots that were not completely cut.  I had already die cut a panel for me to place this image on, so I removed the release paper and...Wow, is this stuff thin!!  Which why am I surprised, it's FABRIC!!  So my advice to you, is if this is for a card, do not remove the adhesive backing!!

Oh, how I tried to adhere this toilet paper thin piece of material straight, it just did not work, at all.  So,  I die cut a frame to fit over my image and decided to adhere that on top. Well, as I had already removed the release paper, my fabric was wanting to stick to everything. Now add a layer of liquid glue to the front and I had one sticky mess. But I persevered. And thankfully so.


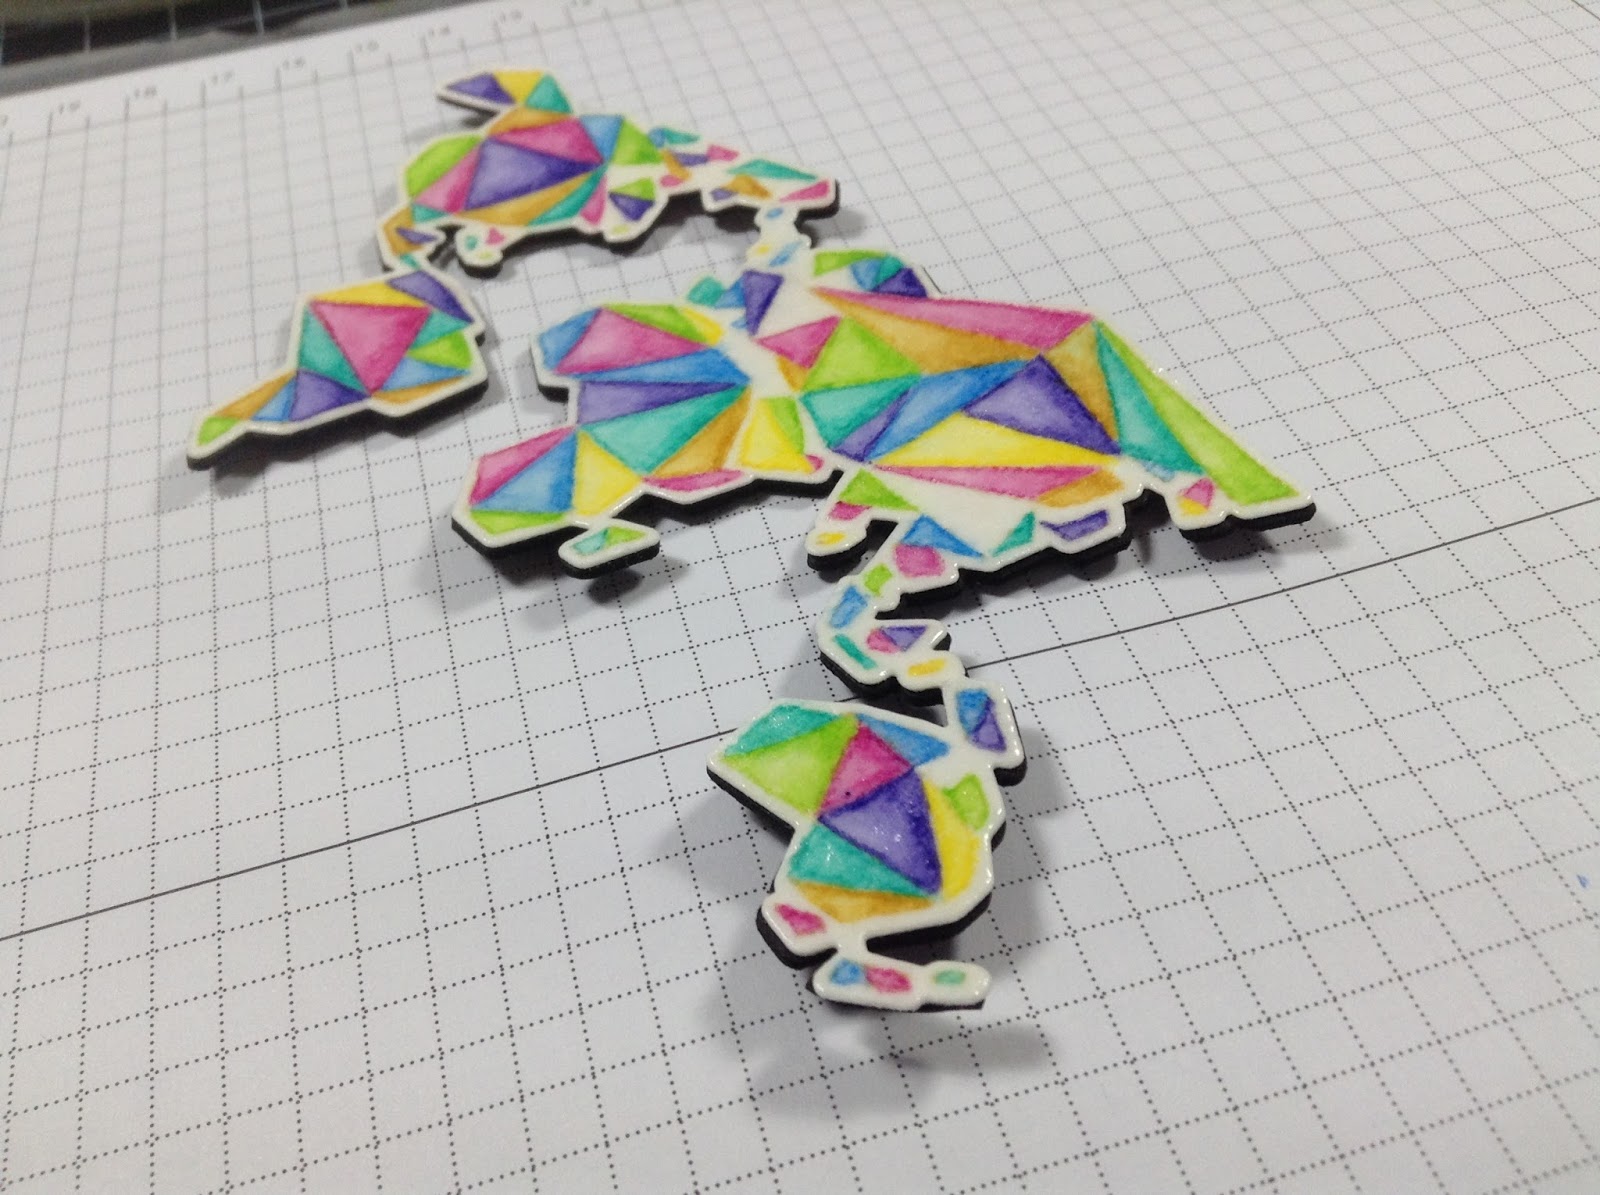
I love the way this coloring looks on this fabric.  It really is quite artsy-looking. Also very vintage looking.
I do want to try this with both alcohol markers and watercolour, but I'm guessing I won't get these kind of results on the first try:)


Thank you for stopping by and reading my extra long story today!  I truly appreciate it!

Laurie


Saturday, July 16, 2016

Waffle Flower-A Bunch

Hello everyone and welcome back!!  I'm here today to share a card using Waffle Flower stamps and dies.  I had always had my eye on the A Bunch stamps and dies.  I thought they were super cute but I never seemed to add it to my cart.  But I finally bit the bullet and purchased it.  And am I ever glad I did!!  It's a cute, whimsical set with many possibilities.  I used it in the most basic way today, though. Good 'ol simple stamping and die cutting!!

I started by stamping the outline of the flowers in Tuxedo Black Memento ink. I used my mini Misti for this as it was the first time I used this set and thought that a double stamp might be needed.  I was wrong!!  It stamped perfectly the first time.

 Now the solid images for the leaves and flowers is actually all one piece.  But the images are spaced far enough apart that you can ink with mini ink cubes (masking might be necessary with full size ink pads).  I used inks from Plus9 and Simon Says Stamp. Again, no double stamping needed!!!


 (the flower centres are separate stamps)

I die cut the flowers with the co-ordinating die. Now this is an interested die.  It's all one piece but it die cuts the flowers separately!  There are also separate flower dies if you want to layer over the main stamped image...it is a very unique set!!

I then die cut the Doily Circle Die out of a light grey cardstock.  I used the Sizzix Precision Baseplate for this and ran it through my Big Shot a couple of times.  It is a very detailed die.  It cut well using this sandwich.  I adhered a section of the doily on one corner of the card and trimmed off the excess.  Then used another portion for the opposite corner.  I used Multi Medium in Matte.


I stamped the sentiment also with Memento Black ink on white cardstock and trimmed it out.  I adhered the flowers with a mixture of liquid glue and foam adhesive.


And finally, a few sparkling clear sequins and some Glossy Accents finish this card!!  


Here are the Waffle Products I used:


Thank you so, so much for stopping by!! 

Laurie


Saturday, July 9, 2016

Paper Smooches July Challenge

Hello everyone and welcome back!!  I've made a card for one of my favourite stamp company challenges...Paper Smooches!!!  This month's challenge is SUMMER.


My original idea consisted of a bright, striped die cut background and an Ice Cream Cone die.  I actually made the background panel and coloured the ice cream cone. Those will be another project because the gears totally changed!!  This is a challenge, right??  And although a striped background and ice cream cone SCREAM summer, I wanted to think outside of the box.  So I picked out a couple of summer themed stamp sets and one Christmas one.  Can you see where I'm going with this??

Here's a peek of the images all coloured in:


Yes. A tropical card with a snowman and a bird wearing a santa hat!!  And a sentiment that ties everything together :)

Here is my finished project. I hope you like it because I had a ton of fun creating it!!


Thank you for stopping by!!

Laurie

Here are all the supplies I used:


Sunday, June 19, 2016

Rainbow World!

Hello everyone!! I'm finally back with a post!  Today I used one of my favourite stamp sets of ALL TIME...Origami Map from Neat and Tangled.  This is such a unique stamp set and I had one particular idea in mind.  No line watercolour with my Derwent Inktense Pencils.  It is such a shame, but I haven't used them in awhile :(

I first stamped the image in Antique Linen Distress Ink onto some Strathmore Watercolor Paper.  I chose the following colours:  Mustard, Violet, Sun Yellow, Iris Blue, Apple Green, Fuchsia and Teal Green.


Behind the pencils, is the coloured and die cut image..sorry I didn't get an "in progress" shot!  I was in the colouring zone and totally forgot.

Here is a closer view:


I ended up spritzing the map with a mixture of water and Perfect Pearls to give it some shimmer.  It looked ok but didn't really "wow" me.  So I remembered a technique that Yana Smakula showed on her blog.  It was using embossing ink and clear embossing powder over your entire image to make it POP.  And it worked!!


It's hard to see in the photo, but it is super shiny and has locked all the shimmer underneath!

I used the die cut on a piece of black fun foam and adhered the image on top with Tombow Mono Multi Glue. 

 I cut a panel using a stitched frame die from My Favourite Things in the same color as my card base and a scalloped oval die (also, MFT) out of a piece of grey cardstock (Stampin'Up).  
I cut one of the sentiments from the set and manipulated them to arc around the oval..my Mini Misty worked great for this!!


And here is the final result...


I wish I could capture the sparkle and shine on camera, but take my word for it, it's there!!

Thank you so much for stopping by today and I hope you enjoyed!

Hugs!

Laurie


Friday, June 10, 2016

Craftin Desert Divas JUNE RELEASE!!!

Welcome to the CDD June Product Release Blog Hop. 
All stamps are in the CDD Shop and now available for purchase HERE.


We also offer SVG stamp outlines for .99 they work perfectly with your cutting machine. You must have a program that opens these files. This is a great alternative to coordinating dies and much less expensive. 


New $1.00 sequins....


Here's what I've created for you...

I used the Island Paradise stamp set along with the Crazy Stitched Frames for my first card.  I coloured quite a few images from the stamp set and fussy cut them out.  I just love that mask!!  To fill out the flowers, I actually used a couple of the larger hibiscus and leaf images from the Flowers in Bloom stamp set.


I die cut a white panel using the Crazy Stitched Frames (which are awesome!!!) and adhered all my elements to the centre and stamped "Aloha".


To say I love the Crazy Stitched Frames is an understatement.  Not only does it come with the frames themselves, but all those flower dies as well!!!  I started by laying down different colors of watercolour, then die cutting all the flowers and leaves.  I die cut the word "thanks" from the new Greeting Word dies from the same watercolored paper.  Isn't that font incredible??!  


I adhered everything directly to the base except two of the flowers, in which I used foam adhesive.  I finished it off by added some white gel pen details.


Now because I am totally in love with these Greeting Word dies and the Crazy Stitched Frames, I had to use them for my final project!!  I started by using the largest frame die to cut a panel of black cardstock.  I paired these new products with some older ones!!  


I used the Farmers Market stamp set for the radishes.  Those cute little faces are included in the set:)
I die cut four "totally" words and stacked them together and adhered them to the black panel.  I heat embossed the "you're rad" in white and foam mounted my radishes.  To finish it off, I added a few white enamel dots!!


I hope you enjoyed my projects for this release!!  And I hope you get a chance to shop!!!

This will, unfortunately, be my last release for Craftin Desert Divas.  This has been such an amazing experience for me,  I've enjoyed every minute!  I want to thank Tara and the entire team of Divas for all the support and friendship!!  Love you guys!!


Here are the specials for this release:

**New sequins mixes will be on SALE for $1.00.

**FREE SHIPPING with minimum on orders placed.

Shipping minimum orders:

$10 USA use Code: 10SHIP

$15 International use Code: 15SHIP
 

Enjoy this special for in stock items only 6/10 thru 6/15 at 10pm MST
All Stamps and Dies are made in the USA.


Each day from 6/10 thru 6/15 one comment left on the projects 

will be chosen from random.com to receive a $15.00 CDD shop 

credit. So be sure to join us for our 2 day blog hop and then hop 

on over to the CDD Facebook page to join us for our Release 

Inspiration Hop. The CDD DT will feature more projects 

showcasing the new June release.


Your next stop is the super talented:  LEAH!!!


Featured Post

A Simple Thanks Card

Well, well, well. Look who decided to show up...me! It's been an awful long time yet again. I seriously thought I'd be well out of t...