I love creating tutorial style blog posts and I try to do them often. I actually do have a You Tube channel but I'm very bad at it! If you're so inclined, you can check it out HERE :)
I decided to create my own cover plate style card front using small dies. This is a fun and easy technique although a bit time consuming. Now, I say time consuming because I did run into a slight problem that haunted me through the entire process, which I'll share with you a bit later!
I wanted to get a fairly symmetrical look to the die cutting so I started by dividing my 4.25 X 5.5 inch piece of cardstock into 4 equal sections.
So, 2 1/8 on the short side and 2.75 on the long side. I chose the Medallion Flower Builder Nice and Neat Dies for the die cutting. These dies are the perfect size and shape to make an entire background.
I lined up the largest die at the corner where the 2 lines intersect. It snuggled it perfectly there! And I made sure the smaller leaf was centred over one of the lines. Now, as I looked at this, I thought to myself "you'll never line this up the same every time". So, I sat there until it came to me. Adhere the dies together so they can be moved as one piece!! Great idea. Executed poorly. This is the beginning of the problem that followed me to the end of this card.
I decided to use Press N' Seal. This stuff works great for moving around die cuts, however not so good for actual die cutting. Yes, this stuff held the dies beautifully! It did not tear the cardstock at all. But....every time I ran it through, it left a bit of whatever it is that makes it sticky on the cardstock. I didn't think it was a big deal because it seemed to come off easily with a white eraser, so I kept going. But even as I would erase, it would just reappear later on. TIP: Use a low tack painters tape or 3M Post It Tape for this!!
See what I mean? Even cat hair stuck to it, hahah!! The positive of using the Press N' Seal was that it was transparent so it was easy to place the dies where they needed to go.
All you have to do is turn the cardstock and place the dies in all four corners, making sure to line up the top leaf with the pencil line!
This was the first four cuts. I felt like there were a few places that were too "empty" so I added a couple more dies and this time used 3M Pore Tape to adhere them.
I should mention that I did keep all the positive die cuts. These will make our faux cover die look more intricate!
I trimmed the panel down to 3.5 X 5 inches. At this point, I wasn't super impressed with how this was looking so I set it aside...for a day. When I got back to it today, I knew what I wanted to do. Ink blending with Distress Oxides!! I chose three colours but ended up only using one, my favourite of all time..Crushed Olive!
And of course no ink blended panel would be complete without water splatters!
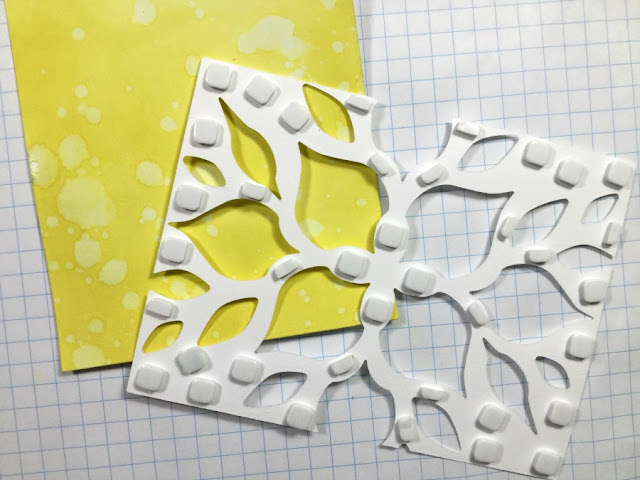
I used regular white cardstock for this, not watercolour paper. Works great but you can't overdo it with the water or your paper will start to disintegrate! I did dry this with my heat tool but was able to give it an extra few minutes because I had yet to do the most tedious part of this whole process...apply foam tape!!
Ugh, I know! But it was well worth the effort!! Once that was adhered to the ink blended panel (which was also cut to the same dimensions of the die cut panel), it was time to adhere some of the positive die cuts back into place.
My preferred adhesive for things like this is Glossy Accents. Not sure why cause it can be messy but you can't beat the hold of this stuff!!
Okay, folks. We're almost there! Time to place a few clear sequins (which kind of evened out the design a bit),
And stamp the sentiment!
I used one of the greeting from the Scandinavian Prints Stamp Set and stamped it onto a die cut banner. The white banner needed a bit of definition from the white die cut panel so I layered it up with a light grey one! This just so happens to be the same grey cardstock I used for the base!
And here (finally) is the finished card...
This really is an easy card to make IF you don't use Press N' Seal. Live and learn, right?!
Thank you so, so much for hanging in there with me for this one! I hope I was able to inspire you to maybe give this a try!! I know I'll be trying this again!
Until next...stay crafty!!
Laurie


Wow, this is ingenious! Love it, I must try this too :D
ReplyDelete