Friday, August 4, 2023

Scrap N Stamp ALTENEW Blog Hop!

 Hey friends, welcome back!  Today we are featuring Altenew products in this months blog hop for Scrap N Stamp Canada!


Scrap N Stamp has recently started to carry the Altenew line of products which is super exciting! There is truly something for everyone!

For my project, I used the GORGEOUS Peony Sunshine 3D embossing folder. I used a thick, kraft cardstock for this and it worked beautifully!


After the embossing, I trimmed the panel down to fit onto an A2, ivory card base leaving a border. To spice things up a bit, I lightly rubbed a white pigment ink pad over the top. This catches the "high" points of the embossed image and brings out the pattern!


For even more added detail, I took some coloured pencils and added some fairly subtle shading. I used a brown pencil to outline it and it seems to pop of the paper even more!

I just so happened to have a small frame in my "use it up" pile and it worked perfectly to frame the kraft panel. Everything was foam mounted onto the base.


The sentiment comes from an older Altenew set called Painted Butterflies. I did add a few gems but they blend maybe a little too well!

Thank you for hopping along with us today! Just leave a comment below for your chance to win a $50 gift certificate to the SNS online store!

Winner will announced on the Scrap N Stamp Blog on August 29/23.

Thanks for leaving some love and good luck!!

You can find the full list of bloggers HERE (SNS Blog)

Until next time....

Laurie


Friday, July 7, 2023

Christmas in July with Scrap N Stamp!!

 Hello and welcome to the Scrap N Stamp Canada "Christmas is July Blog Hop"! You have arrived from the super talented Kia. 


The Christmas in July theme is always fun. It breaks up the spring and summer crafting nicely and lets you dig through your holiday -making stash! 

I mixed and matched three different brands for my project today, something which I love to do.


I used the Christmastime die set from Tim Holtz/Sizzix. This is quite a simple die set yet is just beautiful. I chose to cut everything from white cardstock and use a variety of Distress Inks to add the colour. I then glued all the pieces together to create one solid image.

To easily create the background, I started with a piece of light blue cardstock. I simply inked around it using Broken China, then Chipped Sapphire and finally Black Soot Distress Inks. By starting off with the light blue cardstock, it cuts down on the blending time!  I then mixed a bit of white acrylic paint with water and used a paintbrush to splatter. I made sure to go over the couple and the trees to create continuity.

Now, speaking of the trees! I used the beautiful Layered Narrow Pines die set from Memory Box. This set pairs beautifully with the Christmastime die set.  I did the same technique by using Distress Inks to add colour. I used Rustic Wilderness and Peeled Paint.


I used a stitched rectangle die to trim down the background panel. I used the Stitched Hillside Borders from Lawn Fawn to create the snow bank. 

I foam mounted the "snow" to allow for a couple of the trees to be tucked behind. This meant that the cute couple needed some foam adhesive as well.  This is where I realized I hadn't stamped the sentiment...do you ever do that??

Luckily, it worked out okay! I heat embossed the sentiment in white. The "Warm Winter Wishes" comes from the super sweet Stay Cozy Stamp Set from Aall & Create.

The entire panel was foam mounted onto a top-fold, A2 white card base.  To finish off, I added some white, pearlescent pearls.


And that's my finished card! I hope you like it. It was A LOT of fun to make!

Now, onto the fun stuff...

For a chance to win a $50 gift certificate to the Scrap N Stamp online shop, all you have to do is leave a comment on each stop of the hop! This hop is full of gorgeous, Christmas inspiration so it should be very easy to leave a nice comment!

The winner will be announced on the SNS Blog on July 25, 2023.

Thank you so much for hopping along! Good luck!

Up next is the wonderful Mari...enjoy!

Laurie


Monday, June 26, 2023

Simon Says Stamp Monday Challenge!

 Hello and welcome! I thought I'd join in on a challenge today!! I rarely participate in challenges and I don't know why. They are a great way to get the creative ideas flowing. I also find that I make better use of my supplies. With prompts such as layout, theme or colour combination, it tends to make you look at your stamps, dies and inks with fresh eyes.

This is the Simon Says Stamp Monday Challenge. The theme is "Vacation". Typically, the Monday challenge is a vintage theme. My card is definitely NOT vintage. But that's ok!

I used all older supplies, some of which are no longer available or retired...sorry! But that's the beauty of challenges...you can give your older goodies some more love!

I created a pastel, beach themed card. Everything was cut from white cardstock and then ink blended with Distress Inks. I have tons of coloured cardstock which would make this easier but I love the look of the Distress Inks!


I'm pretty happy with the way this card turned out. It's definitely got a relaxing vibe to it.

Here's a list of the stamps and dies I used. Like I mentioned before, some of these are unavailable but worth a search:)

My Favourite Things:  Beach Scene Builder
                                     Beach Bungalow and Accessories
                                     Cloud Stencil
                                     Sunny Vibes Stamp Set
The scalloped frame is the Fancy Frames from Craftin' Desert Divas (oldie but goodie)

Thanks so much for stopping by!  Have a great week!

Laurie


Friday, May 26, 2023

Let's Celebrate with Jane's Doodles

 Hello and welcome!  Today, I'll share a fun card with you featuring a new digital stamp set from Jane's Doodles!  This one is called Surf's Up. This is another fun, must have set.


I have an inexpensive laser printer. I wish it could handle heavier watercolour paper but sadly, it does not. It does, however, handle a 90lb weight mixed media paper. I used an old Canson spiral bound paper book. 
I'm not sure if it's my printer or the paper, but I find that some of the line work will fade or rub off. Easy fix with a fine liner pen though!


I used watercolour pencils to colour the images, then outlined them the best I could. I just had to add some sparkle and shine with a glitter pen and Nuvo Crystal Glaze.


I hope you enjoyed my card featuring this super cute set!

See you soon!

Laurie

Thursday, May 11, 2023

Jane's Doodles Digis!!

 Hey friends and welcome back! 

You may have heard the Janes from Janes Doodles recently closed her shop and stopped selling her amazing stamps. This was such sad news to hear. But....she has thankfully decided to start selling her designs as digital images!!!

If you're not familiar with Jane's illustrations, I highly recommend you check her out. I've been a fan since I started card making many years ago. She has got a unique, fun and kind of quirky style...which I love!

Now, with all that said, I'm super excited to be a part of her digital design team and help showcase her wonderful designs!


Here is my first project featuring the Road Trip digital stamp! This files is FULL of images! I decided to use the van with everything all in one. But you can set up your scene however you'd like! She has broken down the scene into individual pieces to make creating easy...this is the beauty of digital stamps!


I used coloured pencils and blending solution as my medium. It's literally been years since I've coloured this way and I absolutely love how it turned out.  

This image can be sized however large you want. In this case, it fits my A2 card perfectly. I added a touch of stencilling to give a bit of interest. I also found some very interesting cardstock in my stash. It's an off-white shade with little flecks in it.  I think I got this from WPlus9 a LONG time ago.  


I really hope you will check out Jane's shop! 

Thanks for stopping by...see you soon!

Laurie


Sunday, April 16, 2023

You're So Tweet ft. Ink Blot Shop

 Good morning and happy Monday!! I just wanted to stop in and share a cute card made using stamps from the Ink Blot Shop!

We're preparing for another blast of winter this week here in Manitoba. I'm praying it passes us by. It is however, a lovely day today so I put together a very Springy card.


I decided to stamp an entire background to mimic a piece of patterned paper. I used the adorable Tweet Talk 6X8 stamp set. My ink of choice of Versafine Claire along with clear embossing powder. The heart and dots are from the same set and the tiny flowers come from the Botanical Borders 6X6 set.


I used Bristol Smooth paper along with an inexpensive watercolour palette I got off Amazon. I'm in a watercolour phase right now mostly because my Copics need refills! But I love the "messy" sort of look I got here :)


The sentiments all come from the Tweet Talk set. I used a simple oval die to cut out the sentiment. Finishing touches include some white paint pen dots (I have much better luck with a paint pen than a gel pen) and some Nuvo Crystal Glaze!

I adhered the finished panel onto a top-fold, ivory card base and called it done!!

Thanks for stopping by!  Have a great day!

Laurie


Sunday, March 12, 2023

Simon Says Stamp - Wednesday Challenge

 Hello friends! Today I decided to enter a challenge! I find that challenges are a great way to not only fire up the crafty mojo but to also give you an opportunity to dust off some products that you may not have used in awhile!

I decided to enter the current Wednesday Challenge over on the Simon Says Stamp Blog. It combines two of my favourite things:  Tim Holtz and tags!!

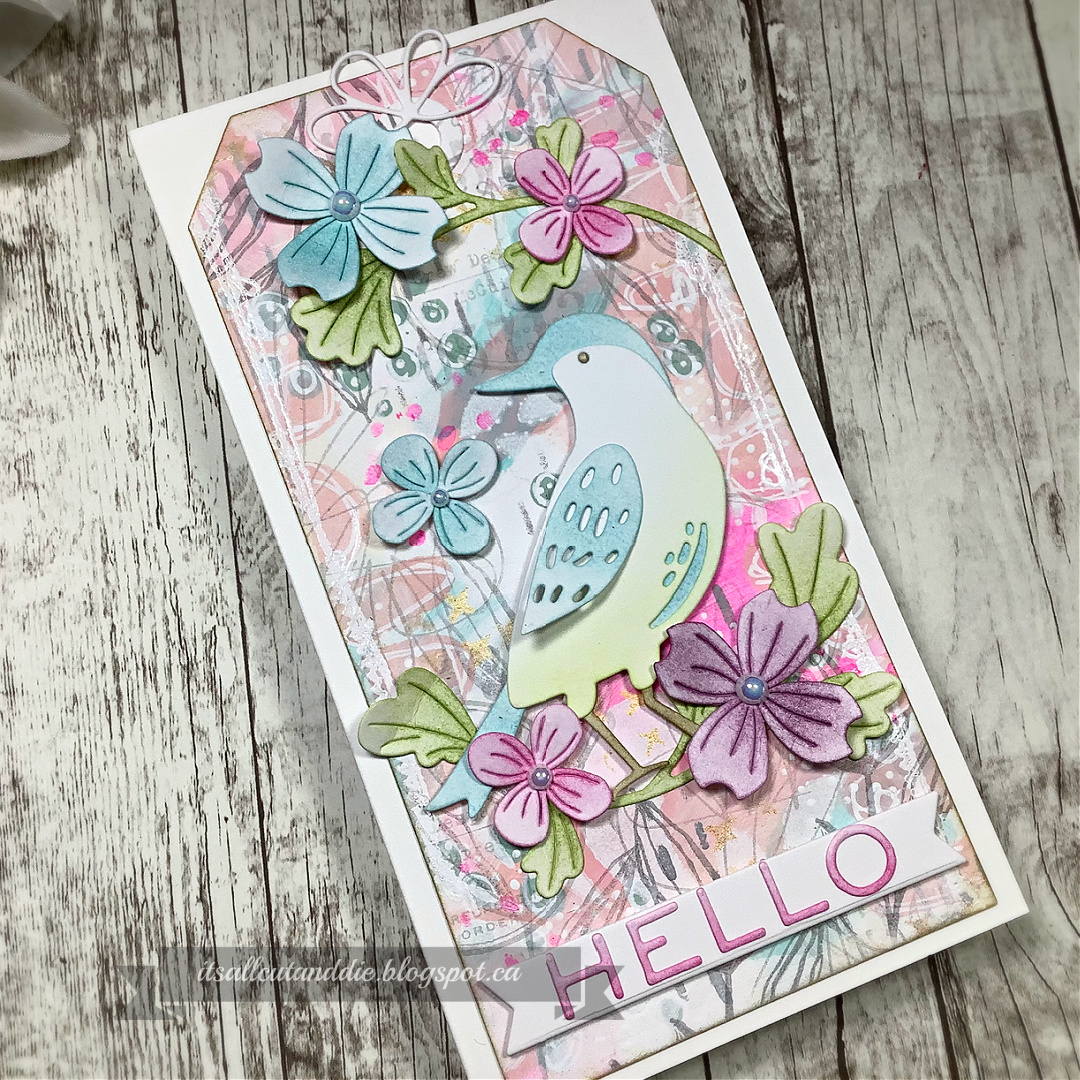
I used the largest of the Tim Holtz Framelits Tags. To create the background, I used a variety of acrylic paints and my fingers to apply. This is my favourite way to get a fun background. I then used a whole bunch of stencils to create layers and patterns.


Next, I dug through my stash and found the Arched Leaf and Flower Blooms die set from Simon. To go along with these flowers and leaves, I used the TH Feathered Friends dies. After everything was cut out, I used Gina K Designs inks to add colour.

I played around a little with the arrangement and used a combination of liquid glue and foam adhesive to adhere everything. 

The sentiment comes from an older TH die set called Pondering Words.

This tag fits onto a card base measuring 6.25 X 3.5.


Thanks for dropping by! See you soon!

Laurie


Featured Post

A Simple Thanks Card

Well, well, well. Look who decided to show up...me! It's been an awful long time yet again. I seriously thought I'd be well out of t...