Showing posts with label 3-D Wednesday. Show all posts

Wednesday, May 8, 2019

3-D Wednesday with My Creative Time!

Welcome to another 3D Wednesday!  Today is all about home decor and die cutting!  This is a fairly lengthy post as I wanted to show you how I did what I did!

Here's how this started:


I've had these battery operated candles for a long time. Not pretty but thats what we're going to do today.  I made candle holders out of paper!!  I started by using a 5.5 X 8.5 inch piece of typing paper. I wanted to start this with cheap paper! I used the Flower Border Die on the long edge of the paper, this involves some partial die cutting, but we'll get to that later!


I loosely wrapped this piece around the largest candle and decided that a 1inch flap would would to close it.


So now it was time to work with real cardstock. For these candle holders, I used an 80lb weight, white cardstock cut at 5.5 X 8.5 inches.  


Line up the die as normal along the top of the 8.5 inch side. I left the very end plus one flower uncovered by the top cutting plate then ran it through.  I removed the die and lined up the die using one of the notches on the die..


Now place the cutting plate over so the end of the die is not covered. If this portion is covered, it will cut the border out completely.  It should look like this:


I did this three times to create all three holders.  To make the holders fit the different heights of the candles, I trimmed 1 inch off the bottom for the tallest candle, making it 8.5 X 4.5, the middle candle was 8.5 X 3.5 and the smallest ended up being 8.5 X 2.75 inches.

Now the fun part part!  To decorate, I used the Stitched Pretty Flower and Leaves Dies along with the Bunch of Stitched Doily Dies.  I went with a simple black and white theme.


I used the largest doily as a little mat and the other three as a backdrop for the flowers.


I think these turned out kind of cute.  Start to finish they took about an hour to make, that's including making a template!


Thanks for stopping by today!  I hope you enjoyed todays longer post and found a little inspiration!

See you soon!!

Laurie


Wednesday, April 3, 2019

3-D Wednesday with My Creative Time!

Hello and welcome!! It's time to make a three dimensional project using goodies from My Creative Time!!  I really struggle with this because I'm mostly a card maker but Emma has so many dies in the shop that make this easy!!

I started my creating a box with the Gift Card/Gift Box Die using 80lb cardstock.  Before adhering it all together, I stamped a pattern on the lid portion using the polka dot stamp from the Egg Decorations Stamp Set (on sale!). I used a beautiful yellow shade of ink from Catherine Pooler called Sauna.

The real star of the show is this bunny:


I used only the front portion of the Bunny Lollipop Holder Die to create this super cute embellishment for the gift box.  I simply added colour using sponge daubers and Distress Inks.  This set comes with separate pieces that cut the eyes, nose and little eye brows.

The bow comes from the Sleigh Die Set and worked so good here!! I used the same yellow ink, with a gentle hand to add colour to it.


The sentiment (also from the Egg Decorations Stamps) was stamped on one of the Chunky Stitched Tag Dies using the same Sauna Ink. To give a bit of definition to the tag, I added some stitching detail with a grey marker.


And my Easter treat box is ready to go!! You could easily switch up the colours to create more of a masculine bunny, and skip the bow:).

Thank you for stopping by! I hope you found a wee bit of inspiration here today!!

See you soon!

Laurie


Wednesday, March 6, 2019

Quick and Easy Craft Room Decor with My Creative Time!!

Hi friends!! Welcome to 3-D Wednesday for My Creative Time!  Today's post is all about using your craft supplies to create a dimensional project.  I love this category as it gets me thinking "outside the box" and creating something other than cards!

I love creating little things to put on display in my craft room.  So, I decided to make some wall art.  In my crafty stash, I found these Elmer Wood Slats.  I got these from Wal-Mart a long time ago.  Have you ever bought something with no idea how you would use it but just thought it would come in handy one day?? Yeah, this is one of those purchases.


The wood wasn't completely sanded around the edges but nothing an emery board couldn't fix!  I then went through my MCT dies and picked the Flower Petal Dies and the Stitched Leaves Dies.  Now, the key to making this a quick project is this:  I used printer paper for the die cutting!  Because it's so thin, you can die cut many layers at once giving you tons of leaves and flowers to work with!!


I just happened to have a real nice pale blue shade!!  After die cutting a bunch of paper, I glued the flower layers together and played around with a layout.


What was nice about this project, is that liquid glue worked for everything!!  I was a bit worried that the wetness would cause some warping or bubbling of the paper, but it didn't! And everything stuck so well to the wood slat!


After making the first one with the white flowers, I decided to reverse the colours and do one with blue.  


I also found in my stash, some wood veneers that I thought would finish the flowers off perfectly.  


To attach the twine, all I did was use some strong double sided tape.  These things are VERY light!!

I had so much fun making these and they are hanging in my craft room right now!!  I think they would look fantastic with the wood painted and using actual cardstock but I wanted to show you something quick and easy to put together!


Thank you so much for dropping by today!!  I hope you'll give something like this a try!!

Laurie


Wednesday, January 30, 2019

3-D Wednesday with My Creative Time!!

Hello, hello!! Welcome back my crafty friends!  Today, I have a non-card project to share!  This was so much fun to make and the best part is, all your cardmaking supplies work for this!!

I made a very dimensional piece that was placed inside a picture frame. I don't think this would be classified as a shadow box as the die cut images are outside the frame. Please let me know if I'm wrong!!


I had this inexpensive picture frame from Ikea in my stash. Now, I want a whole bunch more because I want to make more of these!!!  I started by die cutting the smallest heart from the new Heart Doily Dies out of a watercolour paper pack from Lawn Fawn.  I cut a piece of white cardstock down to 5X7 to fit the frame and what served as the base of the design.  I originally thought that I would just place the 6 hearts on the panel but after fumbling around with the placement, I noticed that I could fit a fairly substantial sentiment on there!!  So of course, out come the Lowercase Fun Dies!!


I used a light grey cardstock for the letters and added a touch of shading with a W1 Copic marker.  To make sure the letters were straight, I did mark a line with a pencil.  I used liquid glue to adhere those down. Now, this is where I actually placed the panel inside the frame as I wanted to make sure I aligned the hearts nicely!!


Before adhering the hearts, I curled the edges slightly to give a nice, rounded look.  I used a strip of foam adhesive down the centre of each heart so they remained curled.  I decided to break up the solidness of a few of the hearts by adding a tiny outline butterfly die cut. These come from the Mini Butterfly Dies.

I thought it needed a bit of sparkle, so I added some clear sequins.


I hope you enjoyed todays non-card project and hope you will give it a try!!

Thank you so much for dropping by today!!  See you soon!

Laurie


Wednesday, October 3, 2018

3-D Wednesday with My Creative Time!!

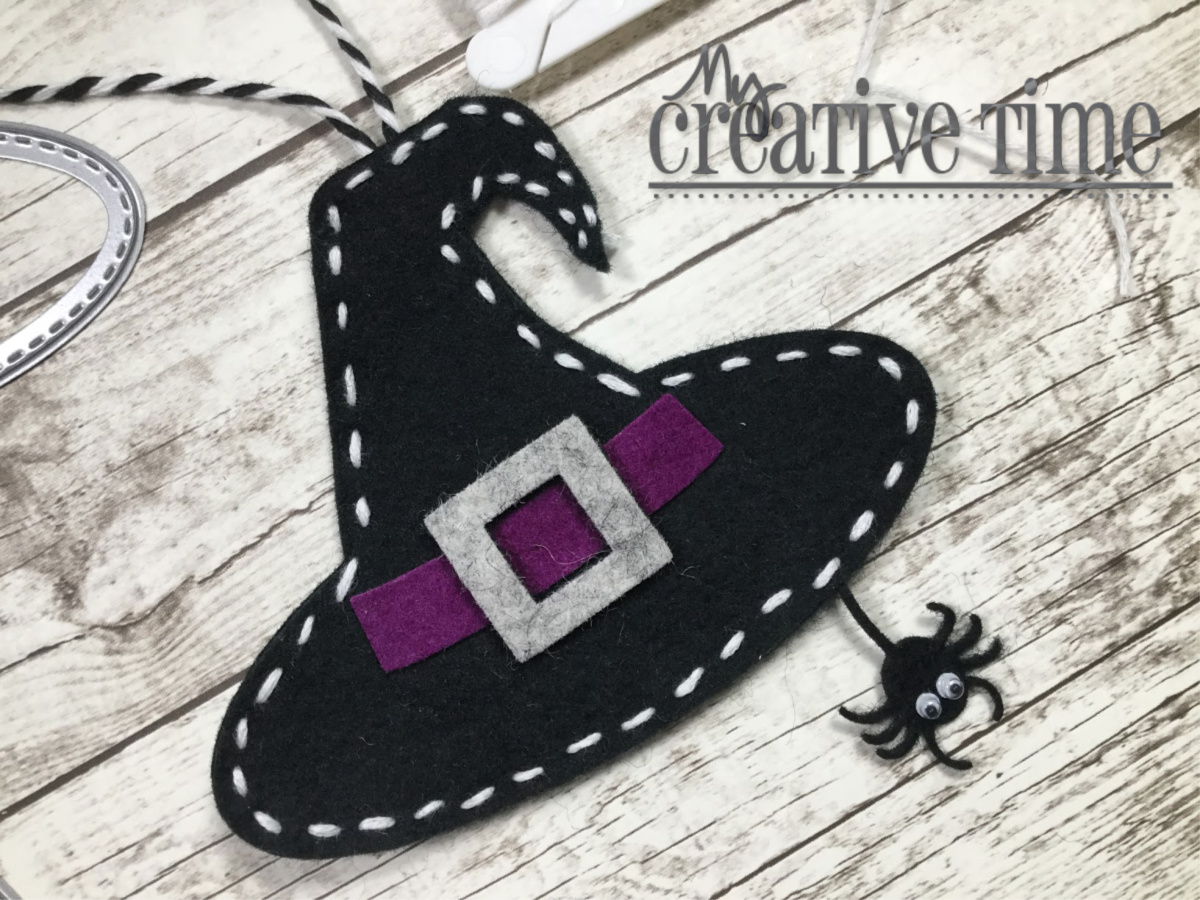
Hello friends and welcome back!! Today I have a cute, felt Halloween ornament to share with you today!

It's nice to make things other than cards and I love when you can combine things like paper crafting and sewing or stitching!!  I used the recently released Witch Hat Topper Die. This die is intended to make the cutest toppers for treat bags but can be used for so much more!

I started by die cutting all the pieces out of a few different colours of felt I had in my stash.


It's best to run them through your die cutting machine a few times to get the cleanest cut. I didn't do that with the hat and spider and ended up with a lot of fuzzy edges on the hat and a torn spider!  What's nice about this particular die is that it is already 2 pieces joined.  This took a bit of pressure off while stitching. Simply fold it over and stitch together!


I used white floss because I thought the contrast would look good.  I also stitched in a piece of bakers twine for the hanger and the little spider!


Here's a look at the completed stitching...


Now, I actually cheated when it came to the band and buckle of the hat. Instead of sewing those pieces on, I used Glossy Accents to adhere them. This glue works great for this!!


I couldn't resist adding small googly eyes to the spider.


I guess you could hand this out to a VERY special trick or treater. Or if you're really ambitious, make a bunch of these ahead of time.  This really didn't take too long to make.

I hope you found a little inspiration here today! These little ornaments can be made with many dies in your stash, you just have to think outside the box a little :)


Thank you for stopping by!!!

Laurie


Wednesday, April 4, 2018

3-D Wednesday with My Creative Time!

Hello and welcome back!! Today it's all about creating a non-card. This was a bit of a challenge for me as I primarily make cards, but challenge accepted!

I wracked my brain trying to come up with good idea. Should I make a treat holder? A gift box? And then it came to me...how about a little DIY home decor?!!  Besides a few card panel scattered about my craft room, I don't really have any handmade decoration. So this is what I set out to create.

I went through my MCT stash and picked out a WHOLE BUNCH of dies!! This project has absolutely no stamping. Sad, I know, but sometimes you just gotta die cut:)

I started by die cutting 6 (second from the largest) Chunky Stitched Tag Dies along with the smaller stitched version that layers nicely on it. I die cut some leaves from the Stitched Leaves Dies and some flowers and leaves from the Stitched Pretty Flower and Leaves Dies.


I chose a pretty palette of Distress Oxide Inks,


and did some simple ink blending on my die cuts.


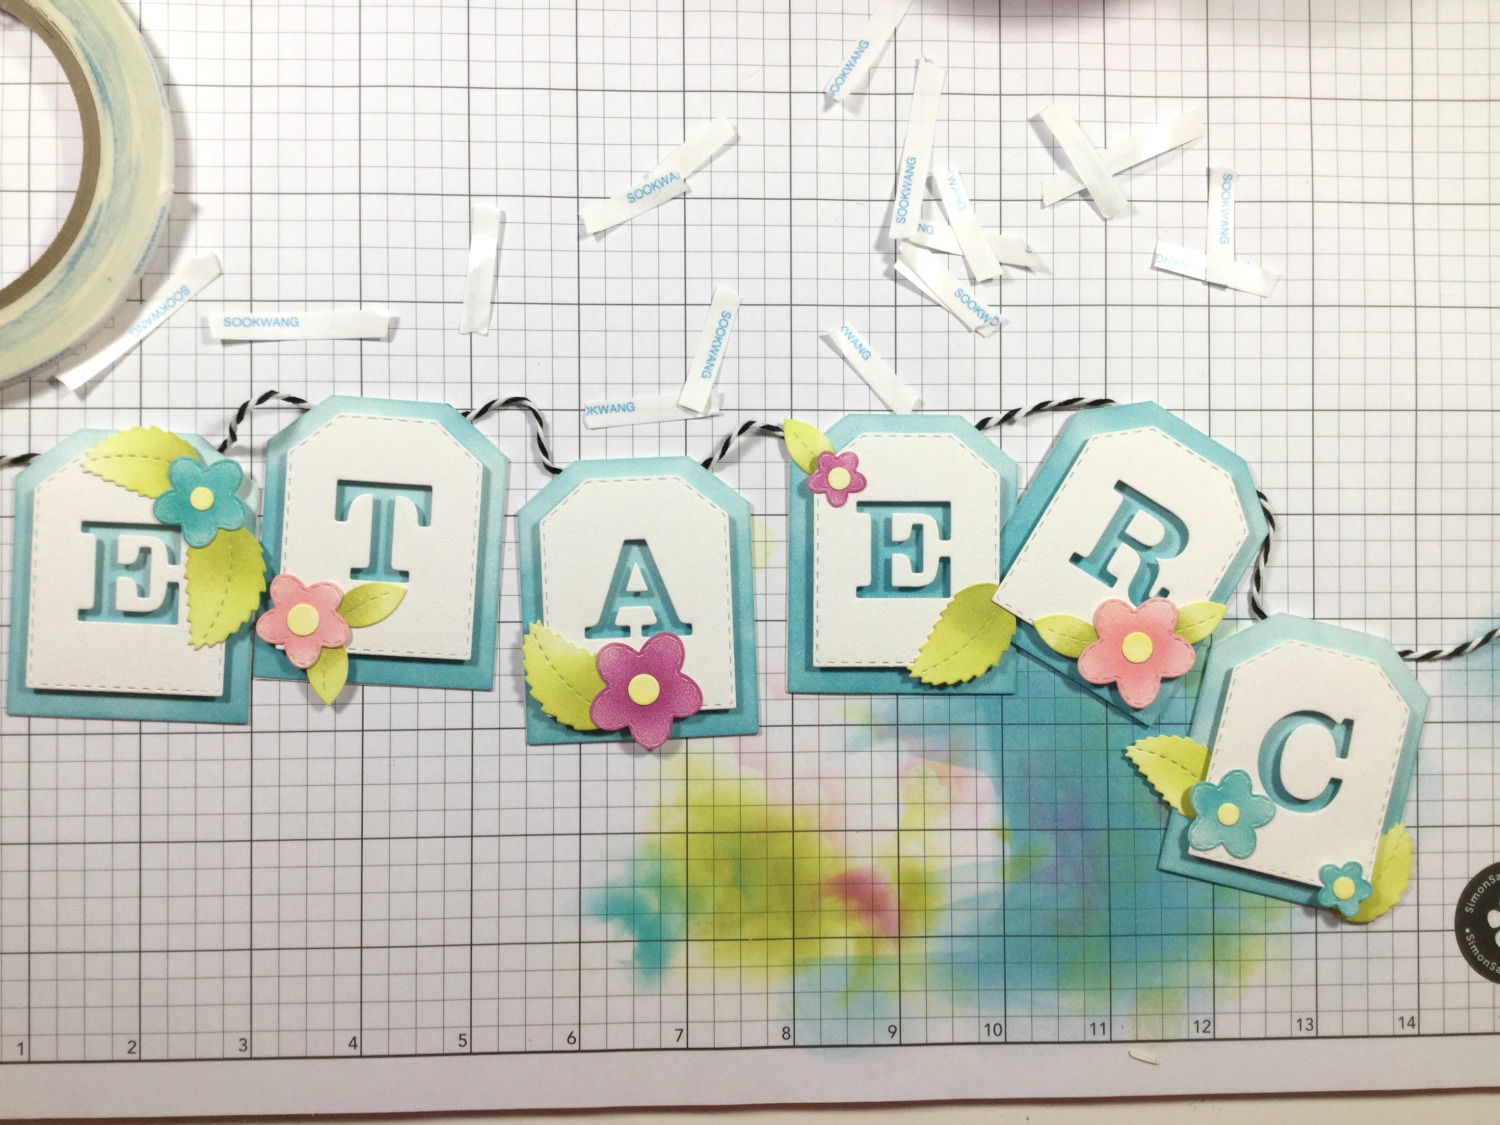
I guess I never made it clear what I'm making!! I decided to make a little banner that says "create". I decided instead of adhering the die cut letters directly to the top layer of the tag, I would die cut them from that layer.


So for contrast, I used Broken China Distress Oxide and inked the base layer tag. Here's a look:


I foam mounted the die cut tags with foam adhesive onto the bases. I took the flowers and leaves and tried to randomly place them on each tag. I wanted them to have more of a "scattered" look. 

I struggled with how to place the twin to each tag.  The way I had placed the upper layer, didn't leave a lot of room to punch holes and at this point, I didn't really want to risk ruining one the tags.  It's funny that I say this because my final plan almost ended in disaster!!! Read on...

I decided to die cut 6 more of the larger tags and adhere them to the back using Scor-Tape. On the top strip of tape, I will adhere the twine, just like so:


Now this is where my near disaster occurred. Check out what I did!!


That's right!! I adhered them backwards! I could not believe it. I sat there is stunned silence for a couple of minutes thinking I would have to start over. Luckily, I was able to carefully open each tag at the top.


I rearranged my word, added a bit more tape to the top of each tag and slid the twine back in..phew!!

In the end, I'm really quite happy with the way it turned out.  I have it hanging over my desk right now!!


Here's a closer look:


I hope you enjoyed todays project and found just a little inspiration!!


Thank you so much for stopping by today!!

Until next time, stay crafty!

Laurie


Featured Post

A Simple Thanks Card

Well, well, well. Look who decided to show up...me! It's been an awful long time yet again. I seriously thought I'd be well out of t...