Showing posts with label birthday card. Show all posts

Sunday, January 26, 2020

Pinkfresh Studio January 2020 Challenge

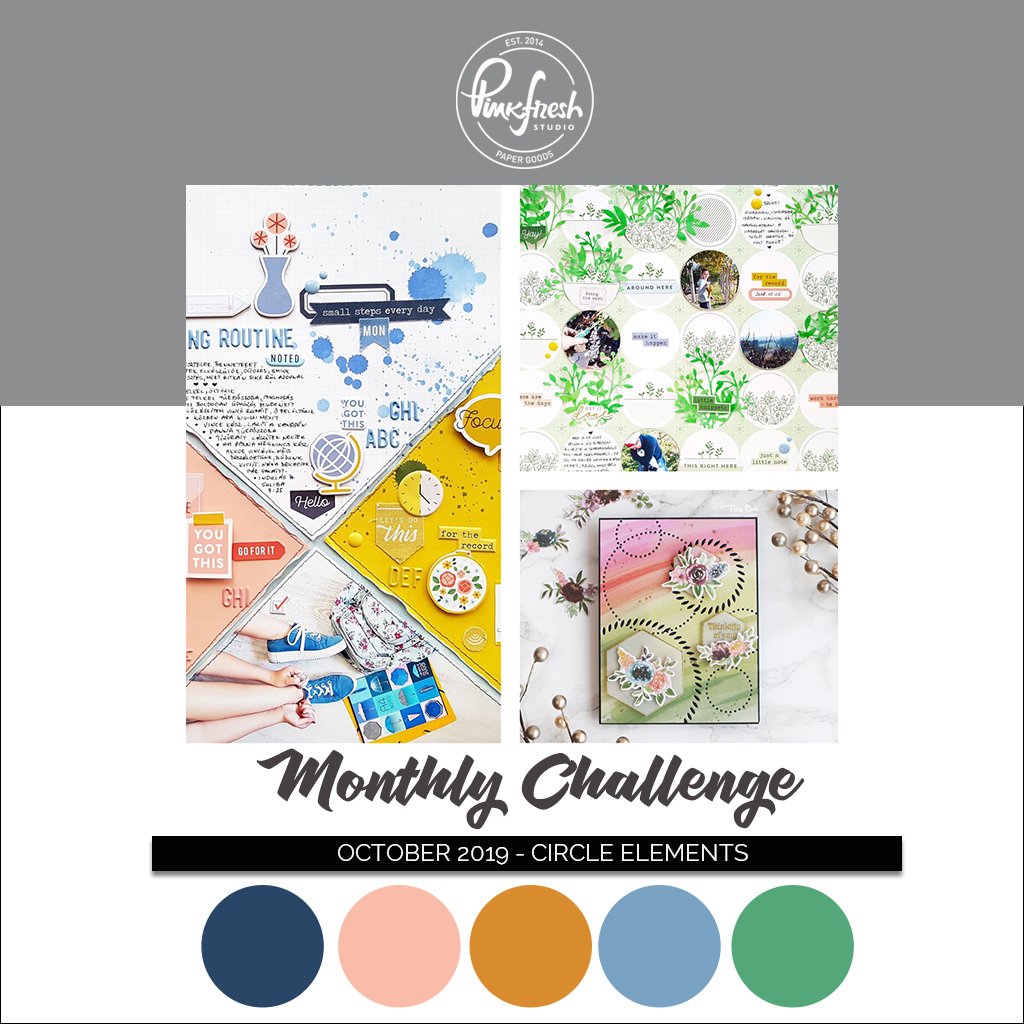
Welcome back! Today, I've joined in the first challenge of 2020 over at Pinkfresh Studio and it's a super fun one!  For this challenge, you can choose any of the challenge themes from 2019, fun right?

I chose October's theme...Circle Elements.

Now, I currently don't own much Pinkfresh Studio but let me tell you that I have remedied that!  I've recently placed a couple orders to beef up my stash! And I'm so excited!! I've really been loving Pinkfresh for awhile and can't wait to get all my goodies!  But enough rambling, let's have a look at what I've made!


I used the Braided Circles Die set to be the focal point on this birthday card. I coloured and fussy cut a couple of images from the Party Animals Stamp Set. This is an older set that has been discontinued.

The "hooray" comes from the Essentials Classic Words Die Set. If you're looking for a set of word dies, I highly recommend this set. It comes with any sentiment you'll ever need. Plus, the font is beautiful and there's a shadow die for each word! It's an amazing set! I used Picked Raspberry Distress Ink to add colour!


One of the first PF sets I got was the Dainty Botanicals Set. I love this set as it is filled with lovely, filler images that are great for almost any card! I thought the greenery would fill in this circe nicely.

Before adhering all the bits and pieces, I added a little blue ink to the top of the circle for a bit of contrast.  I used liquid adhesive for the greenery and foam adhesive for the critters.  I die cut the "hooray" 3 times from scrap, white cardstock and adhered them all together to give the die cut some dimension.


The sub sentiment comes from the Playful Animals 1 Set. This was another great set and I'm sad it's no longer available.  I used an embossing folder from my stash on the front of the card base and foam mounted the focal circle.

A few sequins finish this card and I love the way it turned out.

Thank you so much for stopping by! See you soon!

Laurie


Wednesday, December 11, 2019

My Creative Time 98th Edition Sneak Peek #1!

Welcome back!!  It's that time where we show you some sneak peeks of the upcoming 98th Edition Release from My Creative Time!


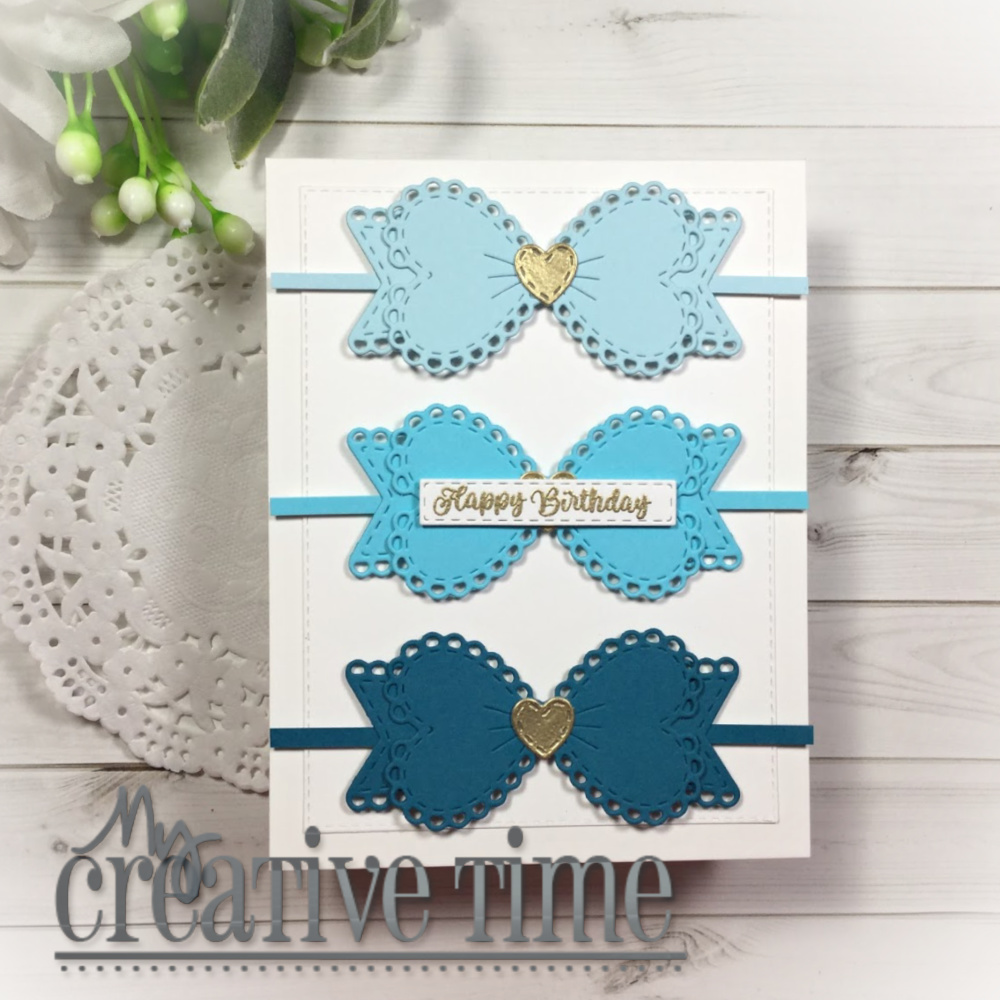
Emma is releasing 3 new Heart Bow dies!  I am a big fan of all the different bows in her line of dies but these may just be my favourite! For my project today, I'm using the Small Heart Bow.  


This is a standard A2 sized card so you can really see the size of this bow.  I went for a gradient look by cutting from three shades of blue cardstock.  The tiny little heart in the centre is part of the die set and looks super cute in gold.  NOTE: I cut tiny strips of cardstock to act as ribbon...this is not included in the die set.

All three bows were foam mounted onto a white panel cut with one of the More Stitched Rectangular Dies. I adhered the panel with liquid glue onto a white card base.


The sentiment comes from the Especially For You Stamp and Die Set and was gold heat embossed onto one the Sentiment Strip Dies.  I foam mounted this, as well. I wasn't going to use the little heart on the centre bow as it was behind the sentiment, but I'm glad I did!


I adore these bow, especially this size. But wait until you see the others!!

Thank you for stopping by! See you tomorrow for another peek!

**Sneak Peek Giveaway**

We will be giving away the sets we are showcasing each day to ONE lucky winner!! For example, the sets we showcase on Wednesday, Emma will announce the winner of that on Thursday and the sets we showcase on Thursday will be announced on Friday on the MCT Blog!  All you have to do is leave some love on each of our blogs.  You are not required to comment on every blog, but the more you do comment on, the more chances you have of winning!!   VERY IMPORTANT: Please leave a way for us to contact you with your comment, just in case you are the lucky winner! For extra entries, you can spread the word about this release on Facebook, Twitter or Instagram using #mycreativetime!  Good luck!!


Laurie


Wednesday, September 11, 2019

Circle Bursts...Your Next Stamp Preview!

I'm baaaack! Welcome, friends!  Today, I'm sharing a little look at another of the stamps sets coming in the new Your Next Stamp release!!  All sets will be available TODAY,  September 12th @ 11am EST , so be ready!!


This little stamp set is called Circle Bursts and is perfect for backgrounds and festive scene making!  You should never overlook these small sets. Not only do they have a great price point, they are often packed with images and sentiments!


I created a background using Tattered Rose, Dusty Concord and Chipped Sapphire Distress Oxide Inks. After the panel was dry, I used Gold Sparkle Embossing Powder from WOW to heat emboss the three circle burst images.  To add some fun interest, I used a few of the Circles-Piercing Holes Die Set to cut around each of the bursts. They fit perfectly!!


I coloured up the cute, singing rabbit from the new Birthday Song Stamp Set with alcohol markers and foam mounted him to the panel.  To give my rabbit some sort of ground, I used one of the Scrapworks-Strips Die Set to stamp the sentiment.


I love the way this card turned out and I love these Circle Bursts!  I hope you enjoyed todays preview!  Please visit the YNS Blog for links to all the amazing projects from the design team and guests!!

And here's a look at the fabulous deals!!


Thanks for stopping by!! See you soon!

Laurie


Thursday, September 5, 2019

Your Next Stamp Preview!!!

Hello, friends and welcome back! Today I have the pleasure of giving you a little preview of one of the new stamp sets from Your Next Stamp!  YNS is one of my favourite companies and the fact that they're Canadian makes me love them more!!


We're having a look at the super cute set called Birthday Song. This little set features two critters singing their hearts out!


I coloured these cuties up with alcohol markers and used the co-ordinating dies to cut them out. I used a confetti-like stencil and a few Catherine Pooler inks to ink up a simple background.  


The sentiment was stamped onto a speech bubble die cut (which came from an older die set from YNS). I used a die to create the stitched frame which I adhered to the inked background.  The critters and the sentiment were foam mounted.

I placed the panel a little crooked on the card base for a bit of added interest. Of course, I had to add some music notes, which are also included in the Birthday Song set, as well as a few clear sequins!


This set is so darned cute and bound to put a smile on someones face!

Please visit the Your Next Stamp Blog where you'll find ALL the previews for today!  Also, check out YNS on Instagram!! One random comment from each preview day will win that days product! All comments must be left by September 15, 2017 with the winners being announced on September 17th, 2019 on the YNS Blog!!

All products will be available for purchase on September 12th, 2019 at 11am EST!!

Thanks for stopping in today!! I'll be back in a few days with another preview!!

Laurie


Tuesday, June 11, 2019

Birthday Palooza with My Creative Time!

Hello and happy Tuesday!  Today we're making birthday projects featuring goodies from My Creative Time!

I used only the dies from the Light the Candles Stamp and Die Set. It has co-ordinating dies to cut out the images but it also includes dies to create your own cupcake. In this case, I made a very large, very rainbow cupcake!


I cut one cupcake wrapper and 5 layers of frosting. I used Distress Inks to add some colour. Before adhering the stacked cupcake, I did a simple watercolour smoosh on the background, which was cut with the second largest More Stitched Rectangular Dies.

The cupcake was adhered with foam adhesive. I stamped a sentiment from the Light the Candles Set onto a banner cut with one of the Ribbon End Dies in a bright pink ink.


A few iridescent sequins and a bit of glitter pen finish the card!

Thank you so much for stopping by today!

Until next time...stay crafty!

Laurie


Tuesday, March 26, 2019

Birthday Palooza with My Creative Time!!

Hello, friends and welcome back!!  I'm back to share a fun yet clean and simple birthday card using some fabulous goodies from My Creative Time!!  This card features quite a bit of die cutting along with a few stamped images!

I started by cutting a white card front down with the second largest of the Stitched Postage Frame Dies.  In the centre of that panel, I die cut the word "celebrate" which comes from the Tag Die Layers Set.


On a white card base, I used the polka dot stencil from the A Sunny Hello Kit (which is still available for purchase!!), and Broken China Distress Ink.  Before foam mounting the die cut panel, I inked a scrap piece of cardstock with the same ink and glued it behind the "celebrate".  I wanted a solid colour so it was easy to read. I also stamped the "your day" in black ink which comes from the Just Because Stamp and Die Set.

I was actually going to leave the card like that!! But I decided it was a bit TOO clean and simple so I added some flowers from the A Beautiful Day Stamp and Die Set.


I used the Broken China Distress Ink to add the colour and also added some darker detail with a blue coloured pencil.  The leaves come from the Stitched Pretty Flowers and Leaves Die Set which were inked with Crushed Olive Distress Ink.

A bit of glitter pen to the flowers and a few black gems finish this card off!!


Thanks so much for stopping by today!! I love it when you visit!!

See you soon!!

Laurie


Wednesday, March 20, 2019

Pink and Main 5th Birthday Blog Hop!!!!

Welcome my friends!! Today is a super special day as we are celebrating the 5th Birthday for Pink & Main!!  I've been on the design team for close to a year and have loved every minute of it!! Michelle is such a delight as well as all her amazing products.  So, Happy Birthday to this amazing company!!

Today, is also release day so the products used on my card today, are available to purchase!


I stamped a background panel using the new Party Balloons Stamp Set.  This also has co-ordinating dies but I didn't use them.  I love the solid images and the separate stamps to decorate them. I cut down the stamped panel with one of the Stitched Rectangles Set 2 Dies.


There's a new interactive element die set available today called the Pull and Flip Dies.  It creates a waterfall effect on your cards and is super cool!  The star, present and party hat dies on this card all come from this set. In retrospect, I should have used different colours on these die cuts to make them stand out a bit more.  To help a bit, I cut a Scalloped Rectangle Die from a piece of vellum and used foam tape to adhere them.


I heat embossed the sentiment (also from the Party Balloons Set) onto the vellum, then used liquid glue behind the star, present and party and adhered to the balloon panel.


I added a few Rainbow Glossy Dots for a bit of shine. If you are new to these, I highly recommend them! There is nothing else like them on the market :)

Now, onto the fun stuff...PRIZES!!

Pink & Main is kindly giving away a $50 store credit to FIVE lucky, random commenters!! Please note:  You must comment on every stop of the hop to qualify to win!!  Good luck!

Here is the entire blog hop lineup!!

Laurie (you're here)

Thank you for stopping by!! Enjoy the rest of the hop!!

Laurie


Tuesday, February 12, 2019

Birthday Palooza with My Creative Time!!

Hello, friends and welcome back!!  Today I'm sharing a quick and easy birthday card using products from My Creative Time.  Because these cards are likely the most needed, it's great when they come together quick!!


I used the recently released Celebration Tags Stamp and Die Set. This set is adorable and has got you covered for almost any occasion.  I die cut all my cupcake pieces out of scrap pieces of patterned paper because who doesn't have a load of that on hand?!


Because I struggle with leaving a lot of white space, I used a stencil to create the rays in the background.  Blueprint Sketch Distress Ink matched the blue hearts almost perfectly!  I used the same ink for the sentiment, using my Misti because Distress Inks are really not meant to stamp with so multiple impressions are needed.


I foam mounted all the die cuts, added some sparkle and Glossy Accents to the hearts and couldn't resist adding a few red sequins!  Looking at this card now, I'm getting some strong July 4th vibes...oh how I wish for July!!

That's all for today. I hope you enjoyed!

Thank you so much for dropping by. I love your visits!!!

Laurie


Tuesday, January 8, 2019

Birthday Palooza with My Creative Time!!

Hello, my friends and welcome back!!  Today I'm sharing a clean and simple birthday card combining a couple of My Creative Time stamp and die sets.

I started by cutting a white panel using the largest More Stitched Rectangles Die and adhering it directly onto a white, top fold card base.  I've really been into florals lately (because I wish winter was over) so I chose the cute tulip image from the Healing Wishes Stamp and Die Set and the butterfly from the A Beautiful Day Stamp and Die Set and coloured them up with alcohol markers.


I used a couple of the Scalloped Stitched Circle Dies to create the focal point.  I think the black and white striped paper really draws the focal to the images!!


I struggled with how to place the sentiment but in the end, decided to curve it around the circle.  I'm not super happy as I think it looks a bit wonky but I wasn't about to start again :)  I foam mounted both the flowers and butterfly onto the white circle then used liquid glue to place it on the patterned, scalloped circle.

I popped up the entire focal image onto the card base, added a bit of sparkle and shine and called this card done!!  I was very tempted to add some sequins in the white space but reined myself in!!


Do enjoy white space on your cards? Is it hard for you to keep it that way?  I struggle but really love how this looks!

Thank you so much for dropping in today!!  I'll see you soon!!

Laurie


Monday, December 3, 2018

Manly Monday with My Creative Time!!

Hello and welcome to "Manly Monday". Today I'm showing you a masculine card made using products from My Creative Time!  This card involves mostly die cutting which I love.

I've been really enjoying making smaller sized cards lately. This particular one measures 5 X 3.5 inches.


As you can see this is very clean and simple. Not a lot of fanciness that I'd normally put into a card :) I started by die cutting the male super hero die from the Have A Super Day Stamp and Die Set out of black cardstock. I decided a bright blue would go well for this masculine design.  The die cut stars are also out of this set.

I foam mounted my superhero with foam adhesive onto a white panel that was cut using one of the rounded rectangle dies from the Scalloped Stitched Rectangular Dies.  To add just a bit more pop of blue, I partially cut one of the larger scalloped dies from this set and layered the two together.


I stamped the simple sentiment on the inside of the card. 


And a simple handrawn border finishes this card.  I really think this is a striking card, perfect for a young boy, teenager or even grown up!

Thanks for stopping by today!!  I'll be back soon!

Laurie


Monday, September 3, 2018

Manly Monday with My Creative Time!

Hello crafty friends and welcome back!  It's all about creating masculine cards today. I don't know about you but this is no easy task for me.

I tend to use a lot more die cutting on a masculine card versus stamping and colouring images.  I'm not sure why but I like a more graphic design when it comes to "boy" cards.

I went through my stash of MCT dies and picked out three sets for this card. This first set is the 3 Star Stitched Dies.  Simple shape but the size of these dies is perfect!  I dug through my scrap cardstock bin and picked out a grey, an orange, a yellow and a blue.  I cut about 2 of each size die.

I took an A2 white card base and tried to randomly piece them together.


I used this photo to help me remember placement!  I decided to adhere the stars onto a layer that was cut at 5.25 X 4.  This helped to "squeeze" the stars closer together.  After they were all glued down, I trimmed the excess off.


I know I've said this before but I will say it again. Everyone needs a good set of alphabet dies (or two, or three) in their stash.  They come in super handy especially when creating a sentiment for a boy/man.  There are tons of feminine or girly sentiments out there but some of these just won't work here.  I used both the Lowercase Fun Dies as well as the Uppercase Fun Dies to make the word "Hey".  This is a fabulous font for both masculine as well as feminine cards!


I die cut the letters out of craft foam as well to give them quite a bit of dimension.  The "birthday boy" sentiment comes from the Sweet Wishes Stamp and Dies Set and fits perfectly under the die cut word!!

I added a bit of glitter pen to the "Hey" and added the star panel directly onto the card base.  The most time consuming part of this card was trying not to get two stars of the same colour close together!!


Thank you so much for dropping by today!!  

Until next time...stay crafty!!

Laurie


Thursday, August 9, 2018

Birthday Palooza with My Creative Time!

Hello and welcome back!! It's time to make a birthday card using products from My Creative Time!!  I chose to make a sewing themed card using stamps and dies that were released last month!!

I started by stamping, colouring and die cutting a couple of images from the You're Sew Special Stamp and Die set.  This is a fab set to make cards for all your sewing friends!


I stamped a background panel in a light grey ink using the various small images from the set.  I foam mounted my coloured images to the panel as well as the sentiment. The sentiment was stamped on one of the Ribbon End Dies.  I thought it would look cute to tie some bakers twine around the banner.


The stamped panel was adhered onto the largest of the More Stitched Rectangular Dies and then onto a white card base cut to the same size.  A few clear sequins, shimmer pen and Nuvo Crystal Glaze finish of this fun card!!


Thank you so much for stopping in today!!  I hope you found just a wee bit of inspiration :)

Until next time...stay crafty!!

Laurie


Monday, May 28, 2018

Made in Minutes with My Creative Time!

A big hello and welcome back!!  Today it's all about whipping up a card quickly!  And my project for you was made in roughly 10 minutes!!

I do have to admit that this is not the norm for me.  When I sit down to make a card, 9 times out of ten I do not have a plan. Today was no exception except for the fact that I knew what products I wanted to use and I also had on hand a bunch of scrap watercolored pieces of cardstock.  I tend to hoard almost everything I have and today that came in very handy!!


As you can see, I decided to use the Birthday Cake Die and the Time to Celebrate Stamp set from the latest release.  And of course, there are my scraps!

I die cut both layers of icing out of the blue paper and the candle and flame out of the green/yellow paper.  But I wanted one more embellishment for my cake, so I used the single flower die along with the dots in the Flower Border Die set. I cut the flower from the green/yellow paper and the row of dots out of the blue.


I die cut the large cake die out of plain white cardstock along with a couple extra icing layers and adhered my cake pieces together.


I think adding extra icing is always a good idea, don't you :)?


I stamped the sentiment just above the cake in black ink and decided to add the remaining blue dots (flower centres) as embellishments.


I was struggling with the all the open space so I took a white Gelly Roll pen and added some stitching detail around the card and some dots around each circle embellishment.  Such a simple thing to do yet is very effective!


And that's the finished card!! Like I said, this came together very quickly because I had scraps to use! But patterned paper would also work excellent for this as well!

Thank you for stopping by today!  

Until next time...stay crafty!!

Laurie


Featured Post

A Simple Thanks Card

Well, well, well. Look who decided to show up...me! It's been an awful long time yet again. I seriously thought I'd be well out of t...