Showing posts with label florals. Show all posts

Thursday, September 3, 2020

Dusting Off the Coloured Pencils ft. Create a Smile Stamps!

 Welcome back! I decided to dust of the pencil crayons and colour some gorgeous new images from Create A Smile Stamps!

Pencil crayons (that's what we call them here in Canada) is a tricky medium for me. I love the look but I'm not a fan of the amount of time it takes. I've watched probably hundreds of tutorials and they all say the same thing...light pressure and build up the colour. Well, I didn't do it that way. I laid it down heavy and in one layer. 


This floral images is from the Mallow Blossoms Set. You can really see here how thickly I applied the colour. I'm also going to point out that I thought the small, green piece was a leaf. In fact, it's a part of the blossom that I THOUGHT was a leaf. I'm clueless when it comes to flowers so please forgive me, haha!


To put this card together, I used the Petals Stencil on the card front with a light, pink ink. I used the second largest Scalloped Rectangle die to create a panel. I carried the stencilling to the inside of the circle. To create the kraft circle, I used one of the Postage Edge Circle Dies. I placed a smaller, plain circle die on the inside to create this ring.

I adhered the ring to the white panel and foam mounted the flowers. The sentiment (from the Mallow Blossoms) was stamped onto one of the Useful Banners Dies and was also popped up. I added a few sequins for a bit of sparkle.

Thanks for dropping in! See you soon!

Laurie


Thursday, July 2, 2020

No Line Watercolour with Create A Smile Stamps

Hello and welcome! Today I'm sharing a card made with stamps from Create A Smile Stamps along with the no-line watercolour technique!


I'm no expert at this and tend to mess with things too much. I'm constantly trying to move the colour around and usually end up overworking it. The key to watercolouring is patience and I don't have a ton of that, haha!  

My go to ink for no line techniques is the No Line Ink from The Stamp Market. I love the foam pad and it usually only requires one impression, even on watercolour paper!  

I used the gorgeous Pure Poppies Stamp Set from Create A Smile. I went for a pinkish-purple flower. My medium of choice was Derwent Inktense Blocks which have been gathering a bit of dust. Every time I use them, I ask myself "why aren't you using these more!?". Of course, you can use the pencils! 


When the colouring was done, I placed the Petals Stencil (CAS) over the top and used a light blue colour to trace around each opening. Because the Inktense are waterproof when dry, you don't have to worry about reactivating the colour! It's very faint but still adds detail!  I trimmed the panel down and added some Black Soot Distress Ink around the edges.  

I did some partial die cutting of the second largest Scalloped Rectangles Die to fit the floral panel. I adhered the two together with tape adhesive then foam mounted it to an ivory card base.

The sentiment comes from the Favourite Everything Stamp Set and was white heat embossed onto black cardstock. The small banner comes from the Useful Banner Dies.


Thanks for stopping in today! Hope you enjoyed today's card and will come back to visit again!!

Laurie

Thursday, March 12, 2020

Woodland Whimsy with Gina K Designs!

Welcome back to another look at the Woodland Whimsy Stamp Set! This set is part of the newest release from Gina K Designs and was illustrated by the talented Lisa Hetrick!

Today's card features some Copic colouring and fussy cutting!  I wanted the card to be bright and cheerful and to put a smile on someone's face!


I started by stamping and colouring a couple of the flowers, leaves and that awesome hanging branch!   I kept the colours light! I fussy cut each image out. I was a little worried about the branch but it was actually very easy to cut out!. I simply used a craft knife to make an "x" in the centre of the ropes, took my scissors and removed enough of the card stock to maneuver my scissors inside!

I used Wild Dandelion ink to blend a small area on a white panel. To add a bit of interest, I used a polka dot embossing folder. I used foam adhesive to adhere all the elements to the embossed panel.


I added some sparkle pen to the flowers and a few iridescent pearls, then foam mounted the sentiment underneath.


I foam mounted the panel onto an ivory card base and called it done!!

Thank you so much for stopping by and thank you to Gina K for letting me be a part of this fab release!

Laurie


Thursday, March 5, 2020

Woodland Whimsy...Gina K Designs

Hello!! Today I'm sharing my second card using the new Woodland Whimsy Stamp Set from the latest release from Gina K Designs.  This gorgeous set was designed by Lisa Hetrick and is just beautiful! You can check out all of Lisa designs, here!

I did one of my favourite techniques on this card, Copic colouring with heat embossing on kraft cardstock.


I first stamped that beautiful cluster of flowers onto a piece of kraft cardstock using a light, copic friendly ink. In the case, Memento Desert Sand. NOTE: A stamp positioning tool is key here as you need to restamp in precisely the right spot after the colouring is done!! I used some pinks and purples to colour the flowers and a couple greens for the stems. What I love about this technique is that you don't have to worry about the details. Because you'll be adding all those back when you heat emboss! When the colouring was done, I popped the panel back into my Misti, inked up the stamp with Versamark Ink and added the gold embossing powder. 


I used a rectangle die and did a bit of partial die cutting. I wanted the petals of the one flower to overhang slightly. This was easy to do. I lined up the die and only put the top cutting plate where I wanted it to cut. I used my Fiskars trimmer (with the guide wire) to line up the top and bottom cuts then trimmed around the flower with my scissors.


I heat embossed the sentiment in the same gold, embossing powder, foam mounted the panel on to an ivory, top fold card base and added a few sequins for a finishing touch. I love the subtle shades the markers give on kraft cardstock.

I hope you enjoyed today's clean and simple project using the new Woodland Whimsy Stamp Set from Gina K and Lisa Hetrick!

I have one more card to share using the amazing set so be sure to visit again!!

Laurie


Thursday, February 27, 2020

Gina K Designs February 2020 Release...Guest!

Hello, my friends and welcome back! I'm super excited (and honoured) to be a part of the Gina K Designs February release!  All the amazing new products are available now and you can find them here!!

I've used the new Woodland Whimsy Stamp Set which was illustrated by the oh-so-talented Lisa Hetrick. If you're not familiar with her stamp sets, you can find them all right here!  Her style is so unique and so beautiful!

I've created three different cards using the set and will share them over the next few weeks! Today, we'll start with this one:


 I chose one of the flower stamps as well as one solid leaf and one open leaf leaves images. Using Fog Ink from Simon Says Stamp, I stamped a random pattern onto a white panel. I decided to add some dots to fill in the pattern even more so I used the Lots of Dots Stamp Set from Simon. Once the stamping was done, I used a rectangle die to cut out the middle portion.

I have to admit, I didn't really think this plan through too well. My intention was NOT to do no-line colouring. I should have used a darker ink. But, at this point, I thought I'd see where this ended up! On the centre portion, I coloured up all the open images with alcohol markers. I did not take my time with this. As I laid the colours down, the basic shape of the flower appeared. No two are coloured the same. I actually love the way it turned!


I stamped the large sentiment right over top of the colouring using a darker shade of grey ink. I adhered the uncoloured, frame portion to a white, A2 cardbase and popped up the inner portion with some craft foam.


I added a few clear gems and called this card done!  I really hope you like it!

Thank you so much for stopping by! Be sure to visit again, as I'll have more to show you using the stamp set!

Please visit the Gina K Designs shop to check out all the fab, new products!

See you soon!

Laurie


Wednesday, May 29, 2019

Create A Smile Stamps Sketch Challenge

Welcome to another challenge for Create A Smile Stamps!  The challenge for the next two weeks is a sketch:


I'm becoming quite the fan of sketch challenges. It really gets the creative juices flowing!  I pretty much followed the sketch to a tee but you can easily change things up. Flip the sketch or use a different shape. Find your inspiration and see where it goes!


I used the largest flower from the Botanical Love Stamp Set for the focal point. I used Versamark Ink to stamp the bloom all over the centre panel which is 5.5 X 3.75 inches.  I cut the Magical Frame Die out of white cardstock and using Versafine Black Onyx Ink, I stamped the flower onto the centre part of the die.

I dusted off my pencil crayons (what we call coloured pencils, ha) and coloured up the flower.


I added the outer frame of the die onto the grey panel first (which I cut out of craft foam, as well) and place the coloured piece to the inside.  I stamped the "smile" in the Onyx Black ink as well and fussy cut around it.  I adhered exactly as the sketch suggests.


I adhered the focal panel onto a white card base, added a few white gems from Studio Katia and a bit of glitter pen to the flowers. And we can call this card, done!!

Please join us in this challenge HERE!  We love seeing what you create! You also have the chance to win a €25 gift certificate to the Create A Smile Stamps Store!!

Thank you for dropping by, see you soon!!

Laurie


Sunday, May 5, 2019

Paper Smooches Flower Challenge!!


Hello friends!!  It has been awhile since I've participated in any sort of challenge...not design team related.  Paper Smooches always has great challenges, and I used to participate in them often!  So, when I seen this month's challenge, "Flowers", I just had to play along!


I dug through my PS stash of stamps and dies and chose the Best Buds stamp set for all my flowers.  I picked the small florals in the stamp and using the Gina K Wreath Builder Template, created a 4X4 wreath.


I stamped everything in a alcohol marker safe, grey ink.  I thought I'd stray away from a bold, black ink.  I coloured all those adorable flowers with Copic markers.


My collection of Copics is fairly small, so I tend to use the same colours over and over in my projects. But I don't mind, I LOVE these colours!  I was flip flopping on what to do next and thought I'd place a cute critter in the centre of the wreath. So I used the bee and the bear images from the Courteous Cuties stamp set and used the co-ordinating dies to cut them out.  


And yes, I decided to cut the centre of my wreath out using the smallest of the Pinked Circle Dies. I found that with all that stamping, the critters got "lost". Plus, I didn't really want to cover too much of those pretty flowers!


After I die cut the circle out of the front panel, I lined everything up and cut it out of the front of the cardbase as well.  I stamped the sentiment (from Courteous Cuties) onto the positive die cut using white embossing powder and adhered it onto the inside of the card.  I added a ton of foam adhesive to the stamped panel and popped it on top.


Of course, I didn't let those critters go to waste!  I glued the bear on the inside of the card and he looks super cute there!!


I was going to add some sequins to the front, but went with a few white gel pen details instead.


I'm really happy with the way this card turned out. I'm not gonna lie, this one took me awhile :)


Thanks for stopping by today!! See you soon!

Laurie


Friday, May 3, 2019

Floral Frenzy Blog Hop with Scrap N' Stamp Canada!!

Welcome to this month's SNS Blop Hop where the theme is FLORALS!!  What better way to celebrate the arrival of spring than with lots of lovely blooms?!


I love cardmaking with floral images. They are always so much fun to colour, especially watercolour!  For my project today, I didn't use any images. I chose to combine watercolour with die cutting.  


I used the recently released Outside In Stitched Flower along with the Stitched Flower Frame Dies to create my bright and happy card!  I die cut all the pieces out of Bristol Paper and used Spiced Marmalade, Mustard Seed, Crushed Olive, Peeled Paint and Picked Raspberry Distress Inks to add some messy colour.

For the white backdrop panel, I used an embossing folder that gives a corrugated look and simply tore around the edges.


The card base is 5 X 4 inches. I wanted some of the flower and leaves to hang off the edge and still have the card fit into a standard envelope.  The card base is made out of Sticky Note cardstock (also from Lawn Fawn) and is available in the Sherbert Pack. For the sentiment, I used the Simple Wavy Banners Dies along with the Wavy Sayings Stamp Set.  I die cut a banner from the same yellow cardstock as well as white.  I stamped the sentiment on the white banner with Versafine Black Onyx Ink then snipped the ends of the yellow banner and layered them underneath.  


I just love that sweet smiley face with the rosy cheeks!  I added some Nuvo Crystal Glaze to the cheeks for a bit of shine. To finish off the card, I added a some Onyx Black Crystals.


Thank you so much for hopping along with us today!!  Remember to visit the SNS Challenge Page on Facebook where you can enter your flowery project!!

GIVEAWAY!!

Scrap N' Stamp is giving away ONE $50 gift certificate to one lucky winner!  All you have to do is leave a comment on each stop of the hop for your chance to win!!

BLOG HOP LINEUP:

Laurie (that's me!)


Thursday, April 25, 2019

Just Cards with My Creative Time!

Hello, friends!! Today, I'm sharing a card made using some brand new and not so new products from My Creative Time!

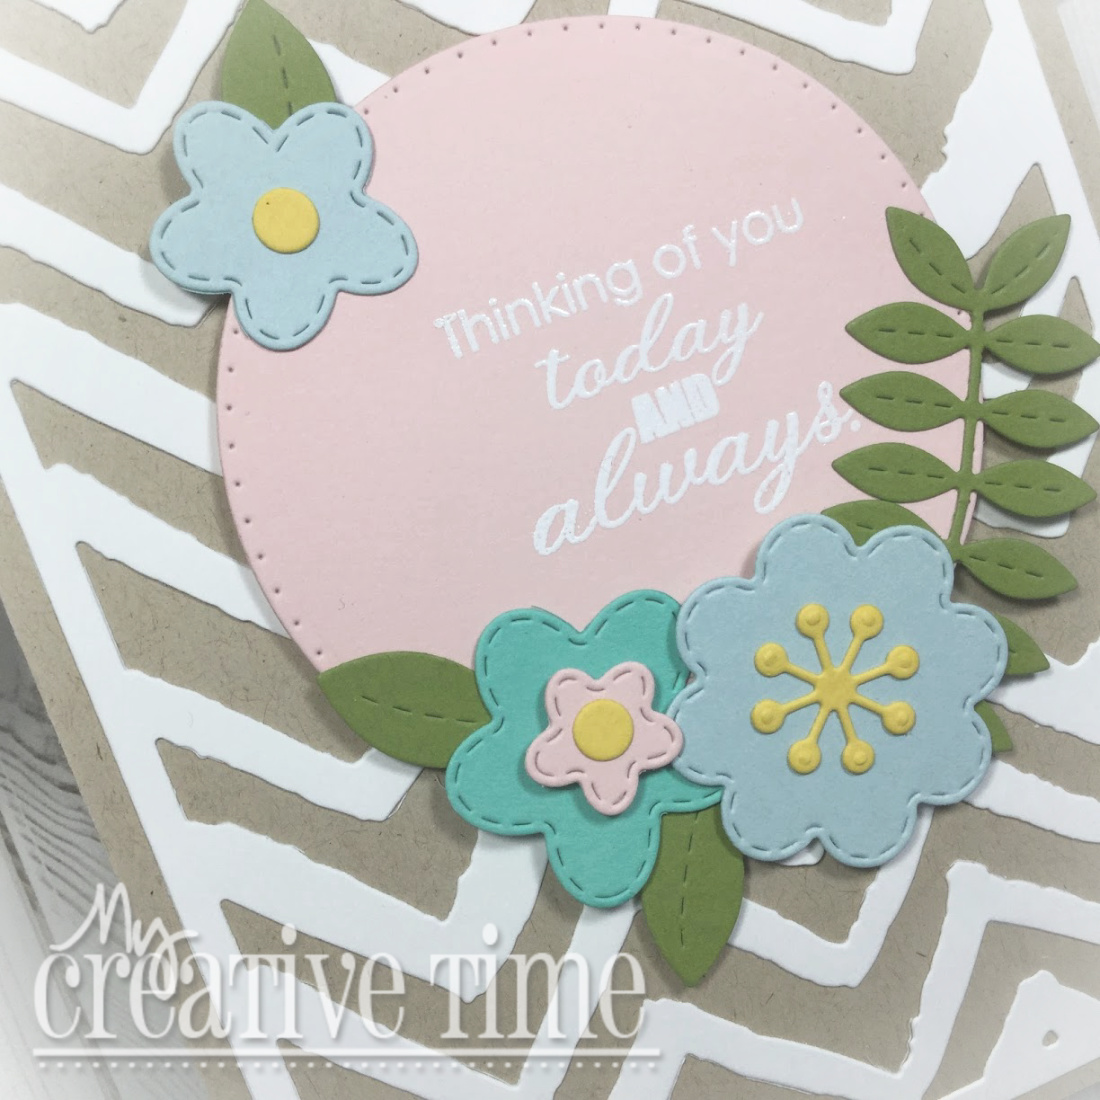
I'm absolutely addicted and in love with the new Zig Zag Background Die and just had to use it on today's project:)


I layered the white zig zag die over a kraft card base. I die cut a circle using one of the Bunch of Fun Circles Dies out of pink cardstock and to decorate that circle, I used another one of my favourite die sets, the Pretty Stitched Flowers and Leaves Dies.  


I used some green and blue shades of cardstock for the flowers and leaves.  Before adhering the die cuts, I white heat embossed a sentiment from the A Friend Like You Stamp and Die Set onto the circle.

I used a combination of foam tape and liquid glue to adhere all the elements to the card base.  I decided to skip any sparkle and shine to this card as I really liked the "flat" finish.


Thanks for stopping by today!!  See you soon!

Laurie


Friday, December 21, 2018

My Creative Time 86th Edition Release Blog Hop & Sale!!

Welcome back my crafty friends!! It's time to celebrate this fabulous little release from My Creative Time!!


Over the past couple of days, we've given you a peek at some florals and some word dies!!  For my card today, I've combined both!! As well as an awesome technique!!


I started with a piece of plain, white cardstock and white heat embossed a couple of the floral and leaf images from the new "Amazing" stamp set. I heavily applied Dusty Concord, Seedless Preserves and Chipped Sapphire Distress Oxide Inks over the top.  I then took a water brush filled with water and "painted" the inside of each flower and leaf.  This lifts some of the colour and gives it a bleached look!


I decided to add a few water splatters for a bit more interest as well as a healthy dose of shimmer pen!!  I used the "miss" and the "you" dies from the You Dies Set 2 for my sentiment.


I die cut each word 3 times and layered them together for dimension. I love that font so much!!  I mounted the panel onto a white card base and before calling it done, I added some teeny tiny hearts.  These hearts are the positive pieces from the More Scalloped Heart Dies and are the perfect size for this card!!


And that's my project for today!!  Up next is the super talented Miss Ruthie!! You can find the entire lineup here.


***FREEBIE***
Starting today... Friday, December 21, 2018 at 8am PST we will be giving away this ADORABLE new "You Dies #1". This new die set will be given to the FIRST 25 shoppers! If you are one of the 1st 25 shoppers it will automatically be added to your package at the time of packing/shipping. Once 25 shoppers come through, this stamp set will be available for purchase! So, if it's available in the store, you are not one of the 25. No exceptions will be made. This freebie is not part of the "Bundle" and will be sold separately!
***BLOG HOP GIVEAWAY***
For our blog hop giveaway, Emma is giving away a $25 gift card to the "My Creative Time" store to ONE LUCKY winner! ALL you have to do is leave a comment on each of our blogs! You are NOT required to comment on EVERY SINGLE blog, but the more you comment on, the MORE chances you have for winning! VERY IMPORTANT, PLEASE leave a way for us to contact you w/your comment just in case "YOU" are the lucky winner!
***SALE ALERT***
ALSO, DON'T FORGET our sale starts RIGHT NOW here:http://shop.my-creative-time.com/Ne...! Use the code: DEC2018 to receive a 15% discount off your entire purchase! This sale applies to "IN-STOCK" items ONLY. This sale will end on Friday, December 28th, 2018 @midnight PST.
Thank you for hopping along with us today!! See you soon!
Laurie


Wednesday, December 19, 2018

My Creative Time 86th Edition Sneak Peek Day One!!

Hello, my friends and welcome to the first day of sneak peeks for the 86th Edition release for My Creative Time!! This is a tiny release but it is SO beautiful!!


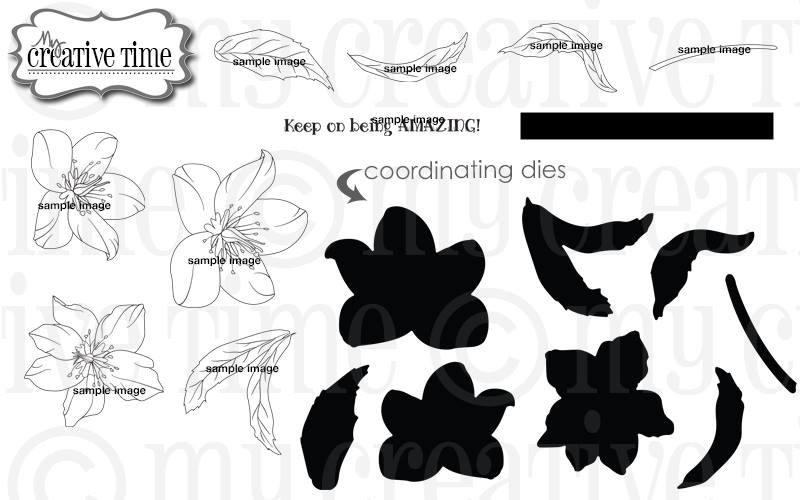
We are showing you a little look at the new "Amazing" Stamp and Die Set. This is a lovely floral image set that will be the perfect addition to your MCT stash!


This card came together so quickly!!  I stamped the large flower and leaves with Versamark Onyx Black Ink onto some watercolour paper.  I did mask the flower before stamping the leaves!  To keep things simple, I decided to do a wash of colour on the outside of the image. This really makes that flower pop!!  


I was going to leave it completely white inside the lines but in the end, I added a VERY light wash but took no time to shade or blend!!  To jazz it up a bit, I added a ton of clear sparkle pen!

The sentiment is from the stamp set as well and was also stamped in the Versafine ink.  I die cut the panel using the largest rectangle from the Scalloped Stitched Rectangular Dies and added a bit of black and white bakers twine.

The card base was made using the largest scalloped rectangle die from the same set. Because this is quite a flat card front, I used foam adhesive to adhere it to the card base.


And a few sparkling, clear sequins finish this quick and easy card!!


***Sneak Peek giveaway!***
We will be giving away the sets we are showcasing each day to ONE lucky winner! For example, the set we are showcasing on Wednesday, Emma will announce the winner of that on Thursday & the sets we are showcasing on Thursday, Emma will announce that winner on Friday on my blog! ALL you have to do is leave a comment on each of our blogs! You are NOT required to comment on EVERY SINGLE blog, but the more you comment on, the more chances you have for winning! VERY IMPORTANT, PLEASE leave a way for us to contact you w/your comment just in case "YOU" are the lucky winner! For EXTRA entries, you can spread the word about this release on Facebook, tweet about it OR even instagram it! #mycreativetime! GOOD LUCK EVERYONE & let's start spreading the word!;)
Before I go, I want to mention that there are several new Overstock and Retired items on sale!! It's totally worth a look!!
Laurie


Sunday, August 5, 2018

First Project For The Ink Road Stamps!!

Hello and welcome!! I am so excited as my first official Design Team project for The Ink Road is live!!  If you aren't familiar with Lara's stamp and dies, you must check out her shop!!  The stamps are so amazing!!  Totally unique and something you won't see anywhere else!!!


Beautiful florals, trendy stripes and a quote from "Friends" in stamp form...what is better??

Please check out The Ink Road Blog for all the details and products used on this card!  And while you're at it, check out the shop...you won't be disappointed!

Thanks for stopping in!  I'll be back soon!!

Laurie

Monday, June 18, 2018

Maple Syrup Monday with Catherine Pooler Designs

Hello friends!!  Colleen from Maple Syrup Designs and I are taking another look at Catherine Pooler Designs stamps and dies...and inks!!

I used the recently released Wonderful Wildflowers stamp set for my project today.  This stamp set has co-ordinating dies but I didn't actually use those today. I started by stamping many of the images with Versamark Ink and heat embossed them with white heat embossing powder.

I used Rose Petals, Peppermint Scrub and Skylight inks to blend some colour onto each image. The white embossing resists the ink.  I used a combination of Green Tea and Eucalyptus ink for the leaves.


I fussy cut each image out. In the end, you'll notice that I did not use the small red flower. Each flower comes with three layers: the outline, a full stamp which fills in the outline and one detail layer. To give a bit of interest to the flowers, I stamped the detail layer in the same ink I used to blend the colour.


After I fussy cut each image, I jazzed up the white card front using a light grey ink, a stencil with small polka dots and an oval mask cut out of a piece of typing paper and an oval die.


I stamped the "wonderful" word from the set in both the Peppermint Scrub and Rose Petals ink to create a soft ombre look.  I ended up fussy cutting around the word so I could pop it up off the card.


I adhered all the images with a combination of foam adhesive and liquid glue.


I added a bit of Clear Sparkle Overlay pen to the darker parts of the flowers.  It reacted a bit with the ink, but the effect is pretty.


I finished the card off with a few Sparkling Clear Sequins.


Thank you for stopping by today and I hope you enjoyed today's card!!

Until next time....stay crafty!!

Laurie


Featured Post

A Simple Thanks Card

Well, well, well. Look who decided to show up...me! It's been an awful long time yet again. I seriously thought I'd be well out of t...