Showing posts with label Distress Oxide Inks. Show all posts

Friday, October 28, 2022

Rainbow "HI" Card

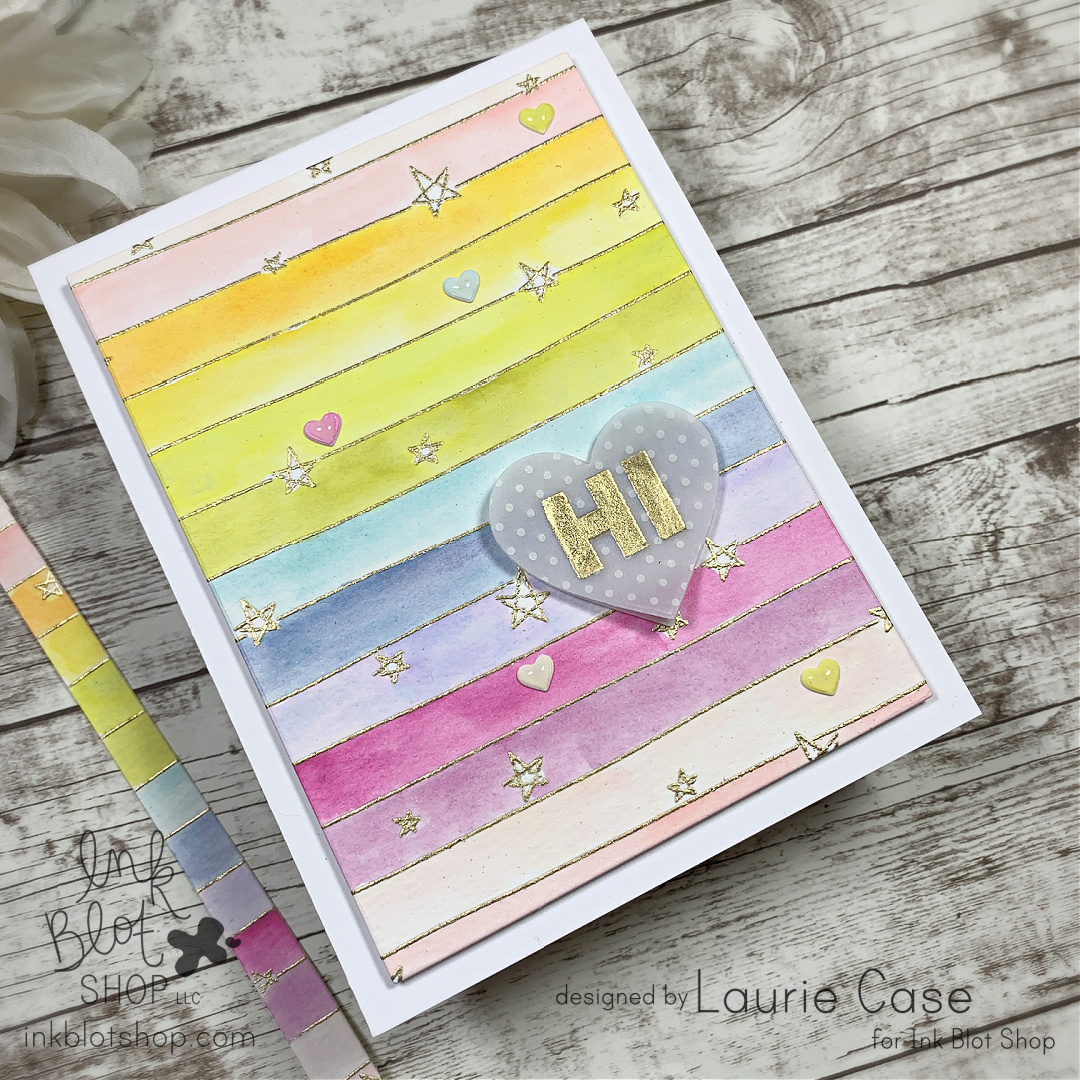
 Hi friends and welcome back! I'm sharing an easy and fun card featuring stamps from Ink Blot Shop! This card features simple watercolour and heat embossing.


I heat embossed the Stars and Stripes Background onto a piece of watercolour paper in Gold. Using a rainbow selection of Ranger Distress Oxide Inks, I quickly coloured in each stripe.


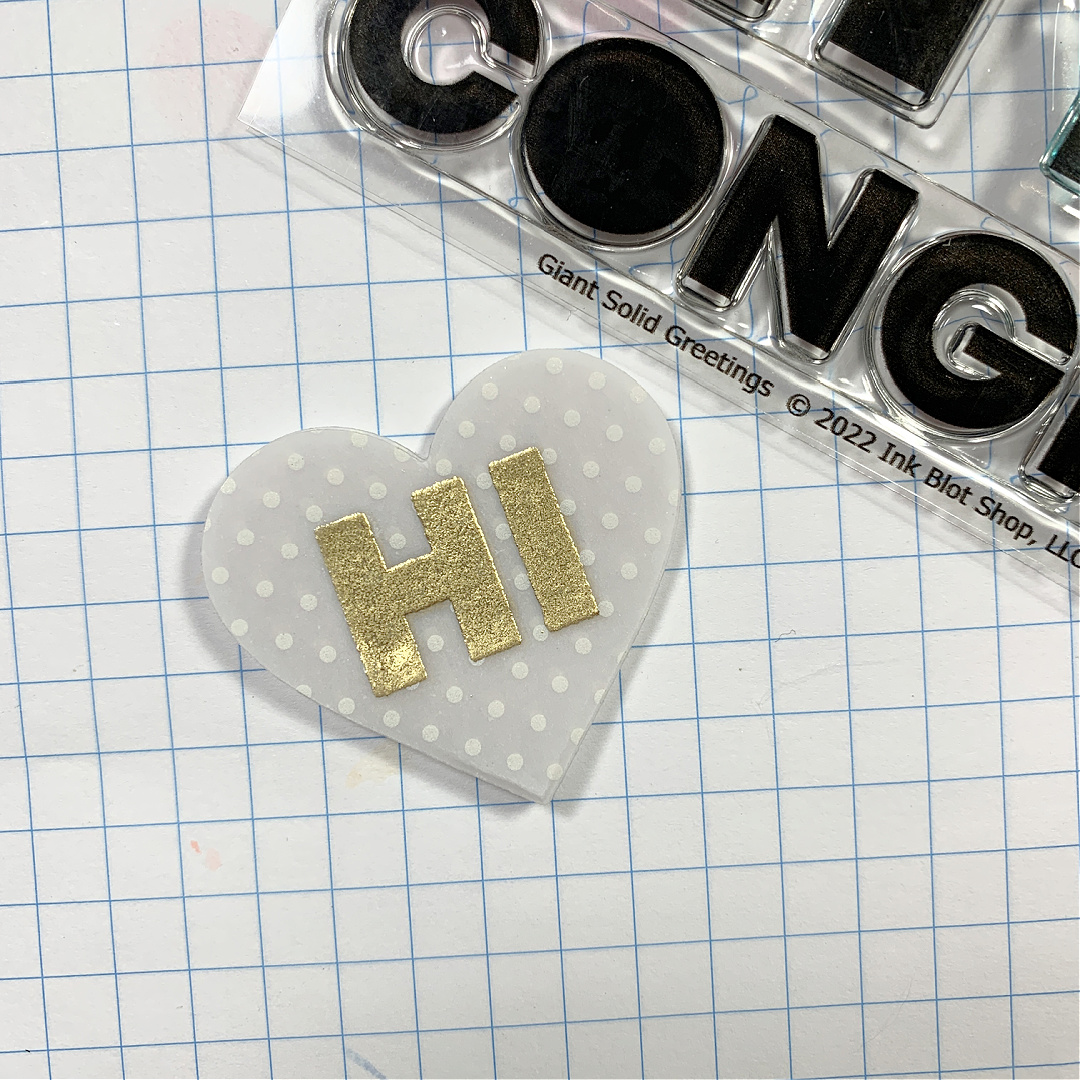
I found a piece of patterned vellum in my stash and decided to gold heat emboss the "HI" from the Giant Solid Greetings Stamp Set. 


I used a simple heart die to cut out the sentiment. I decided to use one of the leftover strips from the focal panel. I used a teeny-tiny heart die and cut out a few different colours. I added these as small embellishments.


I foam mounted the rainbow panel onto an A2 card base, foam mounted the vellum sentiment and used liquid glue on the tiny, embellishment hearts.

And the card is done!


And I still have the pretty little rainbow strip left over!

Thanks for dropping by! Have a great day!

Laurie


Friday, October 4, 2019

Let's Get (Di)Stressed Blog Hop with Scrap N Stamp Canada!!

Welcome back, my friends!  It's time for our monthly blog hop for the Scrap N Stamp Canada Store!  This is a fun one! We are "Di-stressing" with Distress Oxide Inks!!


I love my original Distress Inks but the Oxides with their pigment ink properties can be a whole lot more fun sometimes! I've tried a lot of techniques with them but I know there are tons more. Today, I'm going to share my favourite with you and that's using Distress Micro Glaze and Glossy Cardstock to create some amazing backgrounds!

I used Seedless Preserves, Chipped Sapphire and Shaded Lilac Distress Oxides, watered down.  You can apply the inks any way you'd like. I did one panel using a paint brush, the other with the smooshing technique.


The one on the left is with the paintbrush, the right one is smooshed. The key here is to work in layers, especially when smooshing.  I applied one colour, heat set, applied another colour and so on.  After each panel was dry, I flicked some clean water to create some droplet effects.

Now, this is where the magic happens. While the panels are beautiful, they appear dull and chalky.  the Distress Micro Glaze magically brightens things up making the colours super vibrant!


I use a regular blending tool and foam to apply.  It does not take much!!! Just a light dab into the container and there's enough for both panels!!


Above the line is where the glaze was applied. Just look at how that purple pops!! Isn't it fabulous?!  What's also great about the Micro Glaze is that is waterproofs your project. So anything underneath won't run, bleed or get reactivated.  After applying the product, simply wipe any excess off with a paper towel.

I used the smooshed panel as I thought it looked galaxy-like.  So, I added some white, acrylic paint splatters to enhance that effect. And to make it even more sky looking, I used a bunch of stars and constellations from the Upon A Star Stamp Set and co-ordinating dies from Lawn Fawn (sorry, this set is not in stock at the moment!).


I used Versamark Ink along with Silver Embossing Powder. The Glossy cardstock embosses beautifully. Just make note that it is a slippery surface so your stamp will want to slide around!

I layered the panel onto a shaped card base made from die cutting two of the largest Fancy Scalloped Rectangle Dies (also, Lawn Fawn), scoring one panel approximately 1/2 inch from the top, applying adhesive and adhering the two panels together.


There is so much detail in all that ink plus the white paint splatters really stand out!


And to keep the sparkle going, I added a few clear sequins!  I hope you enjoyed reading about my favourite Oxide technique!  

Remember, you can show us your favourite technique over on the SNS Facebook Challenge Page! We love to see what you create!

The Scrap N Stamp Store is giving away one $50 gift certificate to one lucky commenter at each stop of the hop so make sure to leave some love!! Also, all things Oxide, including the new sprays will be 10% off with the code OXIDE10.. ends October 6th!! Fine Print:  Not valid with any other coupon, sale or promotion. Valid on in stock items only.

Here's the complete hop lineup:

Laurie (me!!)
Nancy E
Chala

Thanks for joining us this time around! Have fun hopping!

Laurie

Wednesday, March 13, 2019

My Creative Time 89th Edition Sneak Peek Day Two!!

Welcome, it's Sneak Peek Day Two for My Creative Time!!  You won't be disappointed with what's being peeked today!!


We are showcasing the brand new Amazing Things Stamp Set along with the new Butterfly Dies!!  These go together perfectly!  And you are going to LOVE the sentiments in this set!


I used the Floating Cloud Dies that we took a look at yesterday.  I love how these nestle into corners!!  This card is a bit of an unusual size due to a cutting error but I think it's actually quite nice. It measures 6 X 3 inches.

I used Faded Jeans Distress Oxide Ink for the panel along with some water droplets.  The sentiment is gorgeous and was white heat embossed after the panel was dry.


Now, let's talk about those butterflies!  I love the stitching detail and how the inner portion of the wings are able to flip up.  I should mention that there is a large butterfly die in this set that I didn't use!!


This card came together quickly as it took no time at all to do the colouring with Distress Oxides Inks and a little bit of die cutting!!  But the result is so pretty!!

I hope you are enjoying the peeks so far!! Tomorrow we will have one more peek and then Friday is the release Blog Hop!!

Thank you for stopping in!! See you tomorrow!

Laurie

**Sneak Peek Giveaway**

We will be giving the sets we are showcasing each day to ONE lucky winner!! For example, the set we are showcasing on Wednesday, Emma will announce the winner of that on Thursday and the set(s) we are showcasing on Thursday, Emma will announce the winner on the My Creative Blog!  All you have to do is leave a comment on each of our blogs!  You are not required to leave a comment on each blog but the more you comment on the more chances you have of winning! VERY IMPORTANT: Please leave a way for us to contact you just in case you are the winner!! For extra entries, you can Facebook, Instagram or Tweet it using the hashtag #mycreativetime.  GOOD LUCK!


Friday, December 21, 2018

My Creative Time 86th Edition Release Blog Hop & Sale!!

Welcome back my crafty friends!! It's time to celebrate this fabulous little release from My Creative Time!!


Over the past couple of days, we've given you a peek at some florals and some word dies!!  For my card today, I've combined both!! As well as an awesome technique!!


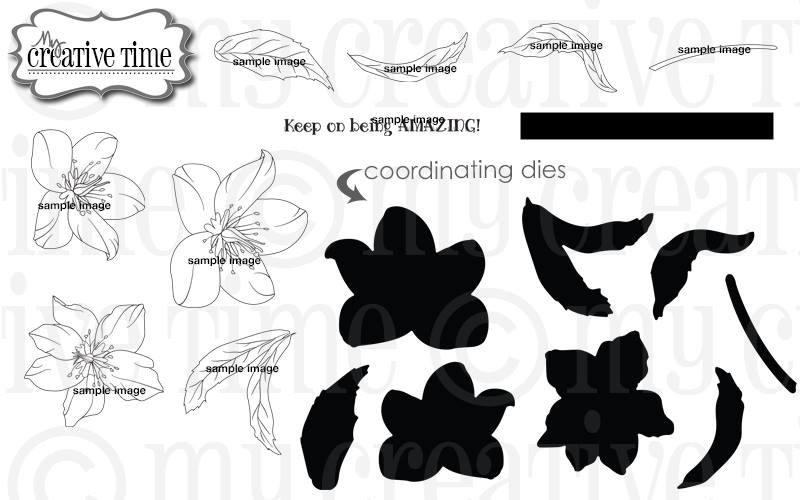
I started with a piece of plain, white cardstock and white heat embossed a couple of the floral and leaf images from the new "Amazing" stamp set. I heavily applied Dusty Concord, Seedless Preserves and Chipped Sapphire Distress Oxide Inks over the top.  I then took a water brush filled with water and "painted" the inside of each flower and leaf.  This lifts some of the colour and gives it a bleached look!


I decided to add a few water splatters for a bit more interest as well as a healthy dose of shimmer pen!!  I used the "miss" and the "you" dies from the You Dies Set 2 for my sentiment.


I die cut each word 3 times and layered them together for dimension. I love that font so much!!  I mounted the panel onto a white card base and before calling it done, I added some teeny tiny hearts.  These hearts are the positive pieces from the More Scalloped Heart Dies and are the perfect size for this card!!


And that's my project for today!!  Up next is the super talented Miss Ruthie!! You can find the entire lineup here.


***FREEBIE***
Starting today... Friday, December 21, 2018 at 8am PST we will be giving away this ADORABLE new "You Dies #1". This new die set will be given to the FIRST 25 shoppers! If you are one of the 1st 25 shoppers it will automatically be added to your package at the time of packing/shipping. Once 25 shoppers come through, this stamp set will be available for purchase! So, if it's available in the store, you are not one of the 25. No exceptions will be made. This freebie is not part of the "Bundle" and will be sold separately!
***BLOG HOP GIVEAWAY***
For our blog hop giveaway, Emma is giving away a $25 gift card to the "My Creative Time" store to ONE LUCKY winner! ALL you have to do is leave a comment on each of our blogs! You are NOT required to comment on EVERY SINGLE blog, but the more you comment on, the MORE chances you have for winning! VERY IMPORTANT, PLEASE leave a way for us to contact you w/your comment just in case "YOU" are the lucky winner!
***SALE ALERT***
ALSO, DON'T FORGET our sale starts RIGHT NOW here:http://shop.my-creative-time.com/Ne...! Use the code: DEC2018 to receive a 15% discount off your entire purchase! This sale applies to "IN-STOCK" items ONLY. This sale will end on Friday, December 28th, 2018 @midnight PST.
Thank you for hopping along with us today!! See you soon!
Laurie


Sunday, September 23, 2018

Scrap "n Stamp Canada "LEAVES" Blog Hop!!!

The design team for Scrap 'N Stamp Canada has come together for another fabulous blog hop!! You likely arrived from  KAREN. If at any point you get lost along the way, you can find the entire list HERE!     Our theme this time around is "Leaves" and how fitting because where I live the trees are beautiful right now!! Unfortunately, these colours don't stay for long and then it's onto at least 6 months of the white stuff...yuck.  But for now, let's celebrate those gorgeous leaves!!


I made three cards for you today. Maybe a little overboard but once I started creating with the Cover-A-Card Fall Leaves Cling Stamp.  This stamp is fabulous for techniques!!

The first technique was to stamp with watercolours. In this case, Distress Oxide Inks.  I literally just slapped on some watered down ink onto portions of the stamp and pressed it into some Mixed Media Paper.  Tip:  the Misti or any other stamp positioned tool is a must for this!


I started by trying to cover one entire leaf at a time but as you can see, the ink just pools. I ended up applying the ink a couple of times and pressing down.  


As you can see, I used non-traditional colours. I chose Peacock Feathers, Worn Lipstick, Picked Raspberry and Twisted Citron Distress Oxides. After the stamping was done, I trimmed this panel down but before adhering it to a card base, I stamped the entire background stamp onto the base using a light grey ink.


The large "thanks" word die is from Birch Press Designs and is called the Big Thanks-Sugar Script Die. It's awesome!!


A few clear sequins and shimmer pen finished off card #1!!

For my second card, I again used Distress Oxide Inks but in Fall colours. I used Gathered Twigs, Crushed Olive, Fossilized Amber and Fired Brick. This time I used sponge daubers to apply the ink.  I love using sponge daubers to ink up stamps, it's so easy to get many colours on one image and Oxides blend beautifully!!


Now this is where the fun comes in!!  I used Glossy Cardstock from Ranger/Tim Holtz to do the stamping because I knew I wanted to use the Distress Micro Glaze over top.  Once the Oxide Inks are dry, take a blending tool and sponge and rub a SMALL amount of the glaze over top.  The colours brighten and pop off the paper!!  This only works on this particular paper!!


It is just gorgeous in real life!! I trimmed this panel down with a Lawn Fawn Stitched Rectangle die and mounted it onto a brown panel cut with a Fancy Scalloped Rectangle Die (also from Lawn Fawn).  Then everything was mounted onto an ivory card base.


I used the same sentiment die but also added a nest of gold thread behind it.


I think this card turned out beautifully. What do you think??  Okay, now onto my last card and I know there is a name for this technique, I just don't know it!!

I used Tim Holtz Distress Watercolour Cardstock for this one as I knew I was going to use A LOT of water!  I took out my Ken Oliver Colourburst to play with. I have the Caribbean Brights Set.


I used only the three greens. Once my panel was good and dry, I added a lot of anti-static powder to it and clear embossed the entire background stamp. 


It's difficult but you may be able to see some shine in the embossed areas.  I then took Black Soot Distress Ink and put a heavy layer over the entire panel. This gives a beautiful effect.  The panel is black only where there is no embossing powder. When you are done, all you see is the leaves with that gorgeous colour!


To finish this card off, I simply cut down the stamped panel and foam mounted it to a white card base.  I used the same "Thanks" die which was also mounted with foam adhesive.


I think this may be my favourite one of the three!


Three very different cards using the same stamp and die, I love when that happens!! Which one is your favourite? I'd love to know!!


Up next on the hop is the crazy talented JESSICA!!

But don't forget about the fun stuff....

Scrap 'N Stamp is generously giving away THREE $25 gift certificates to the SNS store!! All you have to do is leave a comment on each stop of the hop. You have until September 30th to comment and winners will be announced on the SNS Blog on October 2nd, 2018. Good Luck!!

Have a great day!

Laurie


Tuesday, September 11, 2018

Tag It Tuesday with My Creative Time!

Hello friends and welcome to another "Tag It Tuesday" featuring My Creative Time.  I love making and decorating tags.  They're typically a smaller size so they are much easier to decorate.

I used the Chunky Stitched Tag Dies, which is one of my favourite sets and is back in stock!!  While I did make a tag, I used it as a focal point on a card.

I used Strathmore Mixed  Media paper for my project today.  I love this paper because it's bright white, smooth and can handle water.  I die cut a 4 X 4 inches panel and did a simple watercolour wash using Seedless Preserves Distress Oxide Ink.


I embossed the tag die with an embossing folder that has tiny flowers on it.  I thought it would be fun to add a bit of colour to each embossed portion.  I used the same purple ink and added some Peacock Feathers Distress Oxide Ink.  I am definitely going to try this with other embossing folders!!!

I added the tag onto the watercolored panel with foam tape. I used the Big Hello Die for the sentiment which is just a beautiful die!  The small "friend" comes from the Fun Notes Stamp and Die Set.  


It needed a bit more of the Peacock Feathers Ink so I die cut a small butterfly with a die from the Pretty Butterflies and Dragonfly Die Set and loosely watercolored it.


I added the focal panel to a 4.25 X 4.25 inch grey card base and also a bit of sparkle to the large "hello". 

There are many ways to use tags or tag die and this is just one of the way!!  I think this tag would be beautiful on its own.

Thank you so much for visiting, I really appreciate it!!

See you soon...

Laurie


Tuesday, August 21, 2018

Dimensional Window Card

Hi friends and welcome to another post featuring My Creative Time products!  I have very dimension window card to share with you. This is really easy to make and I hope my photos will help if you want to recreate this card.

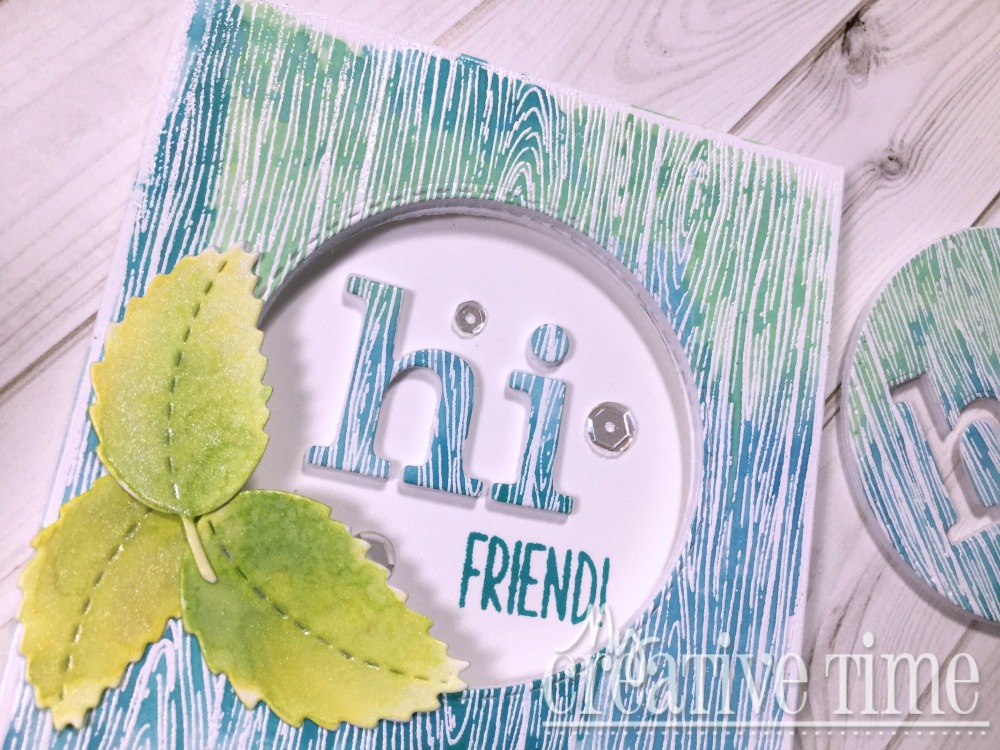
I started by white heat embossing the Grainy Wood Background Stamp onto some Bristol paper. I decided to do a bit of loose watercolour but I didn't want the texture of a watercolour paper.


I chose three colours of Distress Oxide Inks: Broken China, Peacock Feathers and Cracked Pistachio. I did a wet on dry technique because the Bristol paper can only handle so much water. I basically just slapped some colour down with no rhyme or reason, haha!


I trimmed around the stamped image. The measurements are are just shy of 3.25inches and 5.25 inches. This will be the size of my finished card, as well!  Before cutting the "window" in this panel, I adhered some craft foam to the back. By doing this step first, you can be sure all the openings will line up. I chose one of the circle dies from the Bunch of Fun Circles Die Set.


It was no problem for my Big Shot to cut this. Next, it's time to cut the window in the card base itself.      I simply lined up the painted panel to the card base and traced around the cut out circle. REMEMBER: I cut the card base to fit the background panel!


Make sure your card base is open when you die cut this circle :)!  Now all you have to do is adhere the pretty front panel to the base!

For the sentiment, I used the Lower Case Fun Dies dies to spell out "hi". I cut these out of the positive we had left over from the watercolored panel. This already had craft foam on the back so that step is done!!


I glued the letters on the inside of the card so they were seen through the circle window. The dimension of everything looks awesome!!


The word "friend" comes from the Light the Candles Stamp and Die Set and was stamped in the Peacock Feathers Distress Oxide Ink.  Because my placement of the sentiment was slightly "off", I die cut all three leaves from the Stitched Leaves Dies and coloured them Crushed Olive and Mowed Lawn Distress Oxide Inks. I also added a spritz of shimmer spray to them (mixture of Perfect Pearls and water).


I LOVE all the dimension on this card!!


Another great part of this design is that I have the positive circle with the negative space of the letters for another card!!!  

Thank you so much for dropping by today, much appreciated!!

Stay Crafty and See You Soon!!!

Laurie


Featured Post

A Simple Thanks Card

Well, well, well. Look who decided to show up...me! It's been an awful long time yet again. I seriously thought I'd be well out of t...