
I started by white heat embossing the Grainy Wood Background Stamp onto some Bristol paper. I decided to do a bit of loose watercolour but I didn't want the texture of a watercolour paper.

I chose three colours of Distress Oxide Inks: Broken China, Peacock Feathers and Cracked Pistachio. I did a wet on dry technique because the Bristol paper can only handle so much water. I basically just slapped some colour down with no rhyme or reason, haha!

I trimmed around the stamped image. The measurements are are just shy of 3.25inches and 5.25 inches. This will be the size of my finished card, as well! Before cutting the "window" in this panel, I adhered some craft foam to the back. By doing this step first, you can be sure all the openings will line up. I chose one of the circle dies from the Bunch of Fun Circles Die Set.


It was no problem for my Big Shot to cut this. Next, it's time to cut the window in the card base itself. I simply lined up the painted panel to the card base and traced around the cut out circle. REMEMBER: I cut the card base to fit the background panel!

Make sure your card base is open when you die cut this circle :)! Now all you have to do is adhere the pretty front panel to the base!
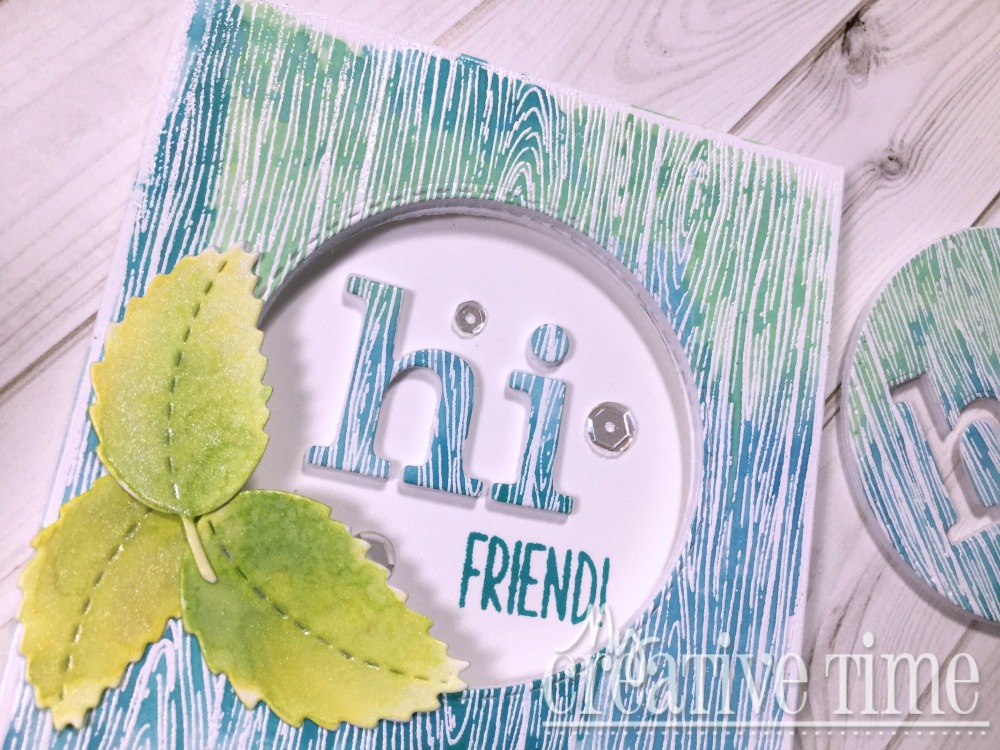
For the sentiment, I used the Lower Case Fun Dies dies to spell out "hi". I cut these out of the positive we had left over from the watercolored panel. This already had craft foam on the back so that step is done!!

I glued the letters on the inside of the card so they were seen through the circle window. The dimension of everything looks awesome!!

The word "friend" comes from the Light the Candles Stamp and Die Set and was stamped in the Peacock Feathers Distress Oxide Ink. Because my placement of the sentiment was slightly "off", I die cut all three leaves from the Stitched Leaves Dies and coloured them Crushed Olive and Mowed Lawn Distress Oxide Inks. I also added a spritz of shimmer spray to them (mixture of Perfect Pearls and water).
I LOVE all the dimension on this card!!

Another great part of this design is that I have the positive circle with the negative space of the letters for another card!!!
Thank you so much for dropping by today, much appreciated!!
Stay Crafty and See You Soon!!!
Laurie


OMG Miss Kendra....WOW What a Gorgeous Card!! Your Distress Ink Technique sure make for a Magnificent look...and your brilliant ideas using Miss Emma's goodies is Ever so clever and a whole lot creative ..you total look is Spectacular!! You so did a Super Outstanding Creative job!! YOU so ROCK!!
ReplyDeleteGreat tutorial and idea for a beautiful friend card!
ReplyDeletequilt 4 fun 2 at hot mail dot com