Showing posts with label coloured pencil. Show all posts

Tuesday, November 22, 2022

YNS Challenge #192

 Hello and welcome!  To get my creative mojo kick started, I perused the internet for some inspiration and a fun challenge. Your Next Stamp was the first company challenge I participated in when I started card making!

The theme of this challenge is "Thank You". I dug through my YNS stash and found one of the cutest sets called Scarf Weather. While I'm typing this post, I just discovered that this set has been discontinued...so sorry about that!

I used my pencil crayons to colour the sweet images, used the coordinating dies to cut everything out and came up with a simple scene.

I used a leaf embossing folder from Taylored Expressions to create some interest on the background panel. Again, apparently discontinued! Can you tell I've been shopping my stash lately, haha?!


This layout is a bit different for me as I usually like things to be centred. I used foam adhesive to pop everything up. And I usually always add white gel pen details!


Thank you very much for stopping in! If you're looking for a fun challenge, check this one out! But hurry, it's almost over!!

Until next time!

Laurie

Thursday, September 3, 2020

Dusting Off the Coloured Pencils ft. Create a Smile Stamps!

 Welcome back! I decided to dust of the pencil crayons and colour some gorgeous new images from Create A Smile Stamps!

Pencil crayons (that's what we call them here in Canada) is a tricky medium for me. I love the look but I'm not a fan of the amount of time it takes. I've watched probably hundreds of tutorials and they all say the same thing...light pressure and build up the colour. Well, I didn't do it that way. I laid it down heavy and in one layer. 


This floral images is from the Mallow Blossoms Set. You can really see here how thickly I applied the colour. I'm also going to point out that I thought the small, green piece was a leaf. In fact, it's a part of the blossom that I THOUGHT was a leaf. I'm clueless when it comes to flowers so please forgive me, haha!


To put this card together, I used the Petals Stencil on the card front with a light, pink ink. I used the second largest Scalloped Rectangle die to create a panel. I carried the stencilling to the inside of the circle. To create the kraft circle, I used one of the Postage Edge Circle Dies. I placed a smaller, plain circle die on the inside to create this ring.

I adhered the ring to the white panel and foam mounted the flowers. The sentiment (from the Mallow Blossoms) was stamped onto one of the Useful Banners Dies and was also popped up. I added a few sequins for a bit of sparkle.

Thanks for dropping in! See you soon!

Laurie


Wednesday, May 29, 2019

Create A Smile Stamps Sketch Challenge

Welcome to another challenge for Create A Smile Stamps!  The challenge for the next two weeks is a sketch:


I'm becoming quite the fan of sketch challenges. It really gets the creative juices flowing!  I pretty much followed the sketch to a tee but you can easily change things up. Flip the sketch or use a different shape. Find your inspiration and see where it goes!


I used the largest flower from the Botanical Love Stamp Set for the focal point. I used Versamark Ink to stamp the bloom all over the centre panel which is 5.5 X 3.75 inches.  I cut the Magical Frame Die out of white cardstock and using Versafine Black Onyx Ink, I stamped the flower onto the centre part of the die.

I dusted off my pencil crayons (what we call coloured pencils, ha) and coloured up the flower.


I added the outer frame of the die onto the grey panel first (which I cut out of craft foam, as well) and place the coloured piece to the inside.  I stamped the "smile" in the Onyx Black ink as well and fussy cut around it.  I adhered exactly as the sketch suggests.


I adhered the focal panel onto a white card base, added a few white gems from Studio Katia and a bit of glitter pen to the flowers. And we can call this card, done!!

Please join us in this challenge HERE!  We love seeing what you create! You also have the chance to win a €25 gift certificate to the Create A Smile Stamps Store!!

Thank you for dropping by, see you soon!!

Laurie


Monday, June 4, 2018

Maple Syrup Monday featuring Catherine Pooler Designs!

Hello and happy Monday!! Well, okay, are Mondays ever happy?? I have a card that will maybe cure the Monday blues...maybe.

For this month's collaboration with Colleen from Maple Syrup Designs, we decided to feature products from Catherine Pooler!! Colleen carries A LOT of this line including the all the incredible inks!!

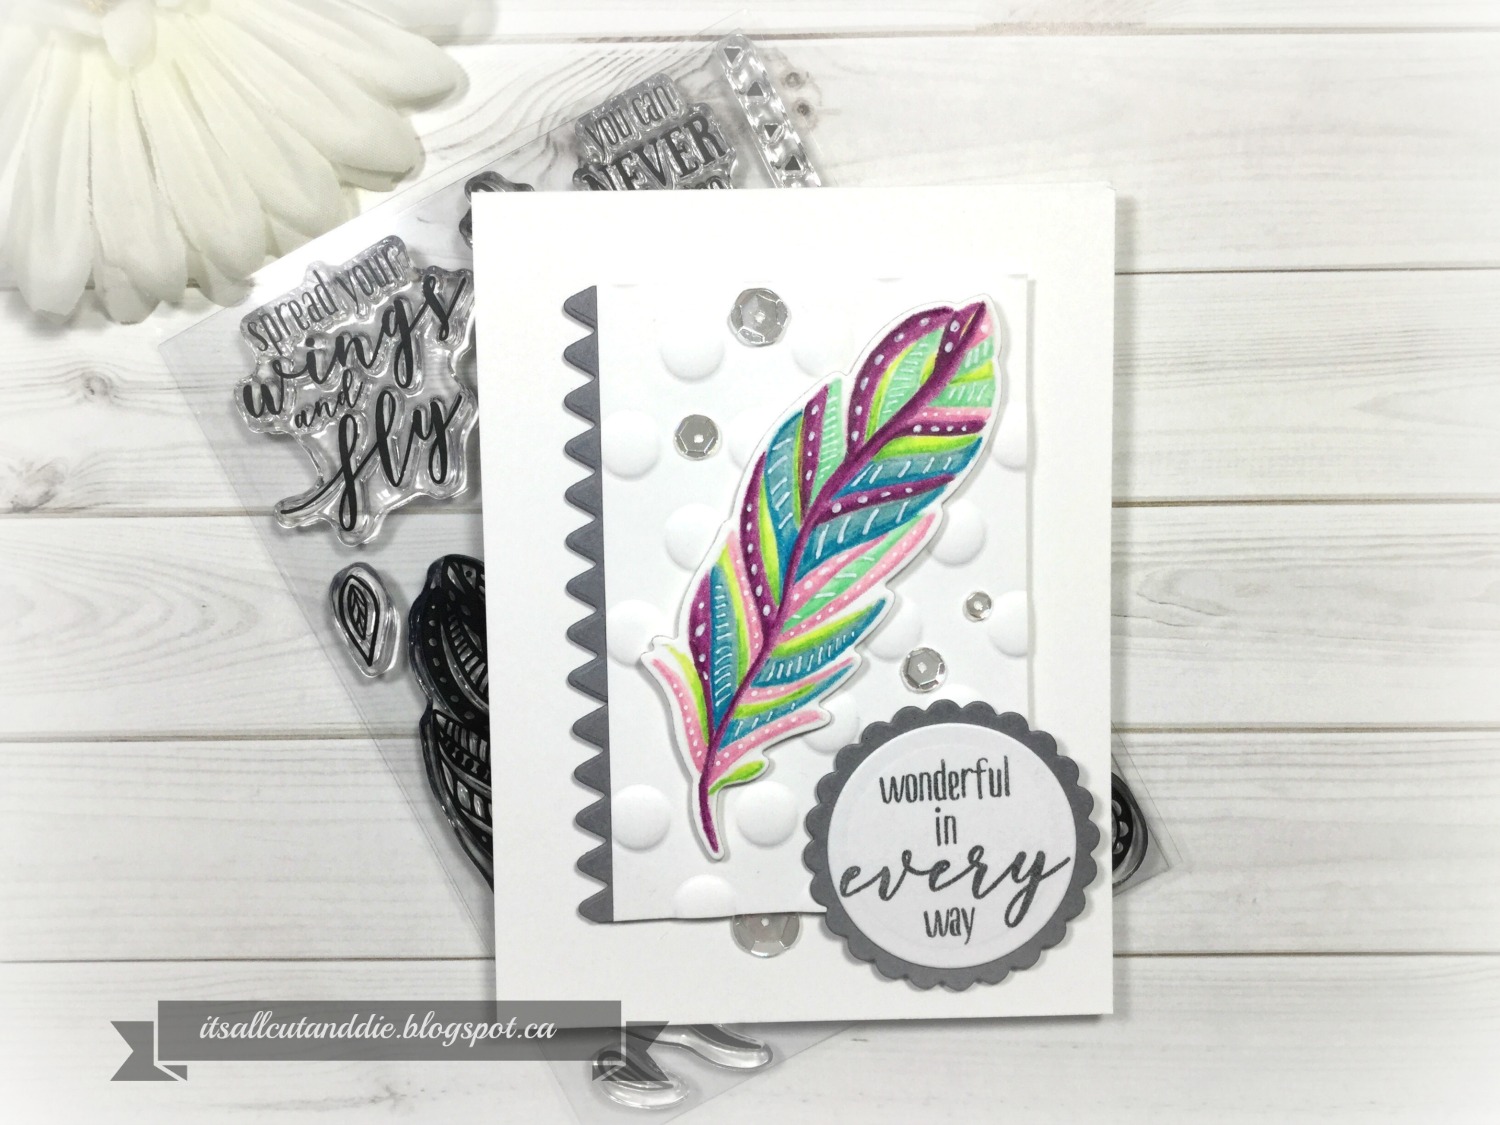
I thought I would tie this post in with the 30 Day Colouring Challenge hosted by Kathy Racoosin! If you've never heard of this challenge, please read about it HERE. If you follow me on Instagram, you may have seen this photo:


I decided to practice a bit of no-line colouring using this gorgeous feather from the Zen Feather Stamp Set and coloured pencils, or pencil crayons as we like to call them here in Canada:)  No-line colouring is not easy for me and this stamp is quite detailed so to make it easier, I ignored all the details while colouring and just used a white gel pen to add them back later!!

I also coloured the flower and tiny leaf image but did not like the way it turned out.  I admit that I rushed through it...I didn't end up using this on the final project.


I wanted to show you something that was kind of cool. Sometimes I will spray my images with a mixture of Perfect Pearls (in the Perfect Pearls shade) and water to give a real pretty sparkle.  I've never done it with pencils before. Since I knew I wasn't going to use this flower, I experimented with it.


Because I used wax based pencils, the water beaded up on the surface and I had to use my heat tool to dry it.  But it gave a very cool texture as well as shine!  I didn't do that to my feather but definitely want to explore that further!

I kept the card simple as I wanted the focus to be on the coloured feather.  


I used the Zen Feather Co-ordinating Dies to cut out the feather and also the zig zag border on the side of the embossed panel.  I totally went "old school" with the sentiment! I used Lawn Fawn Circle Dies and Scalloped Circle dies for that!!


A few clear sequins were enough to give a little sparkle to this card!!


I hope you like this clean and simple Feather Card today!!  And let me know if you are participating in the 30 Day Colouring Challenge!!

Remember to check out Colleen's blog for more Catherine Pooler goodness!!

Thank you so much for stopping by!!!!

Until next time...stay crafty!

Laurie


Monday, January 8, 2018

Made in Minutes with My Creative Time

Good morning, friends!!  Today, I'm sharing a not one, but TWO cards!!  This post shows just how easy it is to create multiple cards, quickly! Or one card, even quicker :)

I started by coming up with a simple layout that could be stamped at once. The Misti comes in super handy for this!


The floral image is from the sweet stamp and die set,  Hey There Little Lady.  The sentiment is from the Create Stamp and Die Set.  If you are new to My Creative Time products, almost every stamp set comes with co-ordinating dies!!!!

I stamped one panel with Memento Tuxedo Black Ink and the other with Versafine Black Onyx ink.


I used Copic markers and coloured pencils for some super simple colouring!!  These are meant to be quick, right??  When it came to putting the cards together, I did assembly line style.  I stamped both, I coloured both, I trimmed both and adhered everything at the same time.


To add a little more interest, I trimmed down the right side about 1/2 inch.  This actually creates a bit of depth and dimension without actually adding foam adhesive!!  Next, now this part did take the longest, was the die cutting of the word die.  It didn't actually have to take this long but instead of using foam adhesive to mount the "create", I cut the die repeatedly out of white cardstock to add the dimension.


I got all my elements together and adhered everything at once!


These two cards took about half an hour!! Here's a look at the completed projects!!


Thank you so, so much for stopping by today! I appreciate your visits more than you know!

Have a great day!!

Laurie


Sunday, September 17, 2017

Starting with "P"!

Hi everyone!!  Last week I picked a new letter for my "Making Use of My Stamps" series.  The letter picked was P.  I knew I had a lot of Paper Smooches stamps and dies but as I was going through my stash, I realized that I also have a lot of Papertrey Ink!!  I don't keep my PTI stamps in with the general population so I totally forgot about them...bad me!!  In this portion of the series, you'll also see some Pretty Pink Posh, Poppy Stamps and Penny Black.

I posted this card on Instagram yesterday for the 30 Day Colour Challenge hosted by the beautiful Kathy Racoosin!  It features the Forest Whimsy Stamp Set from Paper Smooches.  I haven't used my pencil crayons in quite some time so that was my medium of choice.  I have the Lyra Rembrandt Polycolor pencils and I love them!!


I also used the Leaves 1 Dies and the Pinked Circle Dies on this card.

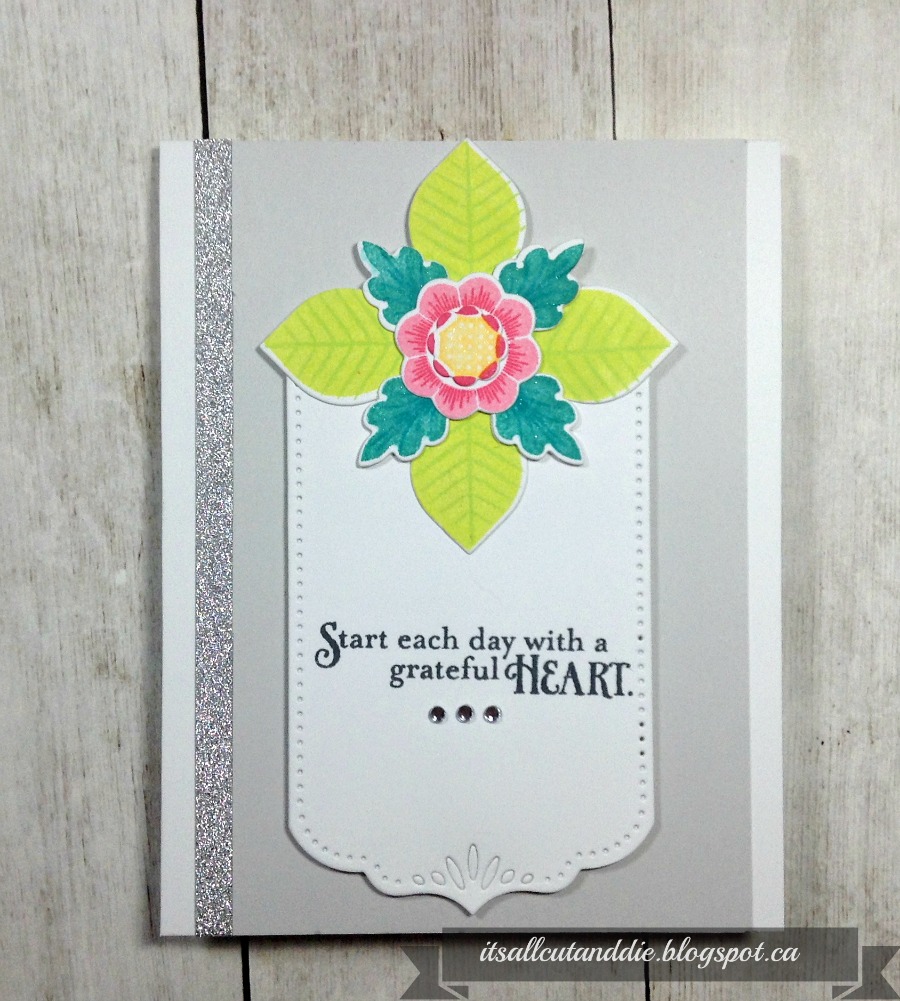
The next two cards feature PaperTrey Ink.  I love PTI products but have not ordered from there for a long time due to shipping costs :(  This first card uses the Lovely Layers Stamp Set and the Co-ordinating Dies.  These dies are solid, which I'm not really a fan of (only because my stamping is ALWAYS off!).  I used all Catherine Pooler Inks for the stamping, love these inks for so many reasons, but that's another post!


Because the colours are so vibrant, I left the card fairly neutral.  I also used the Basic Bookmark 3 Die.   As an afterthought, I added a strip of sparkly washi tape to one side, I felt like it needed some shine!


And my final card for today uses one of my all time faves from PTI,  the Be Happy Stamp Set. Unfortunately, I could not find this set on the PTI website.  The shop still carries the Dies, which can totally be used on their own!


Again, I used CP Inks for the stamping.  This card is so happy, love the way it turned out!


I think I'm really going to enjoy the letter P!!  From whimsical and cute to classy and elegant, this is going to be fun!!


Thanks for stopping by today, I really appreciate it!

Hugs!

Laurie


Tuesday, July 11, 2017

Christmas in July with Studio Katia!!


HO, HO, HO!!!  This week at Studio Katia we've been celebrating Christmas early!!  On one hand, it's nice to mix things up in the middle of the year by taking out your winter stamps and having a play.  On the other hand,  it's too soon to think about snow and winter (we get about 6-7 months of winter here, so I plan on enjoying summer while I can!).

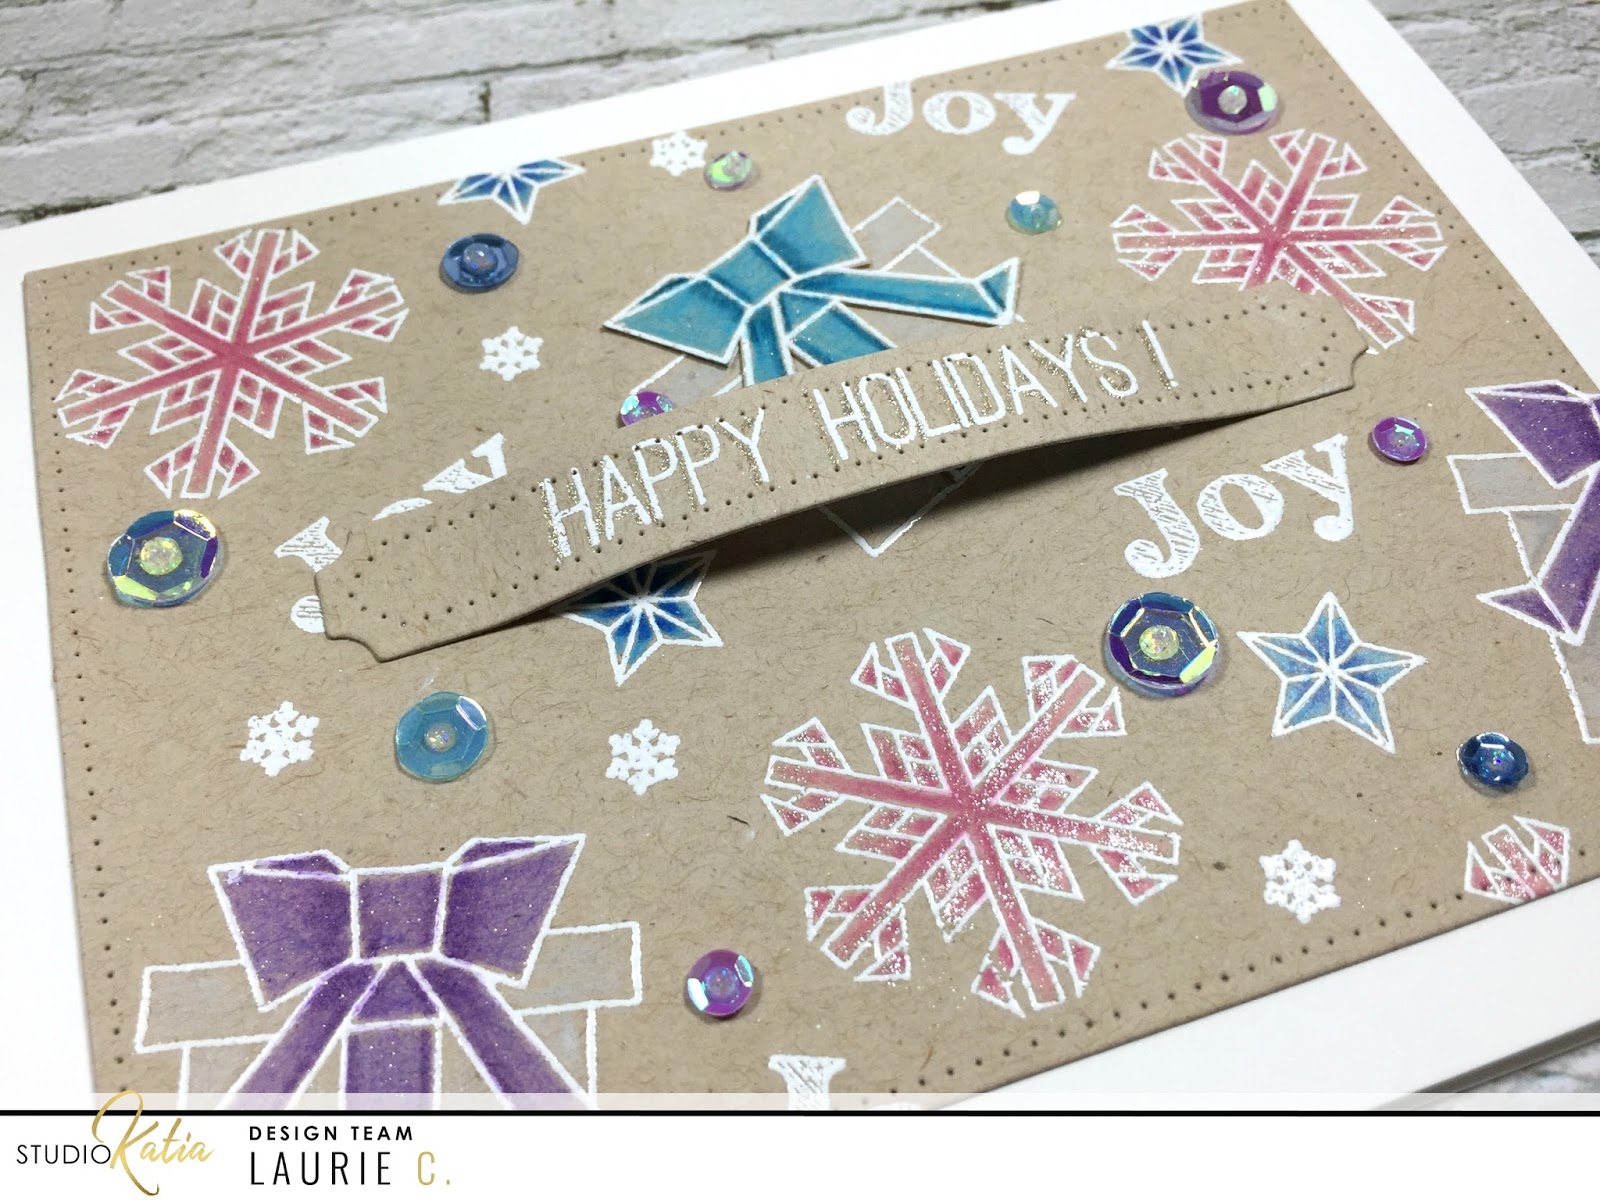
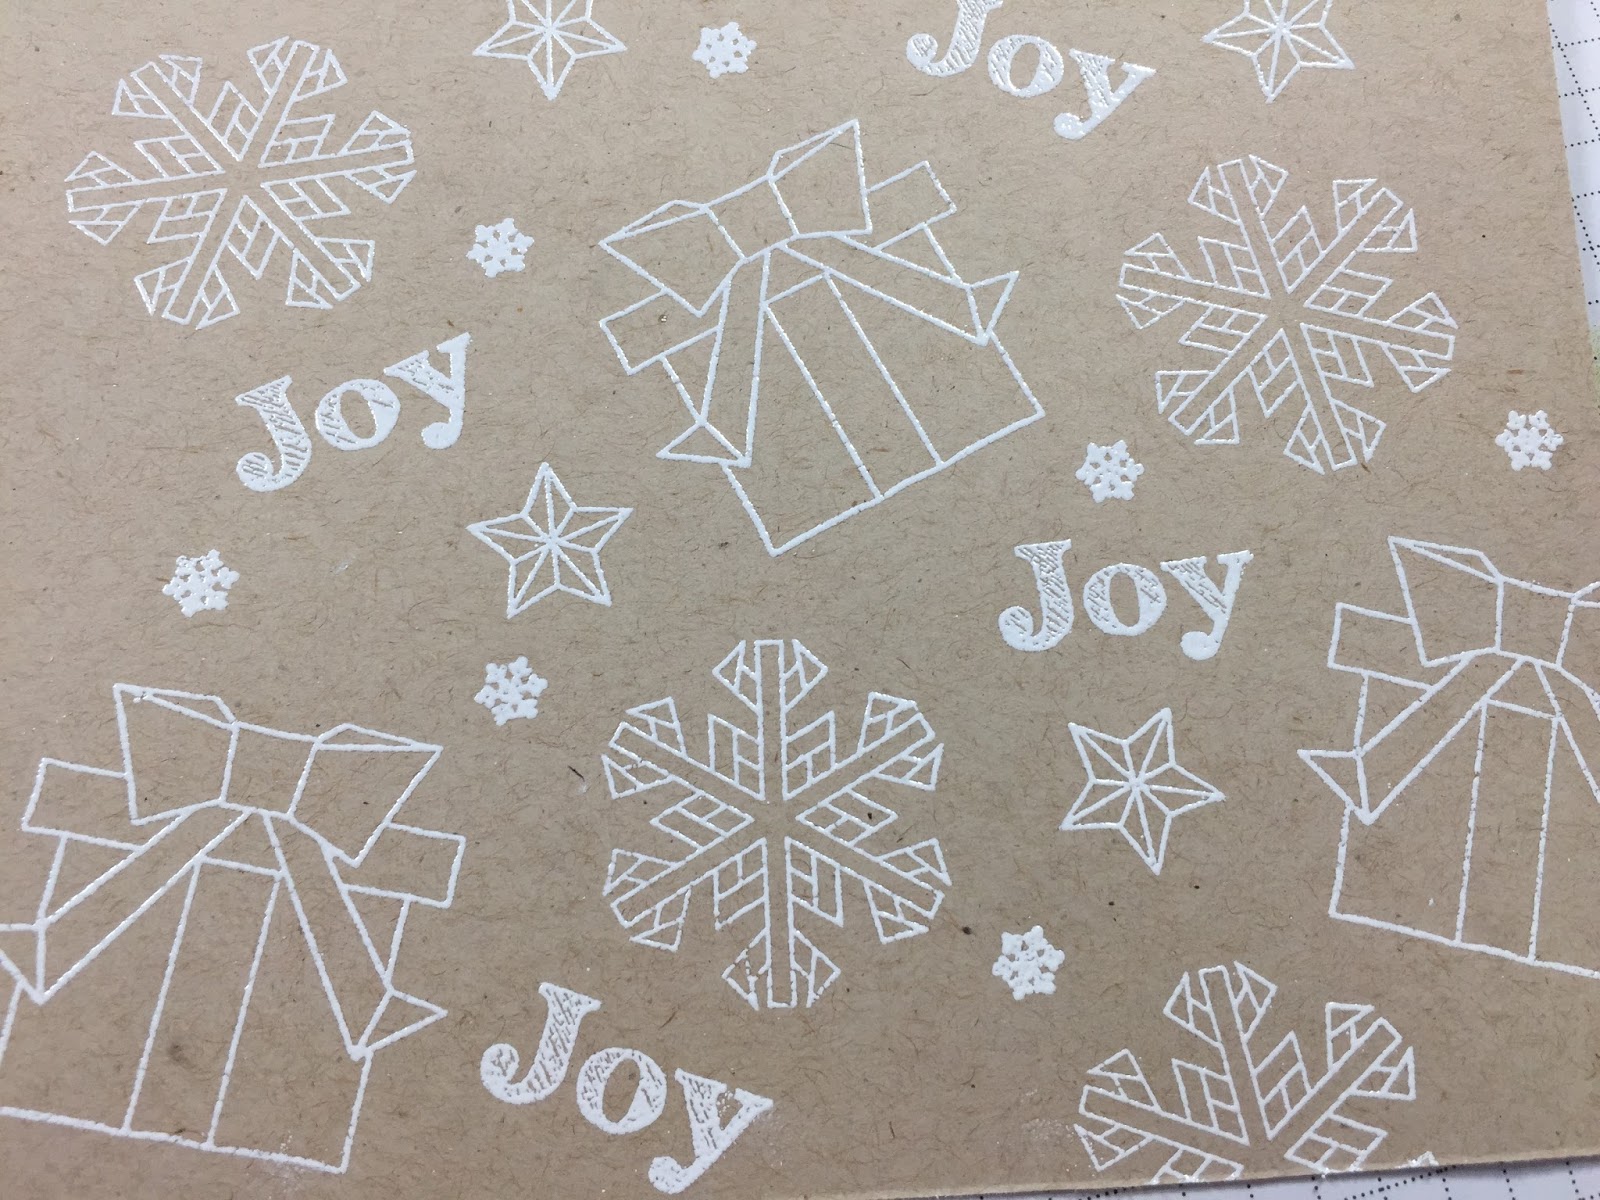
To bring some summer into my winter card,  I used non-traditional Christmas colours.  I started by stamping a few of the images from the Origami Winter stamp set using Versamark Ink and then embossed them using Ranger Fine Detail white embossing powder.  I decided I wanted to colour on kraft with pencils crayons.  Seems like ages ago that I used my pencils!!


I chose two shades of each colour:  pink, turquoise, purple and blue.

I use the Lyra Rembrandt PolyColor pencils and love them!

After I had all the images coloured, I decided that the one bow was way too dark in comparison to my other colours.


To remedy this little problem, I restamped the present and heat embossed like before, chose a couple of lighter colours then fussy cut around the bow portion only.  I used a bit of TomBow liquid glue to adhere it right over the dark bow.


I cut down the kraft panel using the rectangle die from the Dotted Patterns Set 1 and adhered directly onto an A2 white card base.


The sentiment also come from the Origami Winter set.  I white heat embossed it onto the sentiment strip from the Darling Ribbon and Dotted Frames creative dies set.  To give it a bit of dimension, I added two layers of foam adhesive to the middle of the strip and used liquid glue to adhere the ends.


With a few touches of Clear Wink of Stella, the card was almost done...


I went through my stash of SK sequins and picked out a few that matched my colour scheme.  I used the 8mm sequins from the Crystal Clear Fusion,  a few 4mm Luminous Lavender and picked out a couple light blue sequins from the Winter Wonderland Fusion.


I hope you enjoyed today's "Christmas in July" card!  Thanks for stopping by and see you soon!!

Laurie


Monday, May 1, 2017

Shaped Card and Coloured Pencils

Happy Monday, all!!! I'm back on the Studio Katia Blog to share my creation for this week!  Today it's all about a shaped card and coloured pencils, or pencils crayons, as we call them up here in Canada :)

My stamp set of choice is the  Hello Alice set. And for the dies, I used the Stitched Nested Creative Rectangles.


Please swing by the SK Blog for all the details!  

See you really soon!!

Laurie


Monday, February 27, 2017

February Release Design Team Blog Hop!!

Hello everyone and welcome to the Studio Katia Design Team Blog Hop!!  Our newest release has arrived and is available for purchase!!


GIVEAWAY:
To celebrate our February 2017 release, we’re giving away our entire new release to two lucky winners. One winner will be randomly selected from Blog and Instagram. Both winners will be announced on March 1, 2017 on the Studio Katia Blog.

To enter:
Leave a comment on this blog post: 
Follow us on Instagram and leave a comment on every stop.
Make sure to leave all the comments by Tuesday 2/28/2017 11PM MT. 


You should have arrived from The Lovely Erica (SK Blog)and the Beautiful Valentyna is your next stop.  If you get lost you can find the full hop list below!!

Now let's have a look at what I created with some of this release!!

I used the new Medium Mandala Flower.  I have to admit that this may be my favourite stamp from this release.  SO many possibilities with one simple image!!  Here is a way to create different flowers from this one large stamp.  I stamped the image three times and using my Lyra coloured pencils I simply coloured a different section of each stamp. I then fussy cut each section out, and this created 3 different flowers.  But really, the possibilities are endless!!  I then stamped my sentiment from the Duo Talk Stamp Set onto a die cut from the Stitched Nested Creative Recatangles Die set.   To break up the white space, I drew a slightly wonky border around the edge of the card.  To spice things up, I used some sequins from the new Crystal Rainbow Fusion mix.  This has to be one of my favourite sequin mixes!!!


A bit of Clear Wink of Stella and Glossy Accents finish this card off!!


I hope you enjoyed what I created!!  This is just the most incredible release and I had a blast making this card...and many more:)

Ready to get hopping? Here’s the complete Blog Hop List!!

Featured Post

A Simple Thanks Card

Well, well, well. Look who decided to show up...me! It's been an awful long time yet again. I seriously thought I'd be well out of t...