Showing posts with label Made in Minutes. Show all posts

Monday, February 4, 2019

Made In Minutes with My Creative Time!!

Well, it's Monday...blah.  Let's try to cure those Monday blues with a card that literally took minutes to make. I made this super, clean and simple card using one of my favourite sets from My Creative Time.

The Home Sweet Home Stamp and Die Set was one of the first sets I ever purchased from Emma and continues to be one of my most used.  This set is on sale right now, so it's a great time to pick it up...just sayin' :)


I did some very simple ink blending onto a panel cut with one of the smaller Scalloped Stitched Rectangular Dies.  I used Peeled Paint and Salty Ocean Distress Inks.  I coloured up that adorable mushroom with my alcohol markers and added a few details with a white gel pen, a glitter pen and some Nuvo Crystal Glaze.


The sentiment comes from the same set and was stamped on a speech bubble which is from the Stitched Round Speech Bubbles Die Set.  I used foam adhesive to adhere the mushroom and sentiment as well as on the focal panel.


And I left it at that!!  It's hard for me to leave this much white space but I didn't want to add anymore time to the process!!

Thank you for stopping by! I appreciate your visits :)

Until next time...stay crafty!!

Laurie


Monday, August 27, 2018

Made In Minutes with My Creative Time

Hello, my crafty friends and welcome back to another "Made In Minutes"!!  I honestly need to start timing myself for these posts to prove how quickly some of these projects come together!

My Creative Time (Emma) is known for all their amazing packaging and treat holder dies, so I decided to use one for my project today.  Before starting on Emma's Design Team, I never made any sort of 3-D project or treat holder. I always found them too intimidating with all the measurements, cutting and scoring.  But all of these dies take all the stress right out of it!!

I used the Mini Gift Box Die.  This is a fairly new die to the shop and as I'm writing this post, it's currently out of stock so I do apologize!! But never fear, they will be back in stock shortly!!

I cut the die out of 80lb white cardstock. It cut, scored and folded beautifully!


There is a cut on each of the corner flaps. These create little tabs that simply fold into each other.


You don't actually need any adhesive for this little box to stay together. I did add a couple strips just so the side flaps would stay up, but again, not necessary.

I measured the area inside the stitched detail lines on all four sides to create some layers with patterned paper.


1.25 inch squares worked perfectly which I added to all sides of the box.

So cute!! As you can see, I cut a small circle using the Bunch of Fun Circle Dies and also used the Lower Case Fun Dies to cut out the letter "c" to personalize the box a bit more.


To give you an example of what can fit in these gift boxes, I placed a package of sequins along with a jar of Perfect Pearls.  There is definitely room left over!!


All that's left to do at this point is add my little monogram and tie it up with a piece of ribbon!!


This little box is so stinkin' cute!  


Just think of all the ways you can personalize this box or decorate it for every season!! Or how great would these be for birthday or wedding favours??!! 


Now I promise you that this was literally made in minutes. About 10 actually!  The hardest part was tying the silly ribbon!!

Thank you so much for stopping in today. I appreciate your visits!

Until next time...stay crafty!!

Laurie


Monday, March 5, 2018

Made In Minutes (Kind of) with My Creative Time!

Hello, crafty friends and welcome back!!  Today I'm showing a card that is easily made in minutes. Except, there were a couple of hiccups along the way that made the process a bit longer. But hiccups aside, this card came together quite quickly.

When making my projects, I never really have a concrete idea in mind. I will go through my stash of stamps and dies and usually get a spark of inspiration just by looking.


I pulled a few products out and immediately got an idea when I saw the You Are Spot On Stamp and Die Set and the You Make Life Sweet Stamps and Dies.  I started by picking a few of the open circle stamps from the Spot On set and stamped them with Versamark Ink onto Bristol Smooth Paper.  This is where the "mega hiccup" occurred.


Yep, total embossing disaster! I still do not know how I managed to knock the jar off my desk. Let me tell you, this stuff does not clean up easily! I was able to save some of it but this stuff was everywhere!  And now, my white embossing powder has cat hair in it, hahaha! And for the record, this wasn't the first time I spilt it during this project. I knocked it over again on my desk (insert eye rolling here).

Anyway, after the mess was cleaned up (a bit) and the embossing powder melted, I used Pumice Stone Distress Ink to do a wash of colour over the stamping. I then added a bit more colour inside each circle.


I trimmed that panel down with the largest of the More Stitched Rectangular Dies and carried on with the focal point of my card.  I used one of the solid circles from the set and stamped it in various colours to help decide which colour I wanted. FYI: I went with yellow :)


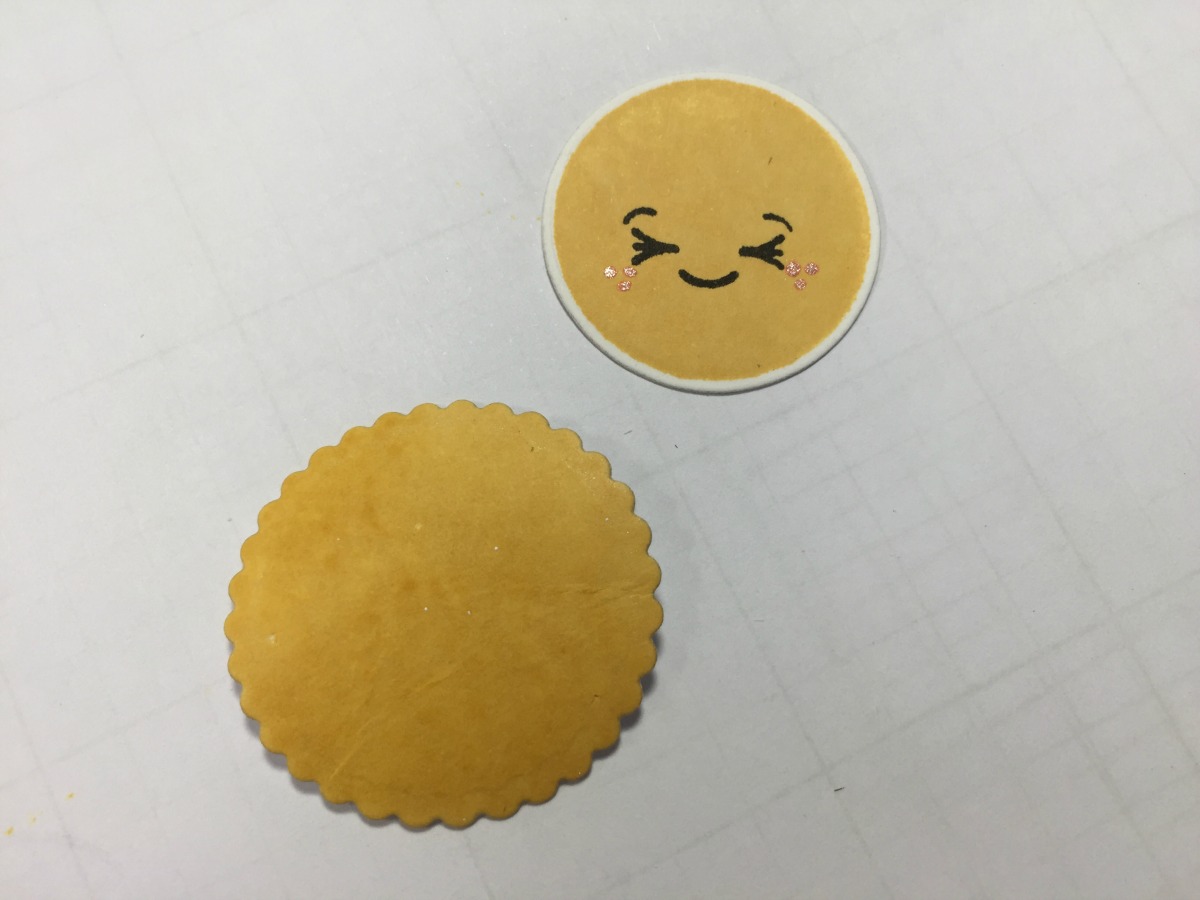
Now, that cute smiley face comes from the You make Life Sweet Set and it looks so cute!! After die cutting it with the co-ordinating die, I felt like it needed a little something extra, so I took one of the smallest dies from the Scalloped Stitched Circles Dies, cut it out of white cardstock and took the yellow ink pad directly to the paper.


I die cut the label from the Inspire Mini Set and using the Misti, stamped the sentiment in Versafine Black Onyx Ink. I made sure to stamp a little to the left of the die cut to leave room for my smiley face!


Assembly was easy! I adhered the dot background panel directly to a top fold A2 card base and foam mounted the sentiment with smiley face.


Of course, a bit of clear glitter pen was added to the face as well as a few clear droplet embellishments!


I really love how this card turned out. And messes aside, it was quick and easy!!


Thank you for hanging in there with me today!!  Hope you enjoyed, got inspired and had a little laugh!

Until next time...stay crafty!!

Laurie


Monday, January 8, 2018

Made in Minutes with My Creative Time

Good morning, friends!!  Today, I'm sharing a not one, but TWO cards!!  This post shows just how easy it is to create multiple cards, quickly! Or one card, even quicker :)

I started by coming up with a simple layout that could be stamped at once. The Misti comes in super handy for this!


The floral image is from the sweet stamp and die set,  Hey There Little Lady.  The sentiment is from the Create Stamp and Die Set.  If you are new to My Creative Time products, almost every stamp set comes with co-ordinating dies!!!!

I stamped one panel with Memento Tuxedo Black Ink and the other with Versafine Black Onyx ink.


I used Copic markers and coloured pencils for some super simple colouring!!  These are meant to be quick, right??  When it came to putting the cards together, I did assembly line style.  I stamped both, I coloured both, I trimmed both and adhered everything at the same time.


To add a little more interest, I trimmed down the right side about 1/2 inch.  This actually creates a bit of depth and dimension without actually adding foam adhesive!!  Next, now this part did take the longest, was the die cutting of the word die.  It didn't actually have to take this long but instead of using foam adhesive to mount the "create", I cut the die repeatedly out of white cardstock to add the dimension.


I got all my elements together and adhered everything at once!


These two cards took about half an hour!! Here's a look at the completed projects!!


Thank you so, so much for stopping by today! I appreciate your visits more than you know!

Have a great day!!

Laurie


Featured Post

A Simple Thanks Card

Well, well, well. Look who decided to show up...me! It's been an awful long time yet again. I seriously thought I'd be well out of t...