Showing posts with label Copics. Show all posts

Wednesday, May 27, 2020

Sending Smiles with Create A Smile Stamps!

Hello!! Today I'm sharing a card using some brand new products from Create A Smile Stamps!  The May release is now available for purchase.

I used the new Plant A Tree Stamp Set along with the Basic Ovals Stencil. The stamp set is on the smaller scale which means the price is fantastic. But it is also packed with a ton of images! The stencil is so versatile. It has four different sizes of ovals and it also comes with the co-ordinating masks!


I started by using the largest oval on the stencil and ink blended some blue and a little brown at the bottom. I stamped each image (they are all separate) directly onto the ink blended background. I used Gina K Inks for this as they work well with alcohol markers.  I added very simple shading to images which really brought them to life!


I used the second largest of the Scalloped Rectangles Dies to trim down the piece of cardstock I was working on. To create the embossed lines perfectly around the oval, I held the panel up to the light and on the back side, lightly adhered the mask portion of the stencil. You can see through the cardstock just enough for placement. I then traced around the mask with a pencil.

On my scoring board, on the BACK of the panel, I added the scoring lines every 1/8th of an inch, stopping when I got to the traced line.

I added some white gel pen details to the images as well as 3 tiny, die cut hearts.  The sentiment comes from the new From Afar Mini Stamp Set and was stamped onto one of the Useful Banner Dies.


Both the sentiment strip and the panel were foam mounted to a light grey card base which measures 5.25 X 3.25 inches.

I hope you enjoyed todays card and will check out the new CAS release!!

Thanks so much for taking the time to stop by today.

Laurie


Tuesday, May 19, 2020

Create A Smile Stamps Card Share!

Welcome!! I'm dropping in to share a card I made using products from Create A Smile Stamps! I've just recently joined the design team and am over the moon to be a part of this amazing group!

For this card, I've mixed a few stamp sets, old and new!


CAS Products used on this card:

Uplifting Stamp Set: helicopter, clouds
Best Bugs Stamp Set: tiny flower
Ting-a-Ling Stamp Set:  kitty cat

I'll be sharing Create A Smile Stamps cards here once a week so stay tuned!

Thanks for stopping by! See you soon!

Laurie

Sunday, January 26, 2020

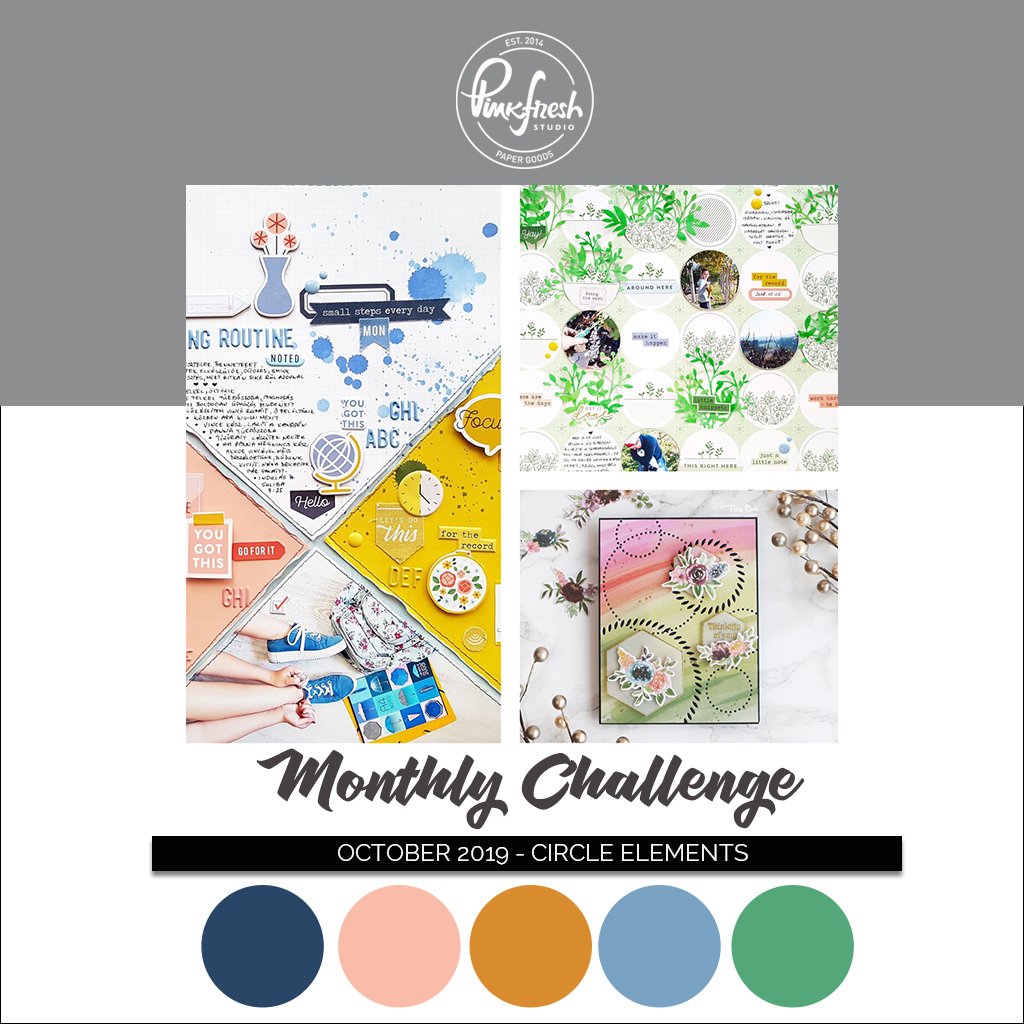
Pinkfresh Studio January 2020 Challenge

Welcome back! Today, I've joined in the first challenge of 2020 over at Pinkfresh Studio and it's a super fun one!  For this challenge, you can choose any of the challenge themes from 2019, fun right?

I chose October's theme...Circle Elements.


Now, I currently don't own much Pinkfresh Studio but let me tell you that I have remedied that!  I've recently placed a couple orders to beef up my stash! And I'm so excited!! I've really been loving Pinkfresh for awhile and can't wait to get all my goodies!  But enough rambling, let's have a look at what I've made!


I used the Braided Circles Die set to be the focal point on this birthday card. I coloured and fussy cut a couple of images from the Party Animals Stamp Set. This is an older set that has been discontinued.

The "hooray" comes from the Essentials Classic Words Die Set. If you're looking for a set of word dies, I highly recommend this set. It comes with any sentiment you'll ever need. Plus, the font is beautiful and there's a shadow die for each word! It's an amazing set! I used Picked Raspberry Distress Ink to add colour!


One of the first PF sets I got was the Dainty Botanicals Set. I love this set as it is filled with lovely, filler images that are great for almost any card! I thought the greenery would fill in this circe nicely.

Before adhering all the bits and pieces, I added a little blue ink to the top of the circle for a bit of contrast.  I used liquid adhesive for the greenery and foam adhesive for the critters.  I die cut the "hooray" 3 times from scrap, white cardstock and adhered them all together to give the die cut some dimension.


The sub sentiment comes from the Playful Animals 1 Set. This was another great set and I'm sad it's no longer available.  I used an embossing folder from my stash on the front of the card base and foam mounted the focal circle.

A few sequins finish this card and I love the way it turned out.

Thank you so much for stopping by! See you soon!

Laurie


Saturday, December 28, 2019

MFT Weekly Sketch Challenge #469

Hello, friends and welcome back! Being on Christmas break is always nice because it gives me time to sit and create! Although, after making all those holiday cards my creative juices flow a little slowly. That's why I like to participate in challenges. I find that by looking at a colour palette or sketch can trigger an idea. And this weeks Sketch Challenge from MFT Stamps did just that!!


I followed the sketch closely but did switch a couple of things! That's the beauty of these challenges. You can follow it exactly, flip it around or switch out shapes! It's wherever the creative process takes you!


I used the second large Stitched Mini Scalloped Rectangles to house my little scene. I coloured the adorable little girl and her basket of flowers from the Bring Out the Sunshine Stamp Set and used the co-ordinating dies to cut them out.  On the scalloped panel, I used the Drifts and Hills Stencil to create a little grassy hill for the girl to stand on.

Instead of the clouds from the sketch, I die cut 3 hearts using the Infinity Heart Dies from Hero Arts and used my alcohol markers to colour them.


I adhered the panel and the hearts on a white card base with liquid glue and used foam adhesive to adhere the girl, the flowers and the sentiment. The sentiment comes from the Essential Sentiments Set and was stamped onto a speech bubble die with the little tail cut off.

I just had to add some white gel pen details to a few areas as well as some Nuvo Crystal Glaze!!


Thanks for dropping by! 

See you soon and...stay awesome :)

Laurie


Friday, November 1, 2019

Poignant Poppies Blog Hop (ScrapNStamp Canada).

Welcome to our monthly blog hop for Scrap N Stamp Canada! Being November, we've decided to use poppies as our inspiration!


Of course, poppies are a symbol of Remembrance Day. But can be used for so much more! Think sympathy, encouragement, hello or thinking of you cards! And don't limit yourself to the colour red! Poppies come in many colours!

I used the Inspiring Poppies Stamp Set from Gina K Designs along with one of my favourite techniques. And that it using alcohol markers along with heat embossing. Now, I'm uncomfortable using my pricey markers alongside embossed images because I'm scared it will ruin the tip of the marker, so here is how I do it.

I stamped out the image using Memento Grey Flannel Ink which is an alcohol marker safe ink. I made sure to use my Misti for this and leave the stamp on the door!


I did some quick colouring. No need to be fussy when it comes to blending as all the detail will be added later!  After it was coloured, I put the panel back in the Misti, rubbed it down with an antistatic bag, inked it up with Versamark Ink and used Metallic Copper Embossing Powder from WOW.


You can see here how all the lovely details are added back in. And that gorgeous embossing powder!


I then took some time to fussy cut the image. Tedious but so worth it!!  I used a stitched frame die from Lawn Fawn and cut it from white cardstock.  I attached the floral image with some behind and some in front.


Before adhering the flowers and frame to a white card base, I used a splatter image stamp from and older MFT set and stamped the front of the card base. I used Versamark Ink and the same embossing powder. Such an easy and mess free way to get a splattered background!

I die cut the frame from craft foam as well, to give some dimension to the card.  I adhered it down then placed some foam squares underneath the flowers.


The sentiment comes from the Inspiring Poppies set as well. I used a couple of pink inks to create a soft ombre look then fussy cut around it. I adhered it down with a combo of liquid glue and foam adhesive.


I love the clean and simple look of this card but with the added punch of that metallic embossing!

Thank you so much for hopping along with us! If you would like to play along with this challenge, please visit the Scrap N Stamp Facebook Page to enter your creation!

Here is the complete blog hop list!

Tara
Sandi
Nancy
Laurie
Deb
Chala
Susan
Kia

Make sure to stop and leave a comment on each stop of the hop for a chance at winning a $50 gift certificate to the SNS online store. Also, as an added bonus, all things Poppy related including stamps and dies will be 20% off this weekend only. Ends Sunday, November 3rd.

Wednesday, October 30, 2019

Sketch Challenge for Create a Smile Stamps!

Hello and welcome back to another challenge for Create a Smile Stamps! This week we're playing with a sketch...


I used the Same Frequency Stamp Set for the super cute robot image! 


I used the Focal Die Set along with the second largest Postage Edge Circle Die as the two circles in the sketch.  I used foam tape to attach the robot to give a bit of a "lift".  Then sentiment was stamped onto a banner die from MFT and layered on top of another cut from the same grey cardstock as the cardbase.


To create some seperation, I cut some white cardstock using the second largest Scalloped Rectangle Die and adhered that directly onto the card base.  For a finishing touch, I stamped and fussy cut a few "nuts" that are in the stamp set. I glued them down and added some sparkle to each one using a glitter pen. 


I foam mounted the sentiment and that was it!!  Hope you enjoyed my take on the sketch!

Please join us! We love seeing what you create!

Also, up for grabs is a €25 gift certificate to the Create A Smile online shop...woohoo!  Please visit the CAS Challenge Blog for all the details!!

I wanted to let you know that Create A Smile Stamps has a DESIGN TEAM CALL for the Challenge Team going on right now!!  You can find all the details HERE!

Thanks for stopping in!  See you soon!

Laurie


Wednesday, September 11, 2019

Circle Bursts...Your Next Stamp Preview!

I'm baaaack! Welcome, friends!  Today, I'm sharing a little look at another of the stamps sets coming in the new Your Next Stamp release!!  All sets will be available TODAY,  September 12th @ 11am EST , so be ready!!


This little stamp set is called Circle Bursts and is perfect for backgrounds and festive scene making!  You should never overlook these small sets. Not only do they have a great price point, they are often packed with images and sentiments!


I created a background using Tattered Rose, Dusty Concord and Chipped Sapphire Distress Oxide Inks. After the panel was dry, I used Gold Sparkle Embossing Powder from WOW to heat emboss the three circle burst images.  To add some fun interest, I used a few of the Circles-Piercing Holes Die Set to cut around each of the bursts. They fit perfectly!!


I coloured up the cute, singing rabbit from the new Birthday Song Stamp Set with alcohol markers and foam mounted him to the panel.  To give my rabbit some sort of ground, I used one of the Scrapworks-Strips Die Set to stamp the sentiment.


I love the way this card turned out and I love these Circle Bursts!  I hope you enjoyed todays preview!  Please visit the YNS Blog for links to all the amazing projects from the design team and guests!!

And here's a look at the fabulous deals!!


Thanks for stopping by!! See you soon!

Laurie


Thursday, September 5, 2019

Your Next Stamp Preview!!!

Hello, friends and welcome back! Today I have the pleasure of giving you a little preview of one of the new stamp sets from Your Next Stamp!  YNS is one of my favourite companies and the fact that they're Canadian makes me love them more!!


We're having a look at the super cute set called Birthday Song. This little set features two critters singing their hearts out!


I coloured these cuties up with alcohol markers and used the co-ordinating dies to cut them out. I used a confetti-like stencil and a few Catherine Pooler inks to ink up a simple background.  


The sentiment was stamped onto a speech bubble die cut (which came from an older die set from YNS). I used a die to create the stitched frame which I adhered to the inked background.  The critters and the sentiment were foam mounted.

I placed the panel a little crooked on the card base for a bit of added interest. Of course, I had to add some music notes, which are also included in the Birthday Song set, as well as a few clear sequins!


This set is so darned cute and bound to put a smile on someones face!

Please visit the Your Next Stamp Blog where you'll find ALL the previews for today!  Also, check out YNS on Instagram!! One random comment from each preview day will win that days product! All comments must be left by September 15, 2017 with the winners being announced on September 17th, 2019 on the YNS Blog!!

All products will be available for purchase on September 12th, 2019 at 11am EST!!

Thanks for stopping in today!! I'll be back in a few days with another preview!!

Laurie


Wednesday, July 10, 2019

Create A Smile Sketch Challenge!

Welcome back to another challenge hosted by Create A Smile Stamps!  We have a Sketch Challenge for you this time around!


I love sketch challenges. They always seem to get the creative juices flowing. What's nice about them is that they can be taken literally or you can put your own spin on them!  Wherever the idea takes you is okay!!

I made a very bright card for this challenge! Like most of us, I have a stash of patterned paper that I rarely use. But I thought some of it would go great with the rainbow colouring I did on this card.


I stamped out those gorgeous hearts from the Colour Your Heart Out stamp Set, coloured them rainbow style and fussy cut each one. I used the second largest of the Scalloped Rectangles Dies on white cardstock and arranged all those hearts according to the sketch. 


I foam mounted the rainbow hearts and used glue to adhere the two smaller hearts.  Something else I rarely do is stamp the sentiment in anything but black, brown or grey. I used a yellow ink here and love the way it looks!

The rectangle panel was foam mounted to the card base, which I covered in the yellow polka dot paper. I added 3 clear sequins to finish the card off.


Thank you for stopping by today!  I cannot wait to see your take on this sketch!  

Remember to link up your projects on the Create A Smile Challenge Blog for a chance to win a €25 gift certificate to the CAS Store!!

Laurie


Wednesday, June 26, 2019

Colours of Summer Challenge with Create A Smile Stamps!

Welcome to another fab challenge hosted by Create A Smile Stamps! This is going to be fun and I think fairly easy!  The theme this time around is "Colours of Summer".

When I think about summertime colours, I instantly gravitate towards sherberty shades. I chose pink, yellow and aqua.


I used the hot air balloon and cloud images from the Scene Builders Stamp Set. I used my Copic markers for the colouring.  I cut down a white panel with the second largest die from the Scalloped Rectangles Dies.  But before adding my balloons I incorporated a light shade of purple to the background, Shaded Lilac Distress Ink to be exact.


To create the cloudy background, I used the Cloud Stencil from MFT stamps. 

The "you" word die is from the You Twice Cool Cuts set which works perfectly with the All About You Stamp Set.  I also added the Shaded Lilac Ink to the die cut as well.  I adhered the stencilled panel onto a white card base, adhered the balloons with foam adhesive and cut multiple layers of the "you" die to create dimension.


I added a few iridescent sequins, white gel pen details and Nuvo Crystal glaze to a few areas.  And that completed this card!

I hope you enjoyed and will play along with us! There's a €25 gift certificate to the Create A Smile Stamps Store!!

Please link up your creation to the Create A Smile Stamps Challenge Blog where you will also find all the details about the challenge!

I cannot wait to see what you create!

Laurie


Sunday, June 9, 2019

Cat Lover Card with Paper Nest Dolls!

Hello, friends! Welcome back, so glad you're here.  Today, I have the pleasure to show you a card made using a new stamp from Paper Nest Dolls!  Christine was so kind to send me the Cat Lover Emma Stamp (in digital form).  This image in right up my alley, as I'm what you'd call a "crazy cat lady".  I love cats!!


I coloured this amazing image up with my Copic Markers.  I have to admit that colouring animals is not my forte, but I did my best!  I encourage you to check out the Paper Nest Dolls website or blog, the talent of that design team is incredible!!!!


This image was very easy to fussy cut. I did take an X-acto knife to remove one of the inner portions. I did add a few white gel pen details to some portions of the image.

For the card base, I used a light pink cardstock. I stamped a paw print image repeatedly in a light pink ink and coloured them in with white pencil...not that you can tell, haha!  


I foam mounted that cat lady and added a sentiment from an older, discontinued set from Concord and 9th.


I'm quite pleased with how this card turned out and have the perfect recipient in mind!!

A big thank you to Christine for letting me have a play with this fabulous new stamp and thank you so much for stopping by!

Until next time...stay crafty!

Laurie


Wednesday, May 15, 2019

"Masking" Challenge...Create A Smile Stamps!

Welcome to another fun challenge for Create A Smile Stamps!  This one is ALWAYS a challenge to me and that's masking!  I'm a fairly lazy card maker so when it comes to masking, I rarely do it.  While I don't mind fussy cutting images, cutting masks always seems like such a chore!  However, every time I create a project with masking, I am amazed at how cool the look can be!

I made a masked background as well as a separate masked scene for my card.  I used the Scene Builders Stamp Set for the majority.  I started by stamping the house image onto a card panel, then using a mask cut from a full stick Post-It Note, covered the image and stamped it again, overlapping the two. I needed 3 masks in total to create the background.


On a separate piece of cardstock, I stamped out a scene using some of the trees and shrubs from the set. I started with the little shrub at the front of the house and worked from there. You always start with the foremost image!  It always takes me awhile to figure this out :)


I fussy cut around the scene leaving a small white border so it would stand out a little from the background.  I used shades of grey for the background panel and went all out with the colour on the separate scene.  I glued the coloured images directly over the FIRST house I stamped on the background panel!


The sentiment comes from the Small Sentiments Stamp Set which works perfectly with the Speech Bubble Cool Cuts.  I added some sparkle pen and Nuvo Crystal Glaze to all the round windows as well as the windows and door of the coloured house. I popped the speech bubble up with some foam adhesive and added a die cut heart as well as some stitiching detail to match the stamping!


I really hope you'll join us as we LOVE to see your creations!!  Remember, you have a chance of winning a €25 gift certificate to the Create A Smile Stamps Shop!! Please visit the CAS Challenge Page where you'll find more inspiration along with link up information!!!

Thanks for stopping by!! See you soon!!


Featured Post

A Simple Thanks Card

Well, well, well. Look who decided to show up...me! It's been an awful long time yet again. I seriously thought I'd be well out of t...