Showing posts with label Tombow markers. Show all posts

Wednesday, February 6, 2019

Create A Smile Challenge...Friendship!!

Hello and welcome back to another Create A Smile Stamps Challenge!!  This one is an easy one.  It's all about friendship. Friendship cards are a favourite of mine to make because you can use so many different styles of stamps. Critters, florals, graphic...anything goes!

For my card today, I combined an older CAS set along with a new release set.  I heat embossed one of the leaf images from the new Fine Ferns Stamp Set.  I used Silver Pearl embossing powder for this.  This is one of my most loved embossing powder!  Because I used watercolour paper, the images are a light shimmery colour without being stark white.


I used my Misti for the stamping as it's super easy to create a mirror image.  To colour, I chose 3 different greens from my set of Tombow Dual Brush Pens.  I swiped some colour inside each leaf and blended it out with water.


For the sentiment, I used the Alphabet Sticker Set in the colour of Deep Sea.  This was my first time using these stickers and I love them!!  I stuck them onto a piece of the same watercolour paper cut with a Cool Cuts Scalloped Rectangle Die.


The small "wonderful" word comes from the All About You Stamp Set. The stamp actually says "are wonderful", but I masked off the "are" before stamping.


I added some glitter and Nuvo Crystal Glaze to the letter stickers, adhered that panel with foam adhesive and added a few clear sequins.  The entire panel was glued onto a white card base.

I hope you enjoyed my project for today and I encourage you to play along!!  Create A Smile Stamps has wonderful products you are sure to love!!

All the details are on the Challenge Blog but here is what you're playing for:

Thank you for stopping by today!!  See you soon!!

Laurie


Wednesday, August 29, 2018

MCT--Whatever Wednesday

Hello friends and welcome to "Whatever Wednesday" for My Creative Time!!  My card today features three of my all time favourite (so far) products from MCT.  And also a bit of no line watercolouring (eeek!).  This is something that is a little stressful for me to do but practice makes confidence right?

My first favourite stamp and die set is Just Because.  This set has some beautiful, outline floral images. These are perfect for any colouring medium but like I said, I chose the no-line watercolour!  I stamped one of the flowers with Antique Linen Distress Ink.  I double stamped it but I think I could have gotten away with just once as it was maybe a bit too dark. I should mention that I used Strathmore Mixed Media paper!!


I decided to use my Tombow Dual Brush Markers for the colouring.  I feel like I have much more control using these than your traditional watercolour pans.  


I use a combination of marker direct to paper and picking up colour off a slick surface.  Although, there is definite room for improvement, I'm pretty happy with the way it turned out.  When the colouring was done and dry, I used my second favourite product which is the XOXO Border Dies Set to cut around the flower and make a pretty panel.


My original plan was to heat emboss a sentiment directly over the flower.  But to be safe, I decided to stamp and die cut it first!  I didn't want to regret anything after I spent time watercolouring!!  The sentiment comes from my third favourite product, the Fun Notes Stamp and Die Set. This set is so awesome. I stamped the word "note" in Versamark and used Pale Rich Gold Embossing powder from WOW.  I used the co-ordinating die to cut it out.


I really liked the look of the die cut word so I just went with it.  I used the die again to cut a piece of craft foam so some dimension could be added.


The panel was adhered directly to the card base with tape runner adhesive.  The size of this card is 
5 X 3.5 inches.


I added a tiny gold, heat embossed heart which comes from the Hey There Cute-Tea Stamp and Die Set.  Before adhering the die cut "note", I stamped "just a"  in an ink that closely matches the grey card base.


I added just a touch of shimmer to the outer edges of the petals to try give them a bit more of a highlight.  


Thank you so much for stopping by today!!  

Until next time...stay crafty!

Laurie


Friday, May 25, 2018

LDRS Creative May Release Day Three!!


Welcome to the third and final day of the LDRS May Release Blog Hop!! I hope you've been enjoying all the fabulous-ness you've been seeing!!  And today will be no exception!

Thank you for joining us on our LDRS Creative inspiration week blog hop! We are showcasing lots of gorgeous projects using products from our new release. You can even see them in action with step-by-step projects by our amazing designers! 

We have some awesome new critters with the Candibean Safari and the Polkadoodles Just Because and Sink Or Swim stamp sets, fabulous dies with the Woodland Foliage Frames, Petite Pinafore Build-A-Card, Petal Perfection Accordion and Happy Days Circle sets, and last but not least, a gorgeous Country Friends Sweet Pea Paper Pack for you to use with all your crafting projects!

Simply use the list at the end of the post to keep hopping! 

Each day we are giving away a $25 LDRS Creative gift card to one lucky hopper!  To enter leave a comment on each blog in the hop, plus follow us on Facebook and Instagram. Winners will be announced on the LDRS Creative inspiration blog on May 29th.

For the release event we are excited to offer some great savings!

Save 20% on EVERYTHING and use code MAY20
(Coupon valid until midnight EST 5/27/18)


Again, I have two cards to share using two new stamp sets.  This first stamp is called Just Because and it's adorable!  I started by stamping the image onto Bristol Paper using the Raven Hybrid Ink.  I used this ink and paper because I wanted to use some water based markers for the colouring.


Now, this image may look a bit daunting but what is awesome about the packaging of these stamps is that is comes with a fully coloured image on the front which I used for reference!

After the image was coloured, I fussy cut around it.


I created a simple background using green and blue inks and a little masking.


I popped the image onto the card front and stamped a sentiment from the Friendly Greetings Stamp Set.


A few white enamel dots finish off this clean and simple card!


This image is just so darling!!


My second card shows you the new Sink or Swim stamp.  This time I decided to use Copic markers for the colouring. Again, use the coloured insert of the set for reference!!


Another super cute image!!  And it looks completely different to the one coloured with watercolours!!  I made a window card using the ovals from the new Woodland Foliage Frames Die Set.  The image was adhered to the inside of the card but can be seen through the window on the front panel.


The sentiment comes from the new Safari set and works perfectly!  Here's a look at both cards, side by side, to compare the colouring.


I hope you enjoyed todays look at the new May Release projects!!

Hop along and comment for your chance to win!! Here's the full list of the today's hop! 


Thank you for joining us this week for a look at the new cuteness that is now available!!!!!

Until next time...stay crafty!!

Laurie


Saturday, February 24, 2018

On the Butterfly Reflections Ink Blog today!!

Hello crafty friends!  I wanted to quickly let you know I'm on the Butterfly Reflection Ink Blog today with this card!!


I hope you can swing by, say hello and check out all the details!

Thanks for stopping in!!

Laurie

Saturday, July 8, 2017

Studio Katia and Sunny Studio Stamps Collaboration Blog Hop!!!!


Hi everyone!!!  Today is an exciting day!  Studio Katia and Sunny Studio Stamps have teamed up to do an incredible collaboration blog hop!!

Both teams are celebrating Summer Time with fun and colorful cards using stamps from Sunny Studio and dies and embellishments from Studio Katia. There's prizes too! Both companies have a prize to give away so make sure you read all the way to the bottom of this post to see how to win!

For my project today, I am using a bunch of dies from Studio Katia and the super adorable A Bird's Life stamp set from Sunny Studio.  This card has lots of layer and was so much fun to make.  One of my favourite things to do while card making is combining companies, and let me tell you, these two companies play VERY well together!!

I knew right away that I wanted to use the Stitched Creative Window die from SK.  I cut that from white cardstock.


I also used the rectangle die from the Dotted Patterns Set 1 to cut out some blue polka dotted patterned paper and the large rectangle from the Darling Ribbon and Dotted Frames die set with white cardstock.

I love the dotted details of these sets!!

I stamped almost every image from the A Bird's Life stamp set with Versamark Black Onyx ink onto some Smooth Bristol cardstock.  I used a variety of TomBow Dual Brush Pens along with the Dual Brush blender to colour those sweet images.  Before putting my scene together, I blended some Faded Jeans and Tumbled Glass Distress Inks onto the bottom portion of the three die cut "windows" created from the Stitched Creative Window die.


To make my scene, I started by adhering the outer white frame directly onto my blue polka dot panel. I adhered all the window portions using foam adhesive.  The birdhouses, trees and birdies were adhered using a combination of adhesives to give a bit more dimension!


The sentiment was stamped onto the sentiment strip die that's also a part of the Darling Ribbon and Dotted Frames die set...that sentiment looks like it was made for that die!!!  To finish this card off, I used my absolute favourite embellishments...the Clear Round Drops Mix.  Those drops go with ANYTHING!!!

I did add a few details on the birds with a white gel pen and a bit of glitter and shine to the openings of the bird houses with a Stardust Glitter Pen and some Glossy Accents.


Eeeek! It's just so cute!!

And a close up...


Now for the fun stuff!!

★GIVEAWAY!★
To celebrate this Summer Time Hop we are giving away THREE prizes - one prize pack from Studio Katia and two $25 store credit from Sunny Studio! 


Here's how to win:
Comment on the Design Team blogs from Sunny Studio and Studio Katia team blogs (see list complete list at the Studio Katia and Sunny Studio Blog)! 
The winner will be chosen at random from the collective blog hop posts. Make sure to check out each of their blogs and comment for your chance to win. You will not know which blog has been chosen so the more you comment on the better your chances are of winning! 
You have until Monday July 10th at 12pm EST to comment - winners will be announced on the Sunny Studio and Studio Katia blogs on Wednesday July 12th.

Here's the complete blog hop list:

Have fun hopping and Good Luck!!

Laurie

Monday, April 24, 2017

Super Soft Watercolour

Hello Everyone and Happy Monday!! I'm back on the Studio Katia Blog to share a card made using the beautiful flower image from the Thank You So Much stamp set along with some fabulous dies!

I wanted to go with a very subtle colour so I chose ONE marker.  To see what products I used and how this card came together, I hope you'll stop by and check out the post :)


Thank you for stopping by today.  
Wishing you the best week ever!!!

Laurie


Monday, March 13, 2017

Hello Friend Floral Card

Hello, everyone!! I'm here to share a pretty in pink card using stamps from the latest Studio Katia release!  For the main element of this card I used the large blossom from the Thank You So Much stamp set.  This flower is large!!!  It will definitely be the star of the show! The leaves are from the new Together We Bloom stamp set.

I decided to heat emboss the flower in gold.  To colour I used my Tombow Dual Brush Markers.  This way of colouring is so simple!!  I just use one colour, adding it to where the darkest part of the image will be and simply drag out the colour using a water brush.  And these particular markers have some beautiful and vibrant colours!  If you follow me on Instagram, you know that I actually coloured two of these gorgeous flowers, one in a light pink and one in a darker pink.  For todays project, I decided to use the lighter flower.


After the colouring, I fussy cut everything out.  For my cardbase, I embossed the front using the largest panel die from the Darling Ribbon and Dotted Frames Die Set.  This gives nice texture and dimension without adding any extra bulk.  I used the middle die from the Stitched Nested Creative Squares Die Set to die cut a piece of Woodgrain Cardstock to house my sentiment.   I stamped the "hello friend" in Versamark and heat embossed it in gold again.  Note:  because this is textured cardstock, I double stamped the sentiment before applying embossing powder...thank goodness for the Misti!!!


After everything was adhered with a combination of foam adhesive and liquid glue.  I embellished the card with one of my favourite sequin fusions, Pink Lemonade.  I added a dot of Crystal Stickles to each sequin and a few drops scattered on the leaves and the flower.


Monday, February 20, 2017

Studio Katia New Release Week!!

Hello everyone!! I'm back with another project. But this is super special and super exciting!!  This week the Design Team for Studio Katia will be sharing projects using the new release!!  You really don't want to miss any of it because this release is AMAZING!!!!

I chose the new Thank You So Much stamp set which features the most beautiful flower image.  It was screaming to be watercolored!!  So, I decided to use my TomBow Dual Brush Markers for this.  I stamped the image in Versamark ink and used white embossing powder...I'm not great at watercolour without those barriers the embossing creates :).  I used only one shade of turquoise to do my colouring but did add layers. I then fussy cut the flower out.

For my front card panel, I used the largest frame die from the Darling Ribbon and Dotted Frame Creative Die Set.  This covers the entire front of the cardbase.  After stamping the flower image repeatedly on the panel (I used Fog ink from Simon Says Stamp),  I did some partial die cutting to separate that panel into two pieces while maintaining the dotted detail.  This created a space to stamp my sentiment.


I found a solid leaf image in my stash, coloured on it directly with a green Tombow marker and simply used a water brush to smooth out the color and add some layers.

I adhered my die cut panel directly onto a kraft cardbase and stamped the sentiment in black ink.  This sentiment is also from a new stamp set in the release called, Hello Alice.  I foam mounted that big, beautiful flower and tucked the leaves behind.

To finish off, I added three Clear Heart Drops.  I actually refrained from using any sort of sparkle on this card because I thought that bold flower image was enough.


Thank you for stopping by today!!  I hope you enjoyed this little sneak of what's to come this week!!

All the new fabulous products  will be available on Monday, February 27th!!!  You are going to LOVE this release!!!

Laurie

Monday, December 19, 2016

You Are My Favorite

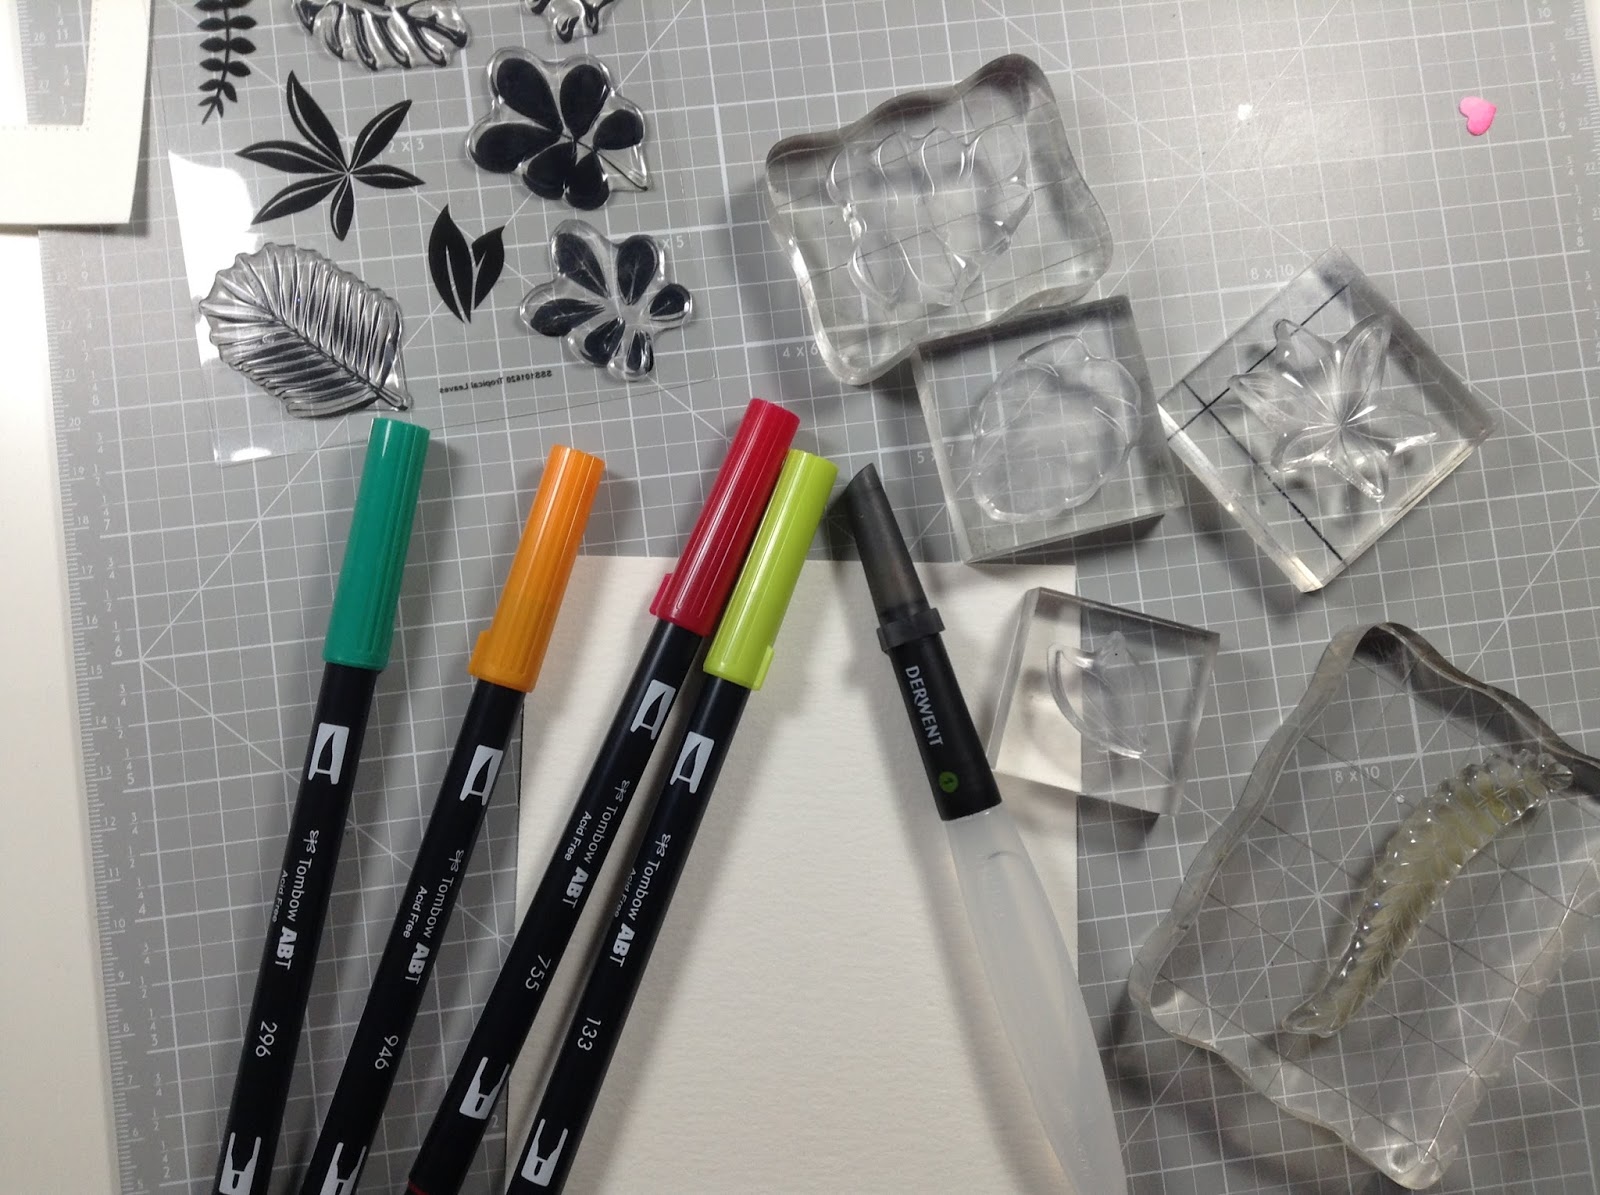
Hello Everyone!!  I wanted to share a card I made using products from Simon Says Stamp.  I've been dying to use the Tropical Leaves stamp set.  This set has been on my wishlist for a long time so when Simon had a 30% off sale, I just HAD to order it!!

My new obsession lately is using my Tombow markers with solid image stamps.  The results are amazing!!  You actually feel like an artist!  I've tried this watercolor technique in the past using my Distress Ink mini ink cubes with not great results.  You always have to "stamp off" because the ink is so intense...and that's too much work :)


I simply swiped the edge of the brush tip across the stamp, sometimes adding a second color, then huffed on it lightly to moisten the ink.  The stamped image comes out quite light but once you add the water, it looks beautiful.


After the panel was done, I used the largest of the Stitched Rectangles to trim it down.  I didn't want to cover all the prettiness that I had achieved, so instead of stamping a sentiment I used the You Are My Favorite die.  I added the panel with foam adhesive onto a cardbase using Hero Art Layering Paper called Floral.


To finish off I scattered some Sparkling Clear Sequins from Pretty Pink Posh.

I really like how this turned out and I hope you do too!!  Thank you for taking the time to stop by!!

Laurie


Friday, December 16, 2016

Sweethearts

Happy Friday!!! I'm here to share another Studio Katia creation with you.  I know the Christmas season is upon us but boy, oh boy, am I Christmas carded out!!!  I am still making the occasional holiday card but I'm quite honestly ready for the next occasion.  That being, Valentines Day, of course!!

I used the Sweet Heart Candy stamp set for this card.  I was in the mood for some simple watercoloring so that is what I did.  I started by stamping the open heart image side by side in the middle of a piece of watercolour cardstock in Versamark Ink, then embossed it with white embossing powder.  After those initial hearts were placed, I randomly stamped the same image over the entire panel (also heat embossing in white).  I added some of the cute sayings that fit perfectly in the heart.

Now what is awesome about this stamp set is that the heart image fits perfectly with the heart die from the Stitched Notebook Die Set!!  So, of course I had to use that too!  I die cut two hearts out of the same watercolour cardstock, then heat embossed the tiny faces in silver embossing powder.


To add my colour, I used my Tombow markers.  I chose pastel colours similar to the actual candy.


Once all the colouring was done, I used the largest die from the new Darling Ribbon and Dotted Frame Dies to get that sweet pierced detail on my panel.  I adhered my two stitched hearts on top of the side by side hearts on the panel and adhered everything onto a kraft card base.

Because the front of the card is basically covered in sentiments, I did not add anything more.  I did, however stamp a simple "love you" greeting on the inside of the card.


I finished the card off by using Icy Breeze Sequins in both the 4mm and 6mm.


Thank you for stopping by today!!  Wishing you all an amazing weekend!!

Laurie


Featured Post

A Simple Thanks Card

Well, well, well. Look who decided to show up...me! It's been an awful long time yet again. I seriously thought I'd be well out of t...