Showing posts with label shaker card. Show all posts

Friday, August 7, 2020

Shake Up Summer Blog Hop (Scrap N Stamp Canada)!!!!

Welcome to the "Shake Up Summer" Blog Hop hosted by Scrap N Stamp Canada! Just like the theme implies, we've made shaker cards for you


We are featuring cute little shaker card kits from Tonic Studios that make life just a bit easier when you're making these. Although, I was a teeny bit confused so watching a YouTube video helps!!


For my card today, I've used the Coffee Mug Shaker Set. These sets include 2 dies and 5 refill pouches! I opted to use vellum instead of the shaker pouch. I wanted a softer, flatter version of a shaker. But the upside of the clear, plastic pouches is they can hold a ton of shaker bits!


I inked the back side of the vellum with a brown ink to look like coffee and added some gold sequins. It's very subtle but still gives that fun shaker sound.

The sentiment, heart and steam come from the Thanks A Latte set from Lawn Fawn...I love that sentiment!


I added a few doodles around the edges and popped the panel onto a kraft card base. Honestly, I don't make interactive cards but throwing together a shaker card every now and then is fun!

Thanks for hopping along with us, you can find the full hop list below as well as GIVEAWAY and SALE details!!

BLOG HOP LINEUP:

Laurie(that's me)


GIVEAWAY:

Scrap N Stamp is giving away a gift package to THREE lucky commenters! Just leave a comment on each stop of the hop. It's that easy!

SALE:

All Tonic Brand is 20% off until August 9th, 2020!! This includes all Nuvo items as well!


Friday, December 13, 2019

My Creative Time 98th Edition Release Blog Hop and Sale!!


Welcome this month's blog hop for the 98th Edition Release from My Creative Time!!  Even though this is a smaller release, it will have you covered for Valentines Day and beyond! Stay tuned to the end of this post for details on the Freebie and Sale as well as the full hop lineup!!

For my project today, I've used the Freebie Die for this month! It's the Fun Sized Heart Bow Die and it is adorable!! I've also made a shaker card, which I rarely do!!

I used and modified one die cut from the recently released Jar Treat Die to create a shaker.


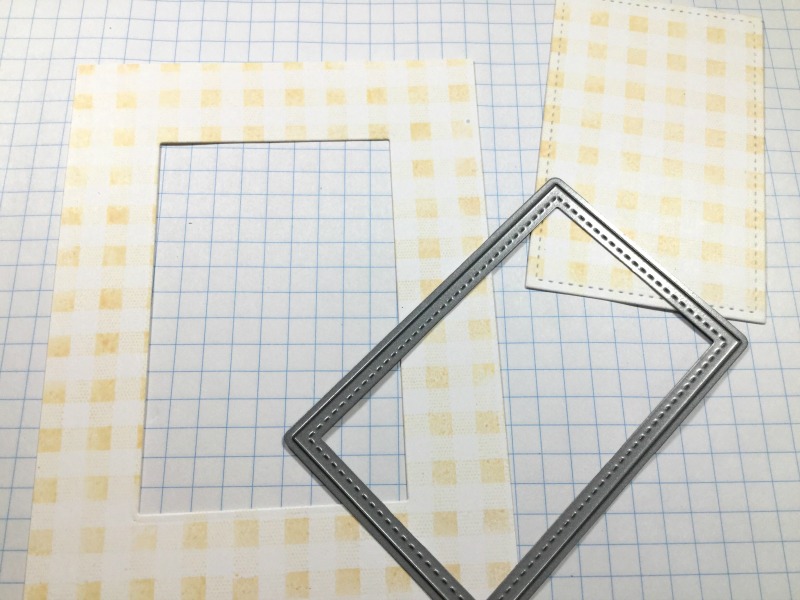
This was very easy and I'll show you how!  Die cut the stitched layer of the jar, twice. Simply cut around the inside of one of the die cuts to create a frame. It doesn't matter that the top is open as this will have foam tape to seal it off. 


It can also be ugly under there as the "fabric" topper of the jar will cover it :)! On the second die cut (the one not cut up), I inked some light blue ink around the edges as well as adhered some die cut hearts directly on it. The sequins will shake around but the hearts will remain in place. I like this because there will always be something floating in the jar.


After the sequins were in place, I added the frame portion, with the acetate attached, one top. I pressed everything together to make sure it was sealed well.

The Fun Sized Heart Bow Die is actually a great size to decorate the jar!  I just went with a simple white bow to really contract against the pink jar topper.  I stamped a sentiment from the Jar Treat Sentiments onto a white circle cut using one of the smaller dies from the Bunch of Fun Circles Die Set.


I made a 4X4 inch card and embossed the front of it using a polka dot embossing folder. I adhered the jar and sentiment to the card base with a combination of liquid glue and foam tape. And that's the finished card!!


There are two other sizes of Heart Bow Dies in this release and they are all just as sweet!! 

BLOG HOP LINEUP:

Laurie (ME)

BLOG HOP GIVEAWAY!!

For our blog hop giveaway, Emma is giving a $25 gift card to the My Creative Time Store to ONE lucky winner!  All you have to do is leave a comment on each of our blogs. You are not required to comment on every blog but the more you comment, the more chances you have of winning!! Very important:  Please leave a way for us to contact you (with your comment) just in case you are the winner!!

FREEBIE!!

Starting today, Friday, December 13th, 2019 at 8am PST, we will be giving away these adorable new "Fun Sized Heart Bow Die".  This new set will be given to the first 25 shoppers!  It will be automatically added to your package during packing/shipping. Once the 25 shoppers have gone through, this die set will be available for purchase!  So, if it's available in the store, you are not one of the first 25 shoppers.  No exceptions will be made.  The "freebie" is NOT part of the bundle and will be sold separately.

SALE ALERT!!

Don't forget!! Our sale starts right now at the My Creative Time Store!!  Use the code DEC2019 at checkout to receive 15% off your entire in-stock purchase!! The sale ends on Friday, December 20th 2019 at midnight PST!!

On a sad note, this will be my last post for My Creative Time as I've decided to step down from the Design Team.  This wasn't an easy decision as I love Emma, her products and the fabulous group of ladies on this team. I want to thank you all who have left the most amazing comments on my posts, I appreciate you more than you know!! Take care, my friends!!

Laurie

Here's a look at this months release:


Thank you so much for hopping along with us!! Happy Shopping!


Friday, August 23, 2019

Paper Sweeties Birthday Blog Hop!!!

Hello, friends! Welcome to a very special blog hop where Pink & Main is teaming up with Paper Sweeties to celebrate their 7th Birthday!!


I don't make many shaker cards but when I saw the awesome little package of Cupcake Sprinkles, I knew this was my only option, haha!! 


To create the shaker window, I used the second largest Cloudy Frames Dies and die cut it in the centre of a white panel cut with the largest die in the Stitched Rectangles Set 2 dies. After gluing the acetate to the back side of the panel, I adhered the frame portion on top.  I did add 2 layers of foam tape behind the window as these sequins are a bit thick.

I used the beautiful "congrats" sweet cuts from Paper Sweeties, which I coloured with alcohol markers to give an ombre effect.  I used a few images from the Bee Happy Stamp Set from Pink & Main. I coloured them with alcohol markers, as well, and used the co-ordinating dies to cut them out.


Before putting my shaker element onto the card base, I stamped a sub sentiment from the brand new Going Places Stamp Set from P&M. I think this sentiment is awesome! This card can be given for pretty much any occasion where a congrats are in order!

I foam mounted all the bees, glued the congrats die cut down and added the shaker to a white A2 card base.  A few touches of glitter pen and this card is done!


Thank you for hopping along with us today! Now, what's up for grabs??!!

Pink & Main is giving away 1 (one) $25 Surprise Pack! And the Paper Sweeties is offering a 25% discount TODAY on their online shop!  To be eligible to win, you must leave some love on each stop of the hop!! The winner of the surprise package will be announced on the P&M Blog on Wednesday, August 28th!


Please check out the Paper Sweeties Design Team projects HERE!!

Tuesday, August 20, 2019

My Creative Time 94th Edition Sneak Day Two!


Are you ready for another peek into this month's release from My Creative Time??! Today we're showcasing the FREEBIE dies!  These dies are free to the first 25 shoppers so you'll want to shop early!!

This set of dies co-ordinates with the Halloween Fun stamps and dies we showed you yesterday.  These little labels are made to fit the sentiments from the set. And have a really cool stitched edge and shape!


I decided to make a shaker card today using both ghost dies from the Halloween Fun dies.  I think it's super cute how it looks like the ghost in the middle is holding a sign!! Isn't the shape of these little dies awesome?


And remember that speckled stamp I mentioned yesterday? I used that again today to add just a little something to the background!!

Are you getting excited for this release yet?  Thanks so much for dropping in! Please visit again tomorrow for another amazing sneak peek!!

**Sneak Peek Giveaway**

We will be giving away the sets we are showcasing each day to ONE lucky winner!! For example, the sets we showcase on Wednesday, Emma will announce the winner of that on Thursday and the sets we showcase on Thursday will be announced on Friday on the MCT Blog!  All you have to do is leave some love on each of our blogs.  You are not required to comment on every blog, but the more you do comment on, the more chances you have of winning!!   VERY IMPORTANT: Please leave a way for us to contact you with your comment, just in case you are the lucky winner! For extra entries, you can spread the word about this release on Facebook, Twitter or Instagram using #mycreativetime!  Good luck!!


Saturday, August 25, 2018

Shake Up Summer Blog Hop with Scrap 'N Stamp Canada!!

Hello and welcome back!  Are you ready to shake things up a bit?  Today Scrap 'N Stamp is having a blog hop featuring SHAKER CARDS!


I will admit that I do not make a lot shaker cards. Why? I'm really not sure. They are not that hard to make and are always so fun to give out.

Sit back, relax and enjoy all the incredible shaker cards made by my team mates! Please stay tuned until the end of this post for details on prizes, because what's a blog hop without prizes :)!

There are tons of products on the market that make constructing shaker cards super easy. These include dies with co-ordinating "pouches" for all your shaker bits and pieces. Tonic Studios make a bunch of different shaped sets including a circle, balloon, star and heart.  These sets come with the die AND 5 pouches and are really affordable. These products eliminate the use of acetate which can be a bit frustrating to use!

Now, after all that being said, I actually went "old school" and created my shaker using acetate (shakes head).  While these sets are fantastic, I wanted a bit more room for all my shaker bits and pieces.  I started by stamping and die cutting all the images from the More Rustic Wildflowers set from MFT.


I lined up all the stamps on my Misti by using the dies as a guide. Once everything was stamped, I was able to die cut everything with one pass!


Next, I stamped a panel of white cardstock with an old Gingham Background Stamp but you could use any stamp or patterned paper for this.  To create the window for my shaker, I used one of the Stitched Rectangle Dies from Lawn Fawn.


To make the window a little prettier, I made a frame out of white cardstock using this same die as well as one die larger from the Fancy Scalloped Rectangle Dies from Lawn Fawn.


By nesting the two dies together and running them through your die cutting machine, you will end up with a frame that fits perfectly around the window!


I trimmed a piece of acetate and adhered it to the back side of this panel. Any plastic packaging will work for this.  To create the "well" for the bits and pieces, I placed a border of foam tape around the edges of the plastic.  I use this foam tape.


Before adding the sequins, I wanted to line up my sentiment stamp which will be on the card base itself.  I did a dry run on the placement of all my flowers and lined up the sentiment on my Misti.


The sentiment comes from the beautiful Choose Happy Stamp Set from Penny Black and I stamped in Versafine Clair Nocturne Ink.

Now it's time to add all the sparkle and shine. I used an old sequin mix plus some Nuvo Confetti Crystal Cloud Circles.  Here's a little tip:  after removing the lining from the foam tape, add another layer of acetate, this will make it heaps easier to line the shaker panel on your card base. You can flip it over and nothing will spill out!!!


I may have overdid it on the sequins as you have to give it quite a shake to see the full sentiment.


I placed my little floral arrangements is opposite corners using a combination of Nuvo Deluxe Adhesive and foam squares.


I'm really happy with the final outcome and had heaps of fun creating this card!!  Just wait until you see what the other designers came up with...you'll be blown away!!

Here's the full blog hop line up:

Laurie (YOU ARE HERE)

PRIZES!!!

Scrap 'N Stamp Canada is giving away ONE Tonic Die and Shaker Set to one lucky commenter on each stop of the hop. There will also be one set given away on the Scrap 'N Stamp Facebook Page! That's SEVEN in total!!  So please leave some love on each of our posts for a chance to win one of these amazing sets!  Winners will be announced on Saturday, September 1st on the SNS Blog!  Good Luck!!

SALE!!

All Shaker Windows are 20% off right now!!

Thank you so much for hanging in there with me. I know this post was a bit lengthy :)

See you soon and happy blog hopping!!

Laurie


Sunday, July 1, 2018

Your Next Stamp Guest Designer!

Hi friends!!  I'm so happy to be guesting for Your Next Stamp for the month of July!!  This has been one of my favourite companies since I began this awesome hobby!! Not only because it's a Canadian company but the designs of the stamps and dies are so incredibly cute and unique!!

I made a card to celebrate using one of my favourite stamp sets and die sets!


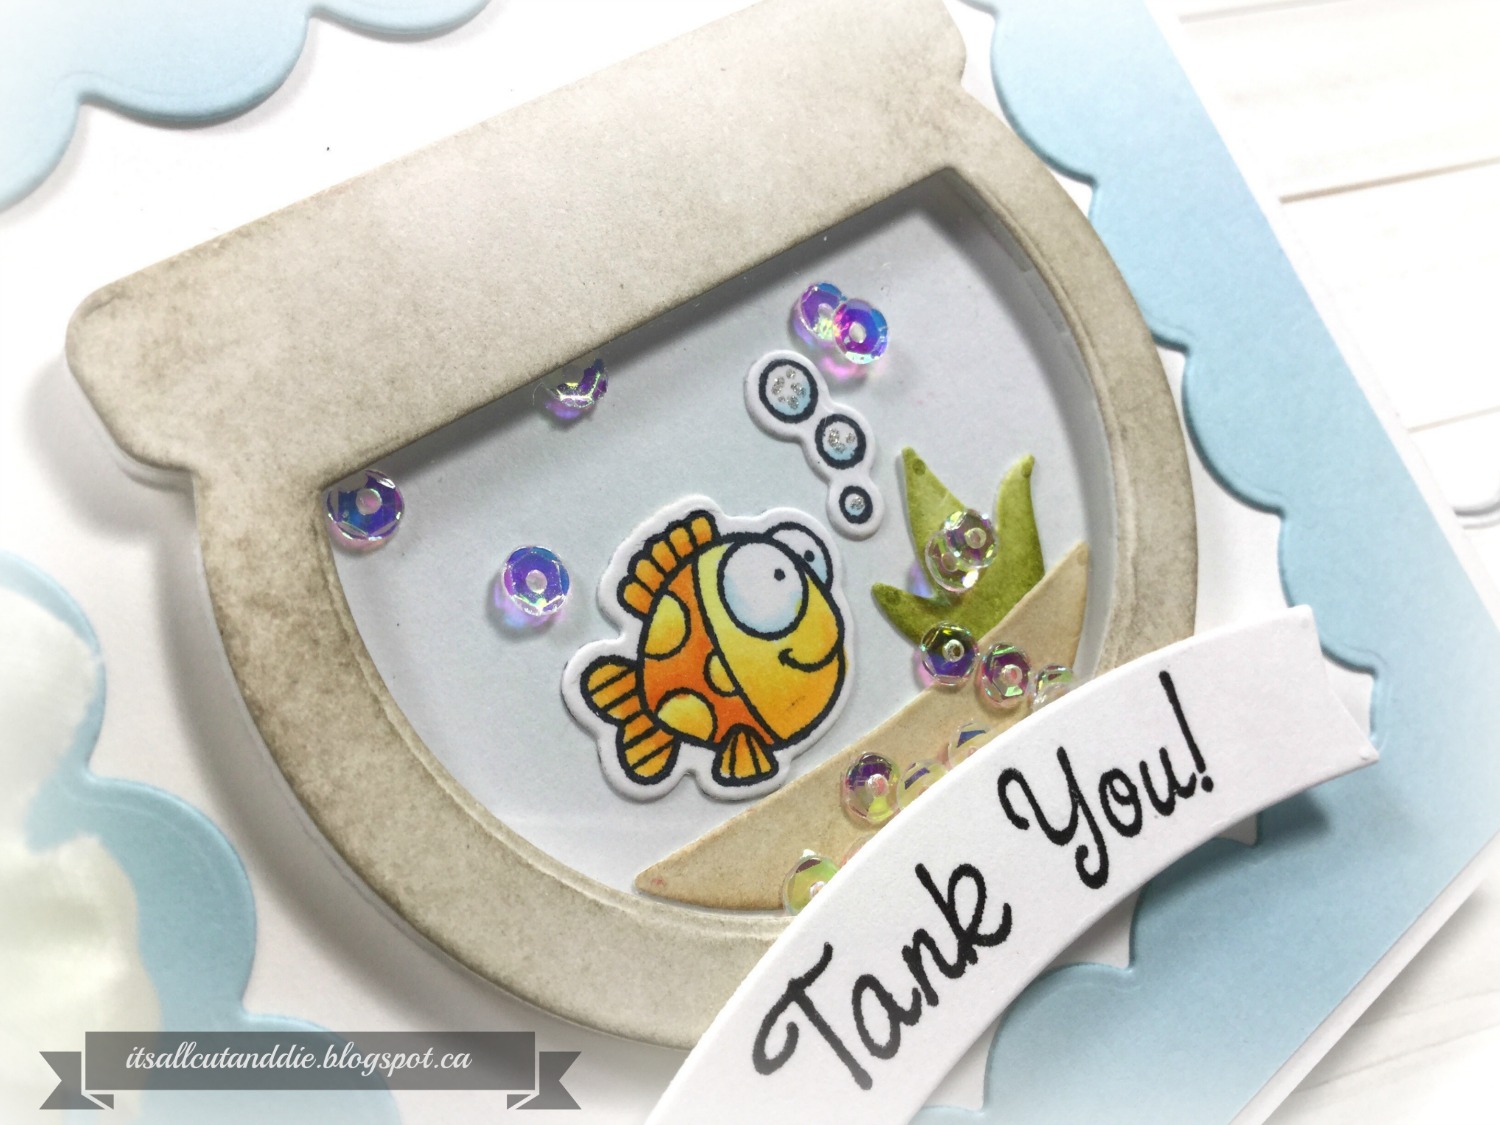
I don't make many shaker cards but this is a very special occasion and the Fish Bowl Shaker Die Set makes it so easy!!  I used the Aquarium Antics stamps and dies to create this cute "tank you" card.

One of my all time fave dies is the Reverse Scallop with Optional Stripes Die Set! This is one of the most unique dies and I hope someday there will be more released!!!


The sentiment was stamped on the banner die that is included in the Cool Tag One Die Set.


I had so much fun making this card!

 I hope you'll join me this month as I play along with all the challenges and also the JULY RELEASE for Your Next Stamp!!  

Thank you so much for stopping in today!! Much appreciated!

I'll be back real soon.  Until then...stay crafty!!

Laurie

Monday, June 19, 2017

Hello Friend Shaker

Happy Monday!!  I'm back to share a sweet shaker card with you today!  I really don't make a lot of shaker cards so this was a fun project!

I started by cutting down a piece of white cardstock using the rectangle die from the new Dotted Patterns Set 1.  I then embossed it using a Polka Dot embossing folder to give it a bit of texture.  To create the frame for my shaker, I took the second and third (from the middle) dies from the Dotted Ovals, taped them together and ran it through my Big shot with some grey cardstock.  I love the dotted detail you get on both the positive and negative die cuts!!


Before I filled the shaker, I stamped the word, friend, onto the embossed panel.  This comes from the And the Fox Says Stamp set.  I used a few Fruit Punch Sequins, Pink Lemonade Sequins and some Space Silver Sequins for my shaker bits.  I then adhered my frame (with acetate) over top.

I had a scrap of watercolored paper so I took the "hello" die from the new You're so Ranunculus Bundle and die cut it out.  This is the perfect size to adhere over the frame!!  At this point, I thought I was done, but decided it needed a cute, little critter.  So, I stamped, coloured and cut one of the cute lions from the Birthday Lions stamp set.  I foam mounted her just under the shaker element.


And, of course, I added a few more Space Silver and Fruit Punch sequins on the panel as well!!  I foam mounted the panel onto an A2 cardbase and voila!! Done!


Thanks for stopping by today!  Have a fabulous week!!

Laurie


Thursday, May 4, 2017

Studio Katia's FIRST BIRTHDAY Blog Hop!!!!

Hi All!!!  Welcome to this special blog hop in honour of Studio Katia's First Birthday!!  I am so thrilled and honoured to be a part of this amazing design team.  I have the utmost respect for Katia who does this all by herself.  She has accomplished so much in so little time with much more to come!!!

So let's get this party started, shall we??  The theme for this hop is SHAKER CARDS!!!  Shaker cards are so much fun but to be honest with you, I rarely make them.  So they are actually a challenge for me.  It takes a lot of planning on my part and I usually end up throwing the first one away :)

I started by going through my SK dies, I knew I wanted to make a shaped card.  So I picked one of my favourite sets, Stitched Creative Squares.  I die cut two of the largest square, scored one of them 3/4 inch from the top, applied Scor-Tape and adhered the two pieces together.  Next, I took the two smaller squares, nested them together on top of another piece of cardstock and ran them through my Big Shot.  This created a frame.


I immediately added my acetate to the back of the frame, applied two layers of foam tape and filled 'er up!  For my bits and bobs, I used the crazy beautiful Crystal Rainbow Fusion, Silver Stars Confetti, and Silver Foil Seed Beads.  I placed another die cut piece of cardstock (using the medium die) and cover the back of my shaker.


After adhering the shaker portion to my cardbase, it was time for the sentiment.  Insert mistake here:  I wanted to stamp INSIDE the shaker part.  And because everything was already put together, I knew stamping/heat embossing on the acetate was not going to work.  Plan B:  I took a "happy" die from an older My Favorite Things set and die cut it from white cardstock.  To co-ordinate with the sequins, I sponged some Jelly Bean ink from Simon Says Stamp on the sentiment.


This die is an "on the edge" die so it doesn't cut the letter right off.  I left a wide enough strip on the bottom so I could stamp the word "birthday".  Then, to get all matchy-matchy, I ran it through using the medium square die so I could get the stitching detail.  The tiny flower comes from Sunny Studio Stamps.  I sponged some Doll Pink Ink (Simon Says) onto some cardstock and cut that out and also cut it out using some teal glitter paper for the centre.  I adhered both the sentiment and flower using Multi Medium Matte adhesive.  And here it is:


This card was totally fun to make!!  You know what else is fun?? Giveaways and Discounts!!!!! 
Here are all the details...


GIVEAWAY INFO:

- You can win a $20 GC to Studio Katia at every stop on the hop! Make sure to leave a comment by Sunday, May 7th for your chance to win! The more blogs you visit, the greater your chances of winning.

- You can also win (1) Simon Says Stamp goody bag and (1) Kuretake ZIG Clean Color Real Watercolor Brush Pens, 80 Color Set. The winners will be chosen from all the comments along the hop.

- Studio Katia is offering 15% off all purchases to their online shop (link http://www.studiokatia.com) using the code "SKTURNS1" through Sunday, May 7th at midnight EST.

*Comments must be left before 11:59 PM EST on Sunday, May 7th and winners will be announced on May 10th.


The next stop on the hop is the super talented, super amazing:  Amy Kolling

Featured Post

A Simple Thanks Card

Well, well, well. Look who decided to show up...me! It's been an awful long time yet again. I seriously thought I'd be well out of t...