Monday, October 7, 2024

A Simple Thanks Card

Well, well, well. Look who decided to show up...me! It's been an awful long time yet again. I seriously thought I'd be well out of this funk I've been in FOR THE LAST YEAR (maybe two).

My creative spark has seemed to take a down turn. I used to have so many thoughts and ideas, now I have very few. So, when that spark ignites, I have to get to the craft room and let it flow!

Funny thing is, even though I hardly create, I'm still buying hahaha! But I've heard that crafting and buying are two separate hobbies!

Lately, my store of choice has been Scrapbook.com. They have such an amazing selection, always have a discount code or freebies. Only downside is the duties I have to pay every time...oh well. Shipping is quick, even to Canada.

So, here is a clean, simple thanks card...


This uses the Mini Hello Dog Die Set which is an exclusive Scrapbook.com product and which also was a freebie! The large "thanks" is from the Concord and 9th Markered Die Set, which unfortunately is no longer available and the "friend" comes from an amazing stamp and die set called Thanks, Friend.


I also used some VERY old patterned paper from Fancy Pants...gotta love using the neglected patterned paper!!

Thanks so much for stopping by! I'm going to try better to show up but I'm not going to promise.

I hope all is well, my friends!!

Laurie


Tuesday, November 14, 2023

Patterned Paper and Coloured Cardstock

Hey friends and welcome! I wanted to share a fun shaped card with you using dies from Pretty Pink Posh and Scrapbook.com!

I've been a little obsessed with both brands lately. Pretty Pink Posh has been coming out with the cutest stamps and dies lately and I seem to be buying at least one thing from each new release! Scrapbookcom has got some of the best nesting die sets, coloured paper pads and patterned paper pads! I find myself visiting this store more often as their exclusive products, sales and freebies are amazing! (NOTE: I'm in Canada. For whatever reason, this is the only US online retailer that I order from that I always end up paying duties/taxes when it arrives....annnoying but I tend to overlook it because their prices can be pretty good). 

Enough chatter, let's get to the card!


I made a fun, floral shaped card using the Nested Spring Flowers Dies from Scrapbookcom. I ADORE this set of dies!  I simply cut 2 of the largest die out of white cardstock, then another of the same size using pattern paper from an older Photoplay paper pad. I then cut another flower in the next size down, out of white. To make the base, I simply made a score line at the top of one of the largest flowers and used Scor-tape to adhere the two together!

I used a combination of the Mug/Additions dies from Pretty Pink Posh. This includes the : Winter Mug Die (this is the base set) and the Fall Mug Additions. These two sets come with all the dies you see here plus more!!!

All the papers for the mug and foliage are from Scrapbookcom. The mug is cut from my favourite fall paper: Cozy Autumn 6x8 paper pad. The solid colours come from a combo of the Floral 6x8 pad and the Boho 6x8 pad.

After everything was die cut, I used a combination of liquid glue and foam adhesive to attach and adhere everything together...this is quite a dimensional project and one best hand delivered!


I added a few white gel pen details. And a sentiment from and Aall & Create set called Stay Cozy.

I absolutely adore how this card came together! And I hope you do too!!

Before I sign off, I wanted to mention that all the links I've provided are from the shops that I bought each of these products and these are not affiliate links.

Thanks for stopping by!

Laurie


Friday, October 6, 2023

Scrap N Stamp Halloween Hop--Ghostly Greetings!

Welcome to this months Scrap N Stamp blog hop! We, of course, are celebrating none other than HALLOWEEN! You should have arrived from the lovely MEGHAN K!


Full confession here..I do not like Halloween. Even as a kid, I never enjoyed it. However, I do like creating some spooky cards. Well, kind of spooky. More "spooky-cute".

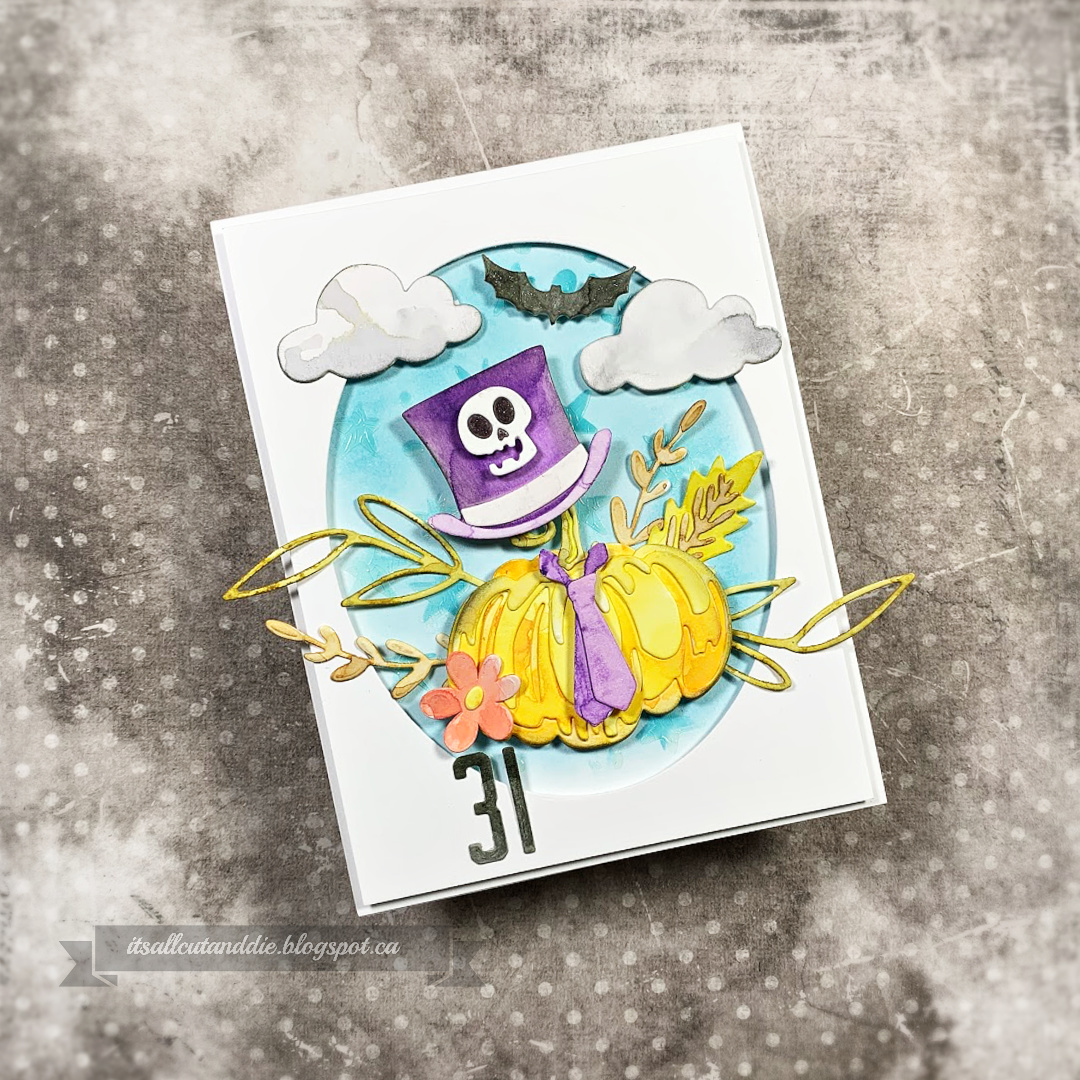
I chose to use a variety of Tim Holtz/Sizzix products for my card today.


I die cut all the pieces from Mixed Media paper. I added colour using the "smooshing" technique with a variety of Distress Inks. This adds colour quickly while creating some fabulous texture! 

I used one of the pumpkins from the Pumpkin Duo Die Set, the hat and tie (which fit perfectly on that pumpkin) are from the Tailored Die Set. The foliage comes from the Funky Florals 2 set. The clouds are from Christmas Cutouts. The little skull on the top hat is from Trick or Treaters and the "31" is cut using the Alphanumeric Nomads set. The small bat is from an older set I had in my stash.

As you can see, all these die sets work wonderfully together and it also shows that I have a bit of an obsession with Tim Holtz dies and die cutting in general!!


To create the background, which is pretty much covered by my focal point, I used Transparent Distress Crackle paste along with the new Spellbound Stencil. I did ink blend some Broken China Distress Ink over it. This was done directly on a white card base.

I die cut an oval window into a card front, foam mounted it onto the base then foam mounted my focal cluster.


Because there is so much texture on this card already, I did not add any sparkle, shine, gems or sequins.

Hope you enjoyed this not so spooky Halloween card! Even though I'm not into Halloween, I had so much fun going through my stash of TH dies and creating!!

Now on to the treats!!

Leave a lovely comment on each stop of this hop for a chance to win a $50 gift certificate to the Scrap N Stamp Online Store!!  You have until October 24, 2023 to leave a comment. Winner will be announced on the SNS Blog on October 31, 2023. GOOD LUCK!!

But here's one more treat for your pillowcase...


Save 25% on select Halloween themed items until Oct 11/23!  Happy Shopping!

YOUR NEXT STOP IS THE WONDERFULLY TALENTED DEEPA!


Sunday, September 24, 2023

Newton's Nook Ink Paw Challenge #207

Hello and welcome back! This week I made a card to enter into the latest challenge from Newton's Nook! I've always been a huge fan of their stamps and dies and decided to use a couple of my favourites. The theme for this challenge is SKETCH. Sketch challenges always gets my creative juices flowing.


Here's my take on this...


I used one of my all-time favourite fall themed stamp sets:  Pumpkin Latte along with its co-ordinating dies. My colouring medium of choice was watercolour pencils which I've been using A LOT lately!

To create the striped panel, I simply used the same colour of pencils that I used on the images to draw 1/2 inch lines on the paper. Then blended it out with water. These particular pencil are permanent when dry to there was no worry on the colours bleeding.


To add some texture to the striped panel, I used the Falling Leaves Stencil along with some white embossing paste. Subtle yet lovely!

I used a border die to create a panel behind the striped piece to add a bit more interest and used foam tape to adhere it to the card base.

I stamped the sentiment on the oval die cut leaving enough room to foam mount the girl. I tucked that cute, pink pumpkin behind her.


I LOVE how this card turned out! Not your traditional fall colours but I think the season is well represented :)!

Thank you for stopping by! Have a great day and see you soon!

Laurie


Friday, August 4, 2023

Scrap N Stamp ALTENEW Blog Hop!

 Hey friends, welcome back!  Today we are featuring Altenew products in this months blog hop for Scrap N Stamp Canada!


Scrap N Stamp has recently started to carry the Altenew line of products which is super exciting! There is truly something for everyone!

For my project, I used the GORGEOUS Peony Sunshine 3D embossing folder. I used a thick, kraft cardstock for this and it worked beautifully!


After the embossing, I trimmed the panel down to fit onto an A2, ivory card base leaving a border. To spice things up a bit, I lightly rubbed a white pigment ink pad over the top. This catches the "high" points of the embossed image and brings out the pattern!


For even more added detail, I took some coloured pencils and added some fairly subtle shading. I used a brown pencil to outline it and it seems to pop of the paper even more!

I just so happened to have a small frame in my "use it up" pile and it worked perfectly to frame the kraft panel. Everything was foam mounted onto the base.


The sentiment comes from an older Altenew set called Painted Butterflies. I did add a few gems but they blend maybe a little too well!

Thank you for hopping along with us today! Just leave a comment below for your chance to win a $50 gift certificate to the SNS online store!

Winner will announced on the Scrap N Stamp Blog on August 29/23.

Thanks for leaving some love and good luck!!

You can find the full list of bloggers HERE (SNS Blog)

Until next time....

Laurie


Friday, July 7, 2023

Christmas in July with Scrap N Stamp!!

 Hello and welcome to the Scrap N Stamp Canada "Christmas is July Blog Hop"! You have arrived from the super talented Kia


The Christmas in July theme is always fun. It breaks up the spring and summer crafting nicely and lets you dig through your holiday -making stash! 

I mixed and matched three different brands for my project today, something which I love to do.


I used the Christmastime die set from Tim Holtz/Sizzix. This is quite a simple die set yet is just beautiful. I chose to cut everything from white cardstock and use a variety of Distress Inks to add the colour. I then glued all the pieces together to create one solid image.

To easily create the background, I started with a piece of light blue cardstock. I simply inked around it using Broken China, then Chipped Sapphire and finally Black Soot Distress Inks. By starting off with the light blue cardstock, it cuts down on the blending time!  I then mixed a bit of white acrylic paint with water and used a paintbrush to splatter. I made sure to go over the couple and the trees to create continuity.

Now, speaking of the trees! I used the beautiful Layered Narrow Pines die set from Memory Box. This set pairs beautifully with the Christmastime die set.  I did the same technique by using Distress Inks to add colour. I used Rustic Wilderness and Peeled Paint.


I used a stitched rectangle die to trim down the background panel. I used the Stitched Hillside Borders from Lawn Fawn to create the snow bank. 

I foam mounted the "snow" to allow for a couple of the trees to be tucked behind. This meant that the cute couple needed some foam adhesive as well.  This is where I realized I hadn't stamped the sentiment...do you ever do that??

Luckily, it worked out okay! I heat embossed the sentiment in white. The "Warm Winter Wishes" comes from the super sweet Stay Cozy Stamp Set from Aall & Create.

The entire panel was foam mounted onto a top-fold, A2 white card base.  To finish off, I added some white, pearlescent pearls.


And that's my finished card! I hope you like it. It was A LOT of fun to make!

Now, onto the fun stuff...

For a chance to win a $50 gift certificate to the Scrap N Stamp online shop, all you have to do is leave a comment on each stop of the hop! This hop is full of gorgeous, Christmas inspiration so it should be very easy to leave a nice comment!

The winner will be announced on the SNS Blog on July 25, 2023.

Thank you so much for hopping along! Good luck!

Up next is the wonderful Mari...enjoy!

Laurie


Monday, June 26, 2023

Simon Says Stamp Monday Challenge!

 Hello and welcome! I thought I'd join in on a challenge today!! I rarely participate in challenges and I don't know why. They are a great way to get the creative ideas flowing. I also find that I make better use of my supplies. With prompts such as layout, theme or colour combination, it tends to make you look at your stamps, dies and inks with fresh eyes.

This is the Simon Says Stamp Monday Challenge. The theme is "Vacation". Typically, the Monday challenge is a vintage theme. My card is definitely NOT vintage. But that's ok!

I used all older supplies, some of which are no longer available or retired...sorry! But that's the beauty of challenges...you can give your older goodies some more love!

I created a pastel, beach themed card. Everything was cut from white cardstock and then ink blended with Distress Inks. I have tons of coloured cardstock which would make this easier but I love the look of the Distress Inks!


I'm pretty happy with the way this card turned out. It's definitely got a relaxing vibe to it.

Here's a list of the stamps and dies I used. Like I mentioned before, some of these are unavailable but worth a search:)

My Favourite Things:  Beach Scene Builder
                                     Beach Bungalow and Accessories
                                     Cloud Stencil
                                     Sunny Vibes Stamp Set
The scalloped frame is the Fancy Frames from Craftin' Desert Divas (oldie but goodie)

Thanks so much for stopping by!  Have a great week!

Laurie


Friday, May 26, 2023

Let's Celebrate with Jane's Doodles

 Hello and welcome!  Today, I'll share a fun card with you featuring a new digital stamp set from Jane's Doodles!  This one is called Surf's Up. This is another fun, must have set.


I have an inexpensive laser printer. I wish it could handle heavier watercolour paper but sadly, it does not. It does, however, handle a 90lb weight mixed media paper. I used an old Canson spiral bound paper book. 
I'm not sure if it's my printer or the paper, but I find that some of the line work will fade or rub off. Easy fix with a fine liner pen though!


I used watercolour pencils to colour the images, then outlined them the best I could. I just had to add some sparkle and shine with a glitter pen and Nuvo Crystal Glaze.


I hope you enjoyed my card featuring this super cute set!

See you soon!

Laurie

Thursday, May 11, 2023

Jane's Doodles Digis!!

 Hey friends and welcome back! 

You may have heard the Janes from Janes Doodles recently closed her shop and stopped selling her amazing stamps. This was such sad news to hear. But....she has thankfully decided to start selling her designs as digital images!!!

If you're not familiar with Jane's illustrations, I highly recommend you check her out. I've been a fan since I started card making many years ago. She has got a unique, fun and kind of quirky style...which I love!

Now, with all that said, I'm super excited to be a part of her digital design team and help showcase her wonderful designs!


Here is my first project featuring the Road Trip digital stamp! This files is FULL of images! I decided to use the van with everything all in one. But you can set up your scene however you'd like! She has broken down the scene into individual pieces to make creating easy...this is the beauty of digital stamps!


I used coloured pencils and blending solution as my medium. It's literally been years since I've coloured this way and I absolutely love how it turned out.  

This image can be sized however large you want. In this case, it fits my A2 card perfectly. I added a touch of stencilling to give a bit of interest. I also found some very interesting cardstock in my stash. It's an off-white shade with little flecks in it.  I think I got this from WPlus9 a LONG time ago.  


I really hope you will check out Jane's shop! 

Thanks for stopping by...see you soon!

Laurie


Sunday, April 16, 2023

You're So Tweet ft. Ink Blot Shop

 Good morning and happy Monday!! I just wanted to stop in and share a cute card made using stamps from the Ink Blot Shop!

We're preparing for another blast of winter this week here in Manitoba. I'm praying it passes us by. It is however, a lovely day today so I put together a very Springy card.


I decided to stamp an entire background to mimic a piece of patterned paper. I used the adorable Tweet Talk 6X8 stamp set. My ink of choice of Versafine Claire along with clear embossing powder. The heart and dots are from the same set and the tiny flowers come from the Botanical Borders 6X6 set.


I used Bristol Smooth paper along with an inexpensive watercolour palette I got off Amazon. I'm in a watercolour phase right now mostly because my Copics need refills! But I love the "messy" sort of look I got here :)


The sentiments all come from the Tweet Talk set. I used a simple oval die to cut out the sentiment. Finishing touches include some white paint pen dots (I have much better luck with a paint pen than a gel pen) and some Nuvo Crystal Glaze!

I adhered the finished panel onto a top-fold, ivory card base and called it done!!

Thanks for stopping by!  Have a great day!

Laurie


Sunday, March 12, 2023

Simon Says Stamp - Wednesday Challenge

 Hello friends! Today I decided to enter a challenge! I find that challenges are a great way to not only fire up the crafty mojo but to also give you an opportunity to dust off some products that you may not have used in awhile!

I decided to enter the current Wednesday Challenge over on the Simon Says Stamp Blog. It combines two of my favourite things:  Tim Holtz and tags!!

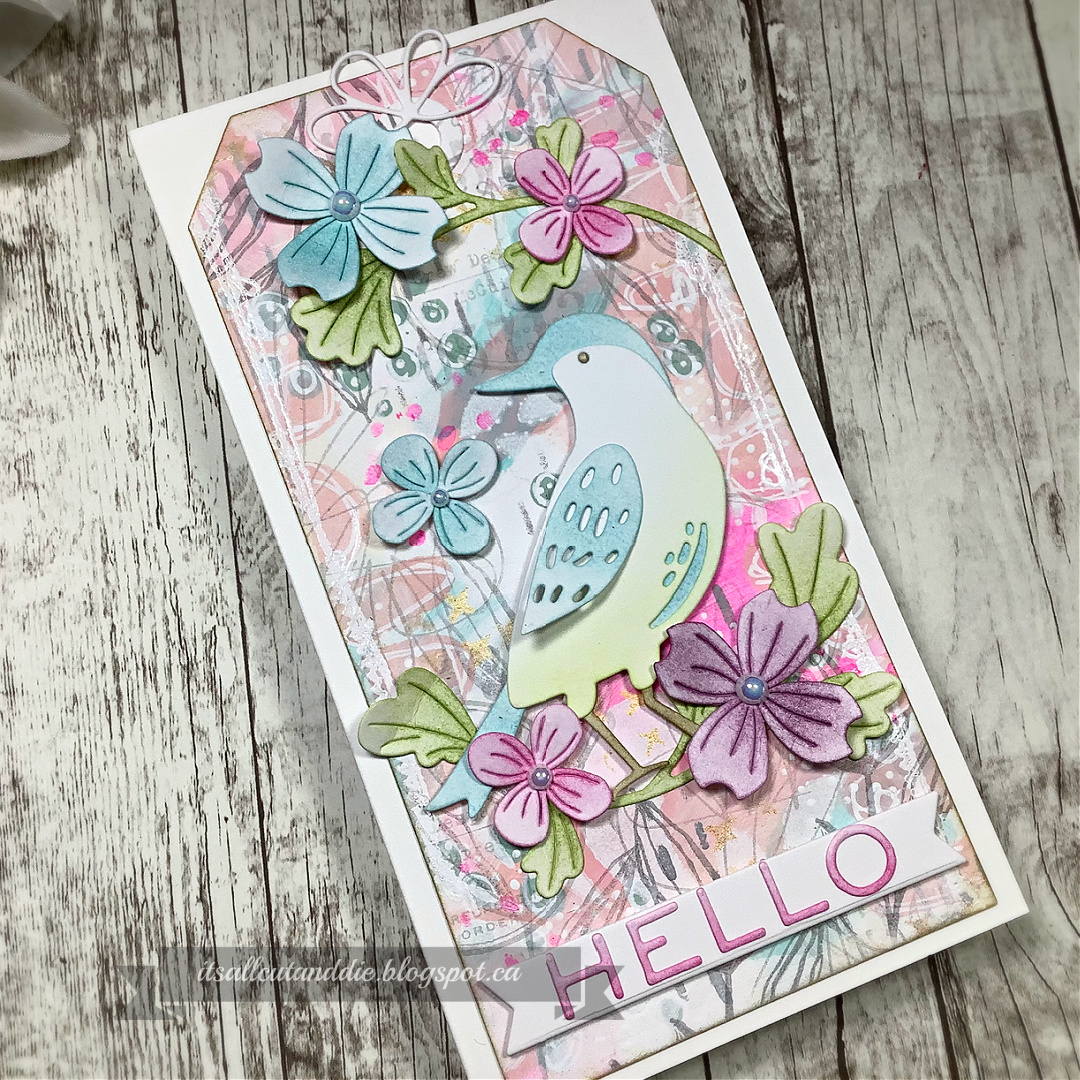
I used the largest of the Tim Holtz Framelits Tags. To create the background, I used a variety of acrylic paints and my fingers to apply. This is my favourite way to get a fun background. I then used a whole bunch of stencils to create layers and patterns.


Next, I dug through my stash and found the Arched Leaf and Flower Blooms die set from Simon. To go along with these flowers and leaves, I used the TH Feathered Friends dies. After everything was cut out, I used Gina K Designs inks to add colour.

I played around a little with the arrangement and used a combination of liquid glue and foam adhesive to adhere everything. 

The sentiment comes from an older TH die set called Pondering Words.

This tag fits onto a card base measuring 6.25 X 3.5.


Thanks for dropping by! See you soon!

Laurie


Saturday, December 17, 2022

Scrap n Stamp's 12 Days of Christmas!! Day 9

 Hello everyone!! I'm super excited to be participating in the 12 Days of Christmas event for Scrap N Stamp Canada


Today is Day 9 and we are featuring AALL & Create!! This brand is new to the shop and I'm so happy about that as I'm a huge fan!  This company has every "style" you can think of. From cute to grunge to artsy and vintage. You must check it out!

I went with the cute theme today. I used a stamp set illustrated by Janet Klein..she creates the most adorable sets!


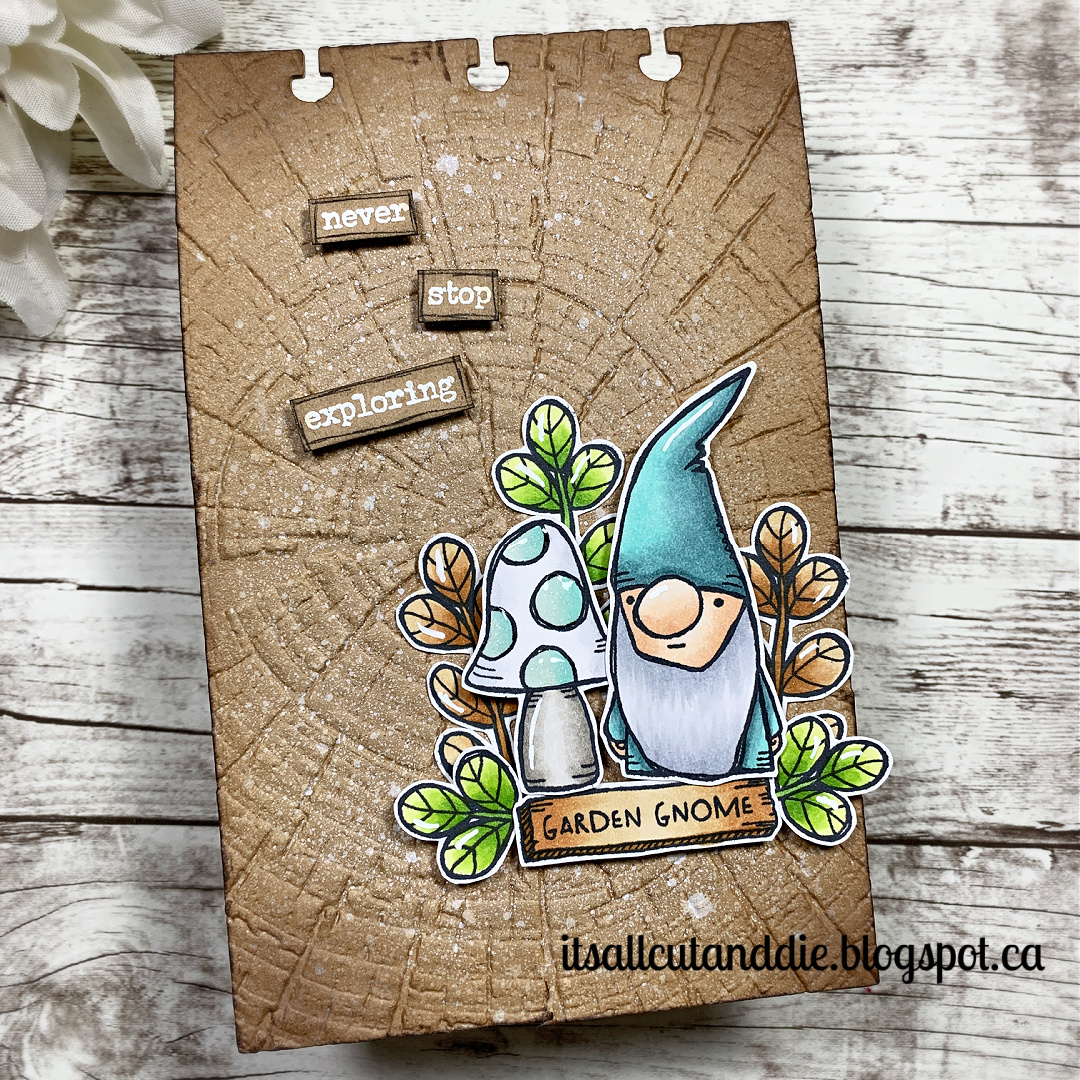
I made a shaped card for you today. The base used a Disc Bound Journal Die set but this would look great as a tag too!


I started by stamping and colouring all the images. There are no coordinating dies but the images are super easy to fussy cut! 

To add some amazing texture, I used the Tree Rings Embossing Folder by Tim Holtz. Side note: If you're on the fence about this folder, jump off the fence and add to cart because it is incredible!

I used White Ink Spray by Avery Elle to add a few splatters then used Vintage Photo and Walnut Stain Distress inks to add some colour around the edges.


I used a combination of liquid glue and foam adhesive to add my images. I cannot get over how cute this gnome is!!!!

For the sentiment, I pulled out the Tiny Text Stamp Set from Tim Holtz. I white heat embossed it then trimmed around each word to create little strips. I foam mounted these as well.

To create the card, I simply die cut another panel, scored 1/2 inch from the top and applied a strong adhesive above the score line then attached the panels together.


This was a super fun project to make. I adore AALL & Create and hope to see more products added to the shop soon!


AALL & Create is 25% off!! I hope you'll snatch a deal while you can!

Thanks so much for stopping by! See you soon!

Laurie


Tuesday, November 22, 2022

YNS Challenge #192

 Hello and welcome!  To get my creative mojo kick started, I perused the internet for some inspiration and a fun challenge. Your Next Stamp was the first company challenge I participated in when I started card making!

The theme of this challenge is "Thank You". I dug through my YNS stash and found one of the cutest sets called Scarf Weather. While I'm typing this post, I just discovered that this set has been discontinued...so sorry about that!

I used my pencil crayons to colour the sweet images, used the coordinating dies to cut everything out and came up with a simple scene.

I used a leaf embossing folder from Taylored Expressions to create some interest on the background panel. Again, apparently discontinued! Can you tell I've been shopping my stash lately, haha?!


This layout is a bit different for me as I usually like things to be centred. I used foam adhesive to pop everything up. And I usually always add white gel pen details!


Thank you very much for stopping in! If you're looking for a fun challenge, check this one out! But hurry, it's almost over!!

Until next time!

Laurie

Friday, October 28, 2022

Rainbow "HI" Card

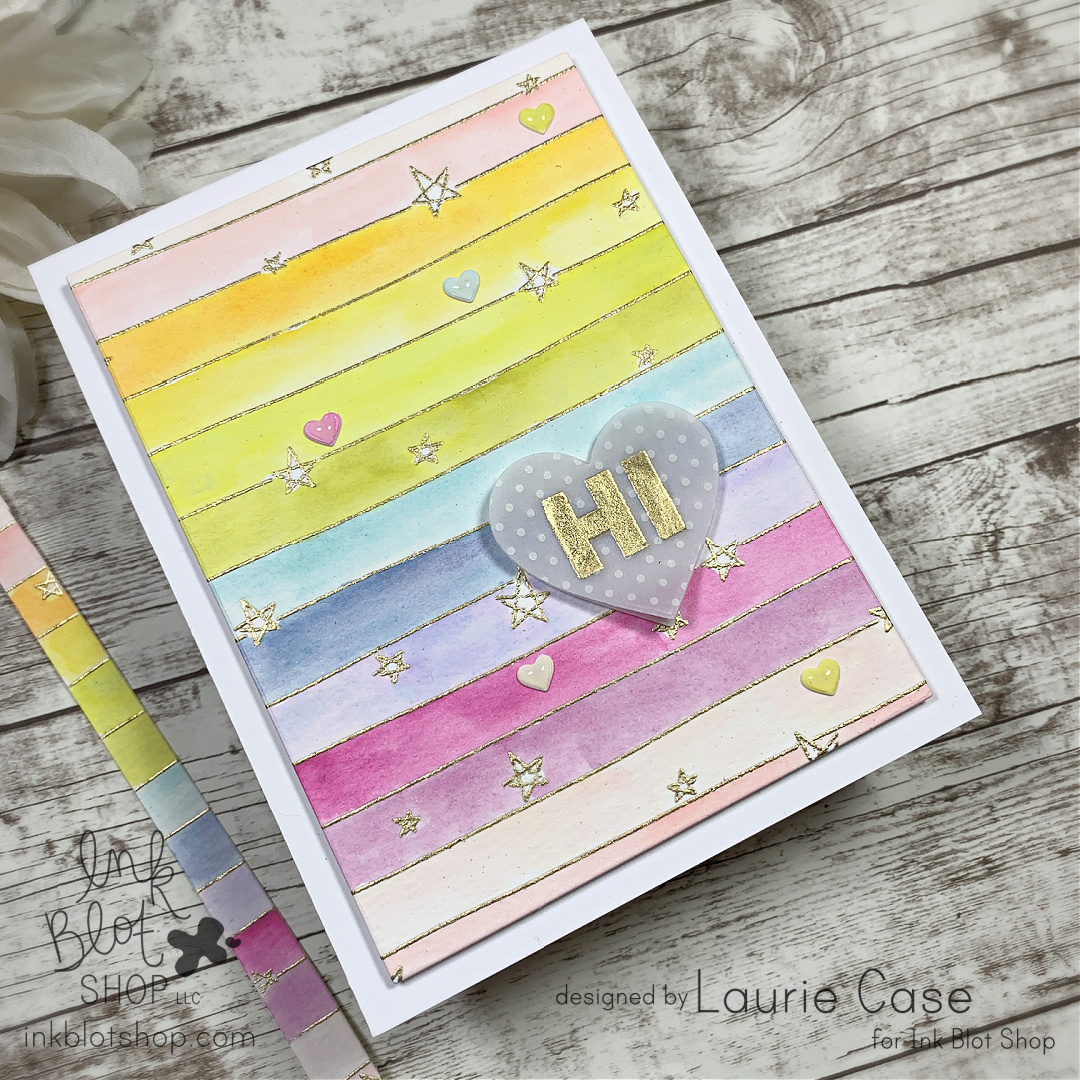
 Hi friends and welcome back! I'm sharing an easy and fun card featuring stamps from Ink Blot Shop! This card features simple watercolour and heat embossing.


I heat embossed the Stars and Stripes Background onto a piece of watercolour paper in Gold. Using a rainbow selection of Ranger Distress Oxide Inks, I quickly coloured in each stripe.


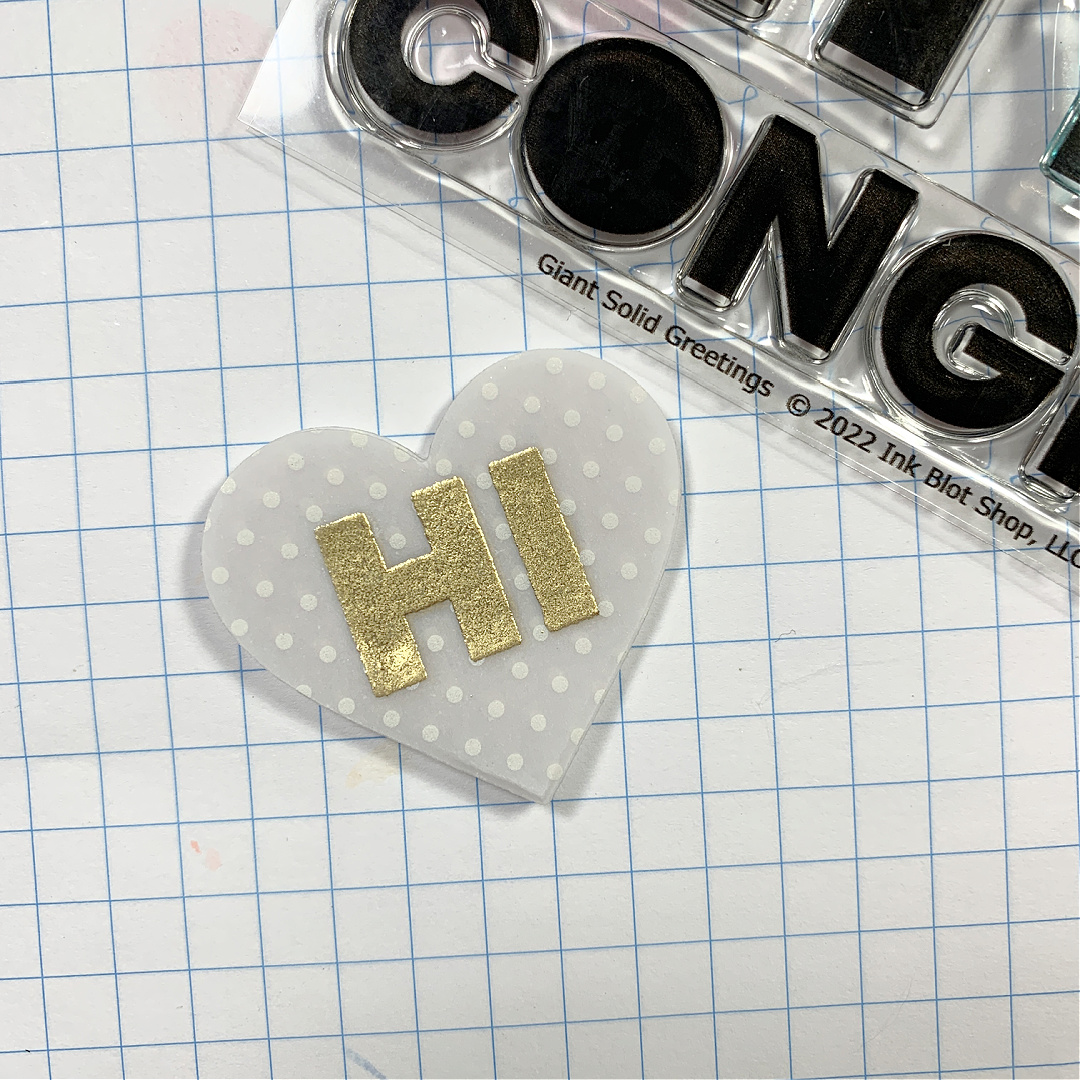
I found a piece of patterned vellum in my stash and decided to gold heat emboss the "HI" from the Giant Solid Greetings Stamp Set. 


I used a simple heart die to cut out the sentiment. I decided to use one of the leftover strips from the focal panel. I used a teeny-tiny heart die and cut out a few different colours. I added these as small embellishments.


I foam mounted the rainbow panel onto an A2 card base, foam mounted the vellum sentiment and used liquid glue on the tiny, embellishment hearts.

And the card is done!


And I still have the pretty little rainbow strip left over!

Thanks for dropping by! Have a great day!

Laurie


Monday, September 12, 2022

Simon Says Stamp Monday Challenge....Diecutting!!

 Well, hello there!! I'm really not sure how many subscribers I have left here and that's understandable and okay.  I've been so very absent here. I apologize and will try harder.  I don't have any other excuse except I'm super lazy.  I actually love sitting down and writing blog posts but when you don't actually HAVE to do it (ie. design teams), it just seems easy to ignore/forget about it! Anyway.....

I'm entering the current Simon Says Stamp Monday Challenge which is all about die cutting!! If you know me or follow me on Instagram, you'll know that die cutting is my all time favourite thing to do so I just had to enter this one!

I love making cards but I've discovered that I can take all the same supplies and techniques and turn paper into home decor pieces! I actually have a bunch of framed "paper pieces" throughout my craft room!


I've used the Lovely Envelope Die Set from Altenew to create this floral filled envelope. I used water colour paper and used Distress Oxide Inks along with the "smooshing" technique. For the sentiment, I used the You Matter Die from Simon.

Once all the pieces were put together, I adhered everything onto a 5X7 piece of ivory cardstock embossed with the Geo Screen Embossing Folder from Spellbinders.


This is just an inexpensive frame. The panel is quite dimensional so I had to really push it in there but it worked!!

I love the way it looked and it is on my wall now!  

I do apologize for the photos. It was a little late and I was having a bit of trouble not catching the glare of the photo frame.

Thanks so much for dropping by. I hope you found a little inspiration :)

Laurie


Featured Post

A Simple Thanks Card
Well, well, well. Look who decided to show up...me! It's been an awful long time yet again. I seriously thought I'd be well out of t...