Showing posts with label honey bee stamps. Show all posts

Sunday, November 12, 2017

Coffee Card for Butterfly Reflections Ink

Good morning, Friends!!  I wanted to share a little peek at the card I have up on the Butterfly Reflections Ink Blog.  I always get so excited when I get asked to help out :)


I hope you'll swing by and say hello!!!!

Thanks, 

Laurie

Wednesday, November 8, 2017

Honey Bee Stamps Season's Tweetings Holiday Release Blog Hop!!!!!

HELLO CRAFTY FRIENDS!!!  I am so excited to be a part of the Honey Bee Stamps Holiday Release!!  The release is now available in the store and it's super awesome!!

To celebrate the new release we are having the Season's Tweeting Blog Hop.  So get comfy and hop along with us!! Be sure to visit each blog and leave a comment for your chance to win!!! We will be giving away a $50 gift certificate to the Honey Bee Stamps store.  The winner will be posted on the Honey Bee blog on Monday, November 13th!!!


13963004_10210447152523947_5725335805742567252_o.jpg

My projects today use the new and adorable Season's Tweetings stamp set.  This is a LARGE set filled with the sweetest bird images and beautiful sentiments.  Once I started I couldn't seem to stop using this set!

I made two very different cards to showcase how versatile this set is.  The first card is more of a fun one.  I used only one bird image and created a "pile of birds" using the masking technique.  Masking is something that I don't do often and when I do, it's simple as possible!


I started by stamping one bird at the bottom of my panel and simply worked my way up. I think I used a total of 4 masks. The colouring was done with some basic Copic colouring.


I stamped the word "tweeting" repeatedly with Versamark ink onto the grey card base and heat embossed it with silver embossing powder. I simply stamped "Season's" onto some white cardstock with black ink and trimmed it into a banner shape.


I fussy cut around the top of my pile of birds and foam mounted that piece onto the card base.  A little glitter pen and Glossy Accents finish this card off!!

My next card is a little more sophisticated, still cute, but a little more elegant.  I started by stamping 3 of the birds onto Bristol paper and coloured them with my Tombow Dual Brush Pens.  I fussy cut them out but there are co-ordinating dies for this set (which will make their way to my craft room, I'm sure :))


Because these bird images and sentiments are quite large, I decided to make a longer card.  3 1/2 X 9, as a matter of fact.  Again, I used Bristol paper and ink blended a night sky, snowy hills background.  I used Tumbled Glass for the snow and Spun Sugar, Picked Raspberry, Dusty Concord and a bit of Chipped Sapphire for the sky.  After that had dried, I heat embossed that beautiful sentiment with silver embossing powder.  I LOVE that script!!


Finally, I foam mounted each of the birds onto the panel and foam mounted the panel, as well, to the white card base.  I added a few "stars" and "snowflakes" using a white gel pen and added some Glossy Accents to certain areas of each bird.


This set is amazingly versatile. Beautiful sentiments and the cutest bird images I've ever seen, a definite must for your stash :)

Finally, I just wanted to show you quickly a project made using the new Miracle of Christmas stamp. This is the most beautiful sentiment!!  This card features the Hexagon Solid Stack Honey Cuts and the Hexagon Stitched Stack Honey Cuts and some simple ink blending.


The sentiment is really all you need on a card, it's just beautiful!!

Thank you for hopping along with us to celebrate the new release!!

Here's the complete Blog Hop Lineup: 


Bibi Cameron  

Emily Midgett

Kelley Kohout

YOU ARE HERE!!

Lisa Cisneros

Melissa Bickford

Nichol Spohr

Taniesa Vlasak

Yulianna Neginskaya

Vera Yates


Thank you so much for stopping by and thank you to HoneyBee Stamps for letting my participate in this awesome release and hop!!

See you soon,

Laurie


Friday, March 31, 2017

Honey Bee Stamps Collaboration with Misti!!!!!

HELLO ALL!!!! Today, the design team from Honey Bee Stamps is having a blog hop along with My Sweet Petunia to celebrate the Most Incredible Stamp Tool Invented...the MISTI!!!!


 I hope you hop along with us as there are going to be fabulous projects and amazing tips on the tool.  Oh ya, and PRIZES!! Stay tuned until the end of this post for a complete list of blogs and the one rule you must follow to be eligible to win!

When the Misti first appeared on the market, I didn't think I needed one.  But after watching numerous videos of stampers using this product, I took the plunge and never looked back.  Today, I can honestly say that I CANNOT live without this tool!!

I started with the Original Misti.  I love the size of this one because it has the room for you to move your card panel or base to help place larger stamps.  Also, love it for background stamps!!
I was then lucky enough to win a Mini Misti.  This size is perfect for stamping multiple images or sentiments.  I would have to say that I use the Mini more but am so happy to have the Original!!

Apart from stamping multiple images at once, double or triple stamping and getting perfect placement, I'm going to show you four ways I use this fantastic tool.  So let's get started!!

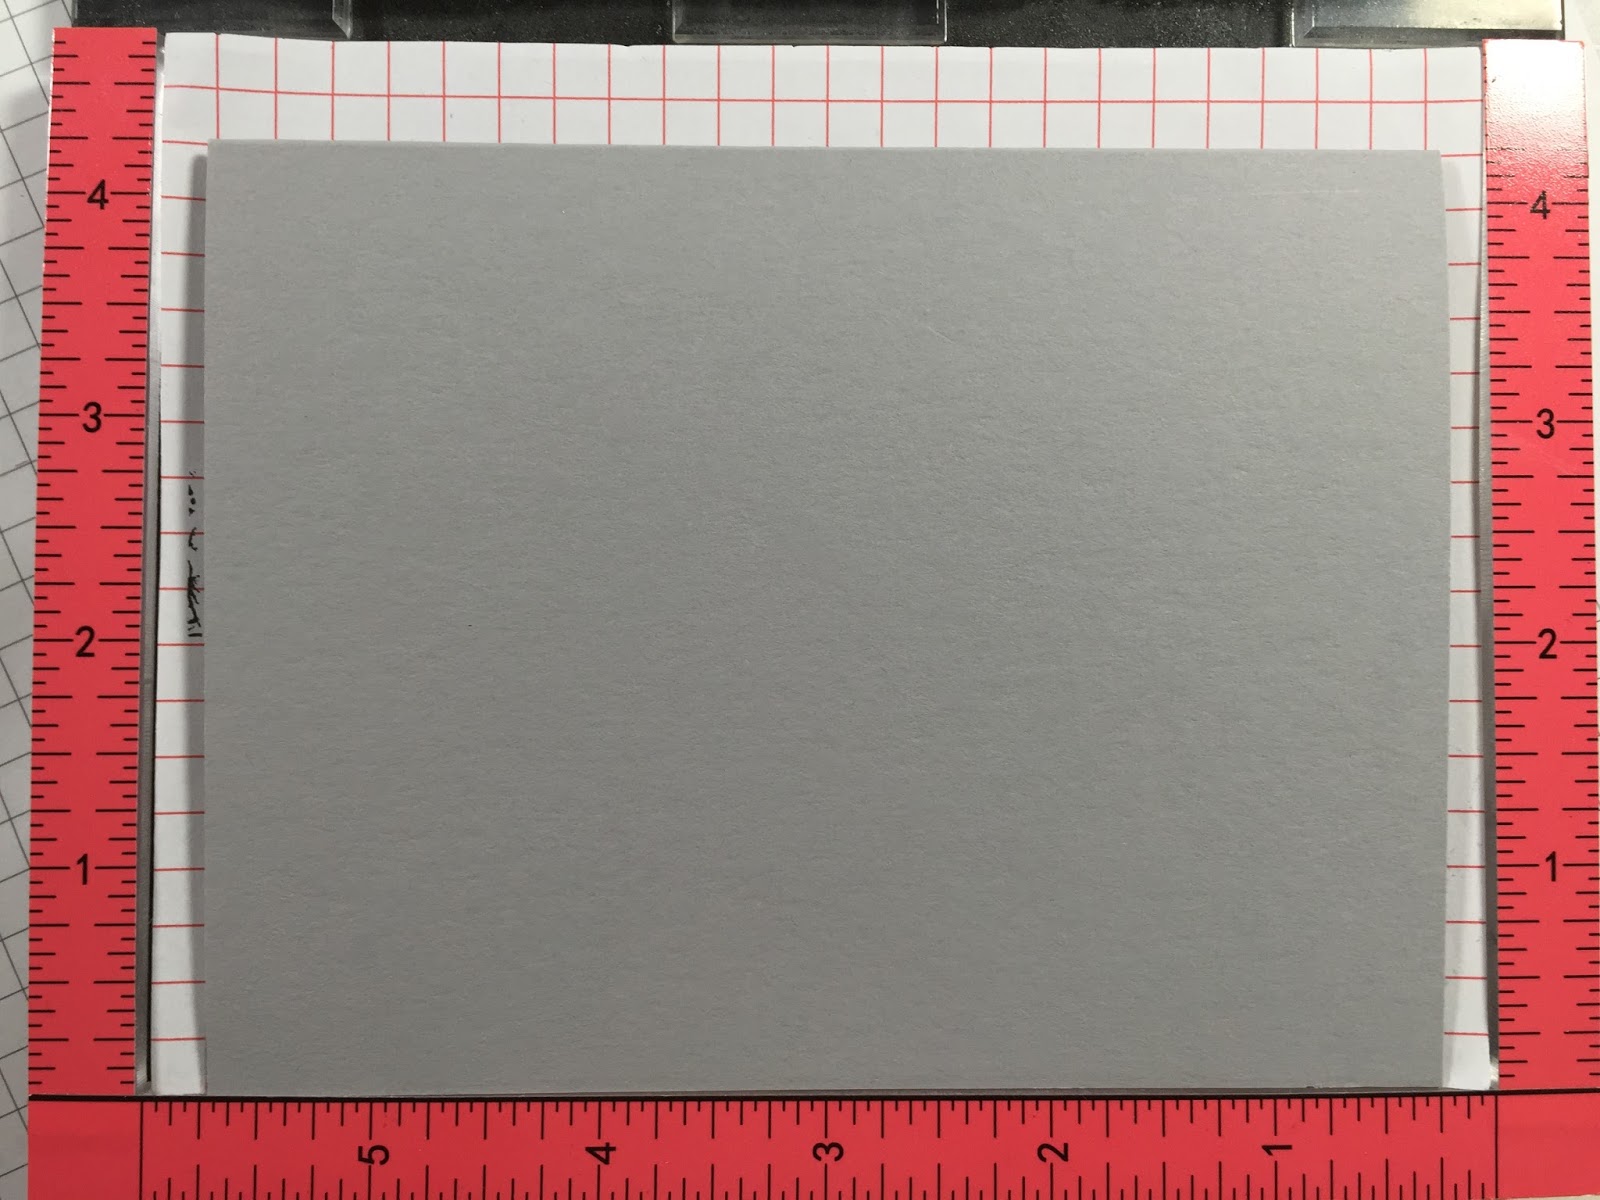
I started by placing a 4.25 X 5.5 inch card panel into my Mini Misti.  I lined up the large border stamp from the Zen Floral stamp set a half of an inch towards the middle of the panel.


This is so easy to do because of the measurements on the Misti itself combined with the grid paper.  I stamped the image with Memento Grey Flannel Ink.  This is the first stamping;


It stamped pretty good the first time but I decided to ink it up once more for an even bolder image.


To create a border to frame my sentiment, I simply rotated the paper 180 degrees (I did not move the stamp).  This allows for perfect measurements on either side of the card panel.


I inked up the stamp, closed the door and voila!!


You can see that there is exactly the same amount of white space on either side of the panel.  Yes, this is possible to do with a block or stamp press but there is NO second guessing your placement with the Misti!!

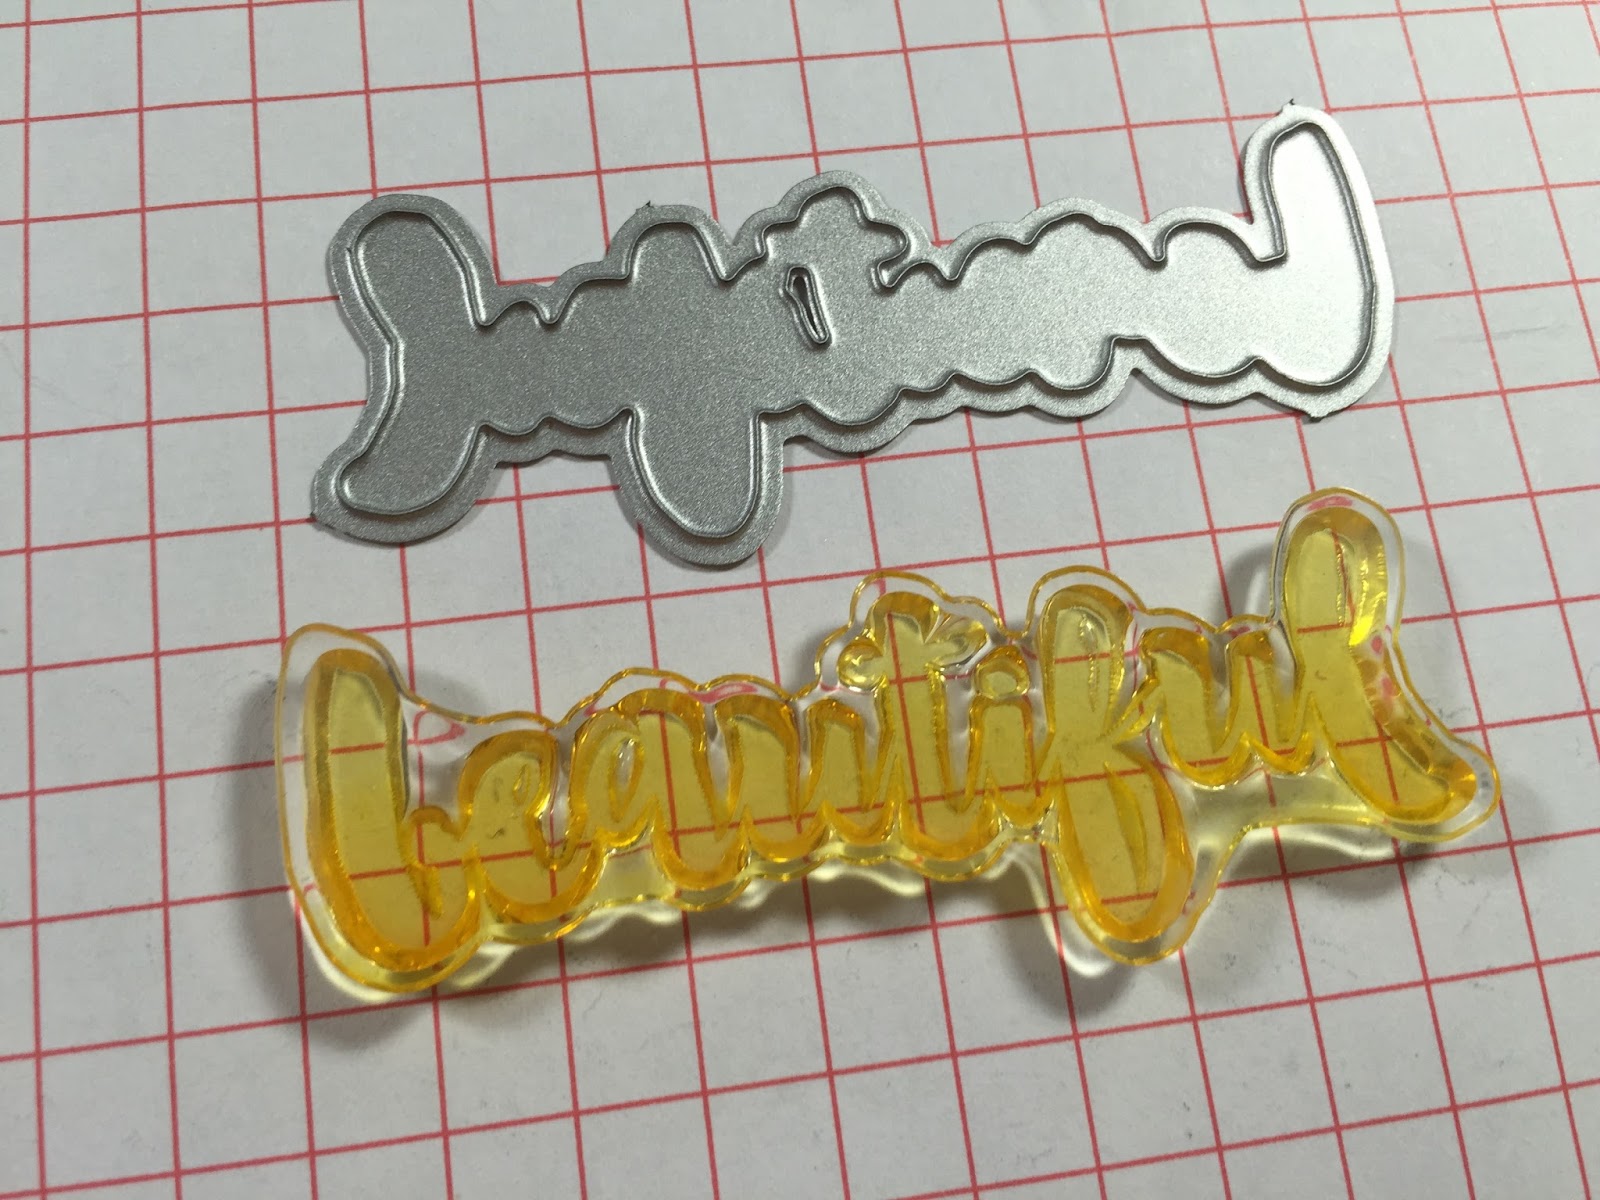
The second tip is using solid dies.  I prefer open dies but sometimes you just don't have that luxury.  I am terrible at lining up stamps to their die cuts.  I always end up with more white space on one side. Here's how I solve this problem.  I start by cutting the die out of the cardstock I want to stamp on.  I place the negative space (the paper with the cut out, not the die cut piece itself) into the Misti.  In this case I used the "beautiful" die from the Beautiful Life Honey Cuts.


I line the Matching Stamp up in the negative space. Before placing the die cut, I ink up my stamp and do a test run right onto the grid paper.  This allows me to see if any adjustments are needed.  Now that the stamp is in the perfect place, I place the actual die cut into the negative space and stamp.  This brings us to the third tip...ombre stamping!!  Oh, how I love the look of ombre.  I chose three shades of purple for my sentiment, a light, medium and dark.  I inked up the entire word in the lightest shade.


It turned out a little splotchy but that ok because we're adding more layers!  I then used the medium shade and inked up the lower half of the stamp.  To make sure you don't get a harsh line, just dab a bit of the ink away with your finger before closing the door.  Next, add the darkest shade to only the lower bits of the stamp, dabbing away the harsh line.  You could stop there but I like to clean off the stamp and ink it up with the lightest colour again and stamp.  The blend is beautiful!  I loved it so much I stamped and ombre heart as well.


Now, its time to add some details to my panel.  I took the Zen Floral Honey Cuts and instead of cutting the floral borders out, I used the die to emboss.  After placing the die over the image, use rubber embossing mats and your embossing sandwich and run through your die cut machine.


It creates a nice subtle texture.  I trimmed my panel down to be slightly smaller than an A2 sized card base.  It's now time for the fourth tip!  I am quite awful with lining up my panels straight on the card base.  So I used the Misti to help.  I place a tiny bit of dot adhesive to the inside of the base (to keep it from popping open) and line it up in the Misti. You can see I leave a quarter of an inch on either side.


Then using the measurements and the grid paper, I can line my panel up straight!


I used foam tape to adhere the panel to the cardbase and also to mount my word die and heart.  I added a bit of colour to a few of the florals by using the same purple inks and a blender pen.


To add a little sparkle, I added a few Diamonds, Clear Wink of Stella and some Glossy Accents!!


I hope I was able to give you some ideas on how to use the Misti!  If you don't yet have one, I encourage you to try one out.  They are truly worth the investment.  


Now, onto the prizes!!  Up for grabs is: 
1.  Your choice of an Original Misti or a Mini Misti from the My Sweet Petunia Store 
2.  $45.00 Gift Certificate to Honey Bee Stamps!!!  
All you have to do is leave a little love on each blog on the hop, that's it!!  Winner of the Misti will be announced on April 7, 2017 HERE.
Winner of the Honey Bee Stamps Gift Certificate will be announced


Here's the entire hop:

Laurie Case   (YOU ARE HERE)

Thank so much for taking the time to join us today!!  Have a great day!!


Wednesday, March 22, 2017

Big Thanks with Honey Bee Stamps!

Hi everyone!!  Just wanted to quickly stop in and tell you I'm on the Honey Bee Stamps Blog with this card today!  I used a bunch of different products, new and old, to create this card.  I hope you have a chance to drop in and check out all the details!!


See you really soon!!! :)

Laurie

Wednesday, March 8, 2017

FRIENDS

Hi everyone!!  I'm up on the Honey Bee Stamps Blog where, this week, we are honouring Kathy Racoosin from The Daily Marker!  She hosts the 30 Day Colouring Challenge which is just fantastic and I encourage you to check out her blog for all the details!!

For my post I'm highlighting watercolour with Stabilo 68 pens.  Love this medium for watercolour as it always gives such great results with little effort :)


Please head on over to Honey Bee for all the details and a full pic of the finished product!!

Thanks for stopping by!

Laurie

Wednesday, February 22, 2017

Hooray for Happy Mail!!

Hi all!!  I wanted to let you know that I'm up on the Honey Bee Stamps Blog with a card using some older stamps and dies and some brand new dies!!


I hope you have some time to swing by there for ALL the details and links :)

Have a Happy Wednesday!!

Laurie

Thursday, February 16, 2017

Sneak Peek Day Four -- HoneyBee Stamps

Welcome to Day Four of sneaks for Honey Bee Stamps!!  This is the final day of sneak peeks. Tomorrow, all will be revealed!!

Yesterday was puppies, today, you guessed it, it kitties!!  I'm a total cat lady so this set is right up my alley!!


This set features so many kitties, big and small! With accessories and toys to dress them up and create little scenes!!  It's SO cute!!  Can you tell this may be my favourite set of the release??


Tomorrow, is release day!!!!!


Wednesday, February 15, 2017

Sneak Peek Day Three -- HoneyBee Stamps

Hello and welcome to Day Three of Sneak Peeks for Honey Bee Stamps!!!  So far we've seen balloons, boxes and babies!!  Today we are switching gears and featuring man's best friend, dogs!!  Or shall I say...Playful Pups!!!


Here's a little look at the card I made.  To see more, please check out the Honey Bee Stamps Blog!  


Thank you for stopping by!!  See you tomorrow for our final sneak!!!!


Tuesday, February 14, 2017

Sneak Peek Day Two - HoneyBee Stamps

It's Day Two of our sneaks!!  I hope you enjoyed yesterday's little preview!  Today's set pairs perfectly with both of the sets that were sneaked yesterday.  And it's all about babies!!


This set is really clever.  Full of baby related images to help you with welcome baby cards of baby's birthday cards!!


Thank you for stopping by and hope to see you again tomorrow for Day Three!!


Monday, February 13, 2017

HoneyBee Stamps Sneak Peek Day 1

Hello and welcome to the first day of Sneak Peeks for HoneyBee Stamps!!  Today we're featuring TWO new stamp sets.  We all love HoneyBee's buildable sentiment sets and this first set will not disappoint!!  It is full of happy and celebratory greetings!!  It is simply called HOORAY!!!


The second set being sneaked today goes perfectly with Hooray.  It's called CELEBRATION BOX.  This set is amazing!!  And super fun!!  Full of confetti, streamers, balloons and more!  And what's amazing about this release, is that my fellow DT member, Lesley Oman, helped create some of this new release!!  Amazing, or what??!


Here is a card I created with the CELEBRATION BOX stamp set!!


Please stop by tomorrow for Day Two of the sneaks!! All products will be released THIS FRIDAY!!


Wednesday, February 8, 2017

A Simple Love Card

Hi everyone!! I'm up on the HoneyBee Stamps Blog today with a real simple card that came together quite quickly and helped use up some paper scraps!!  I hope you can swing by there today for all the details!!


Thank you and have a fab week!!

Laurie

Wednesday, February 1, 2017

SMILE!!

Hello friends!!  I'm sharing this super bright and cheerful card on the Honey Bee Stamps Blog today!

I broke out my Stabilo 68 pens and did a bit of simple watercoloring.  I used the Lotus Blossom stamp repeatedly on the background and added that fabulous "smile" on top.  Please check out the HBS blog for all the details and products used!!


I hope this card put a smile on your face!!  Thank you for stopping by!!

Laurie


Wednesday, January 25, 2017

Just My Type!!

Hi peeps!! I wanted to pop in to share my latest project for Honey Bee Stamps!!  I love creating custom sentiments with Alpha stamps sets and the Brush Grunge Alpha Set is one of my all time faves!!  In this one set you get upper and lower case letters, punctuation AND some small images including an awesome splat image!! Real bang for your buck!!!
I also used the Just My Type mini stamp set along with its Co-ordinating Dies!!  Please visit the HoneyBee Blog for ALL the details!!


Thanks for the visit!! Until next time...hugs!!

Laurie

Wednesday, January 18, 2017

Cherish

Hello and happy Wednesday!!  I'm popping in today to share my DT project for HoneyBee Stamps!!  This is a card with quite a bit of die-cutting and a little bit of colouring.

I used the vintage style set called Not Too Shabby and the beautiful Cherish set for the sentiment.  Both these sets have coordinating dies which I also used!

I first created a frame using some Square Stitched Scalloped Frame Dies from MFT.  I layered multiple pieces together to create a thick frame.  I stamped, coloured and die cut the mason jar and the bouquet of flowers from the Not Too Shabby set.  I did a bit of drawing to create the illusion the flowers were inside the jar.


I stamped the large Cherish and used the coordinating die to cut it out.  As well, I used sentiment strips to complete the sentiment.  Layering these on coloured cardstock made them pop out a bit more.  Before adhering everything together, I used a polka dot embossing folder on a white card panel to create a bit more dimension.


I added a little Clear Wink of Stella to make that Cherish shine and die cut some hearts (also in the NotTooShabby set) to create tiny embellishments!


Thank you so much for stopping by!!  Please visit the Honey Bee Stamps Blog for ALL the details:)

Laurie


Wednesday, January 11, 2017

Exciting, Fabulous News!!

Hello everyone!  Today, I'm so excited to be sharing my first project as a design team member for Honey Bee Stamps!!  I am thrilled to be a part of this amazing team for the next 6 months!! :)


I created a card using a couple of my favourite sets from HBS in two of my favourite colours...grey and gold!  I started by creating a mask out of some plain (happens to be pink) printer paper and a circle die.


I used the negative piece to cover the panel I created out of white cardstock.  I then stamped a woodgrain background stamp overtop.  This left me with a clean, circle shaped stamped area.


As you can see, I stamped some images from the Country Blooms stamp set.  I used Versamark Ink and Gold Embossing Powder.  This is one of my favourite and mostly used sets!!  I used the Co-ordinating Dies to cut the images out.  For the colouring I left it VERY simple.  I chose the lightest shades of four colours that I had in my Promarker stash and simply blended them out with the blender marker.  I did not want vibrant colours taking away from the gold embossing.  You can see how faint the green leaves are.


For the sentiment, I used the very first stamp set I bought from HoneyBee...Beautiful Life!!!  This set also has Co-ordinating Dies which I used here.  I stamped the word "fabulous" in Versamark and embossed it in gold as well.  Have to keep this gold theme going!!  I cut multiples of the fabulous die so I could make a very dimensional embellishment.  I have a stack of scrap, inexpensive white cardstock that I use in my stamp storage pockets. I use this for things like layering dies so I'm not using up the "good stuff"!  I stamped the "you are" with black ink, for a little contrast, onto a small strip of white cardstock.


To put the card together, I used a combination of foam adhesive and liquid glue, but mostly foam adhesive!  I surround half the stamped circle with the floral and leaf images and placed the sentiments on the opposite side of the circle.  To finish off, I used the sequin stamp, also from the Life is Beautiful set in gold embossing powder to "jazz' things up a bit!!


Thanks so much for stopping by today!!  I hope you enjoyed! 

 I'll be back real soon!!  

Laurie


Featured Post

A Simple Thanks Card

Well, well, well. Look who decided to show up...me! It's been an awful long time yet again. I seriously thought I'd be well out of t...